Dell 3000cn Color Laser Printer User's Guide - Page 32
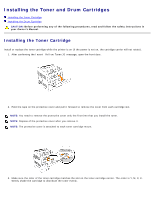
Installing the Toner and Drum Cartridges
 |
View all Dell 3000cn Color Laser Printer manuals
Add to My Manuals
Save this manual to your list of manuals |
Page 32 highlights
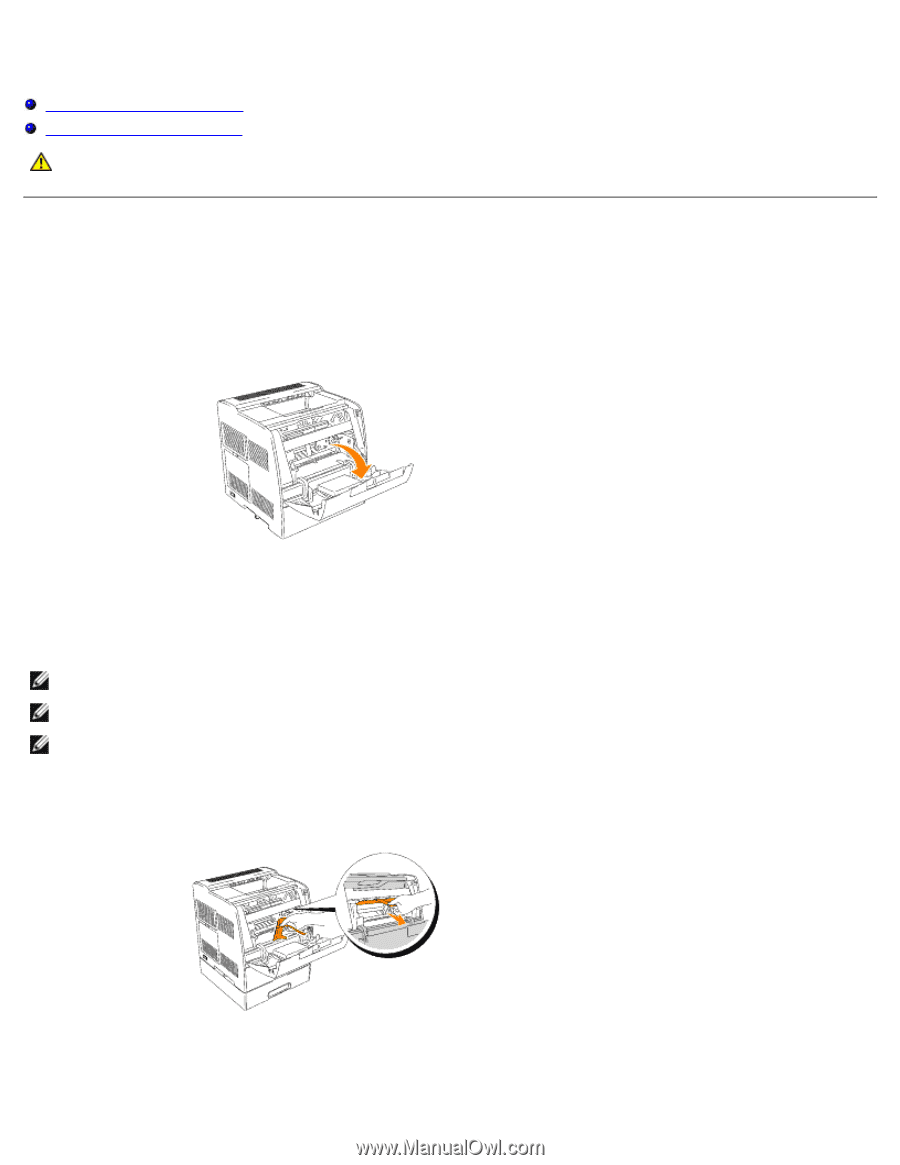
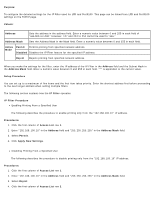
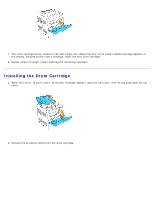
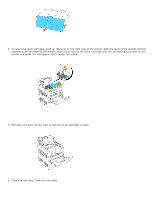
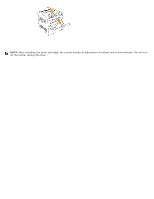
Installing the Toner and Drum Cartridges Installing the Toner Cartridge Installing the Drum Cartridge CAUTION: Before performing any of the following procedures, read and follow the safety instructions in your Owner's Manual. Installing the Toner Cartridge Install or replace the toner cartridge while the printer is on (if the power is not on, the cartridge carrier will not rotate). 1. After confirming the Insert Yellow Toner(Y) message, open the front door. 2. Hold the tape on the protective cover and pull it forward to remove the cover from each cartridge slot. NOTE: You need to remove the protective cover only the first time that you install the toner. NOTE: Dispose of the protective cover after you remove it. NOTE: The protective cover is attached to each toner cartridge mount. 3. Make sure the color of the toner cartridge matches the slot on the toner cartridge carrier. The order is Y, M, C, K. Gently shake the cartridge to distribute the toner evenly.
-
 1
1 -
2
-
3
-
4
-
5
-
6
-
7
-
8
-
9
-
10
-
11
-
12
-
13
-
14
-
15
-
16
-
17
-
18
-
19
-
20
-
21
-
22
-
23
-
24
-
25
-
26
-
 27
27 -
 28
28 -
 29
29 -
 30
30 -
 31
31 -
 32
32 -
 33
33 -
 34
34 -
 35
35 -
 36
36 -
 37
37 -
38
-
39
-
40
-
41
-
42
-
43
-
44
-
45
-
46
-
47
-
48
-
49
-
50
-
51
-
52
-
53
-
54
-
55
-
56
-
57
-
58
-
59
-
60
-
61
-
62
-
63
-
64
-
65
-
66
-
67
-
68
-
69
-
70
-
71
-
72
-
73
-
74
-
75
-
76
-
77
-
78
-
79
-
80
-
81
-
82
-
83
-
84
-
85
-
86
-
87
-
88
-
89
-
90
-
91
-
92
-
93
-
94
-
95
-
96
-
97
-
98
-
99
-
100
-
101
-
102
-
103
-
104
-
105
-
106
-
107
-
108
-
109
-
110
-
111
-
112
-
113
-
114
-
115
-
116
-
117
-
118
-
119
-
120
-
121
-
122
-
123
-
124
-
125
-
126
-
127
-
128
-
129
-
130
-
131
-
132
-
133
-
134
-
135
-
136
-
137
-
138
-
139
-
140
-
141
-
142
-
143
-
144
-
145
-
146
-
147
-
148
-
149
-
150
-
151
-
152
-
153
-
154
-
155
-
156
-
157
-
158
-
159
-
160
-
161
-
162
-
163
-
164
-
165
-
166
-
167
-
168
-
169
-
170
-
171
-
172
-
173
-
174
-
175
-
176
-
177
-
178
-
179
-
180
-
181
-
182
-
183
-
184
-
185
-
186
-
187
-
188
-
189
-
190
-
191
-
192
-
193
-
194
 |
 |