Dell 3000cn Color Laser Printer User's Guide - Page 38
Connecting the Printer Locally, Turn On the Printer
 |
View all Dell 3000cn Color Laser Printer manuals
Add to My Manuals
Save this manual to your list of manuals |
Page 38 highlights
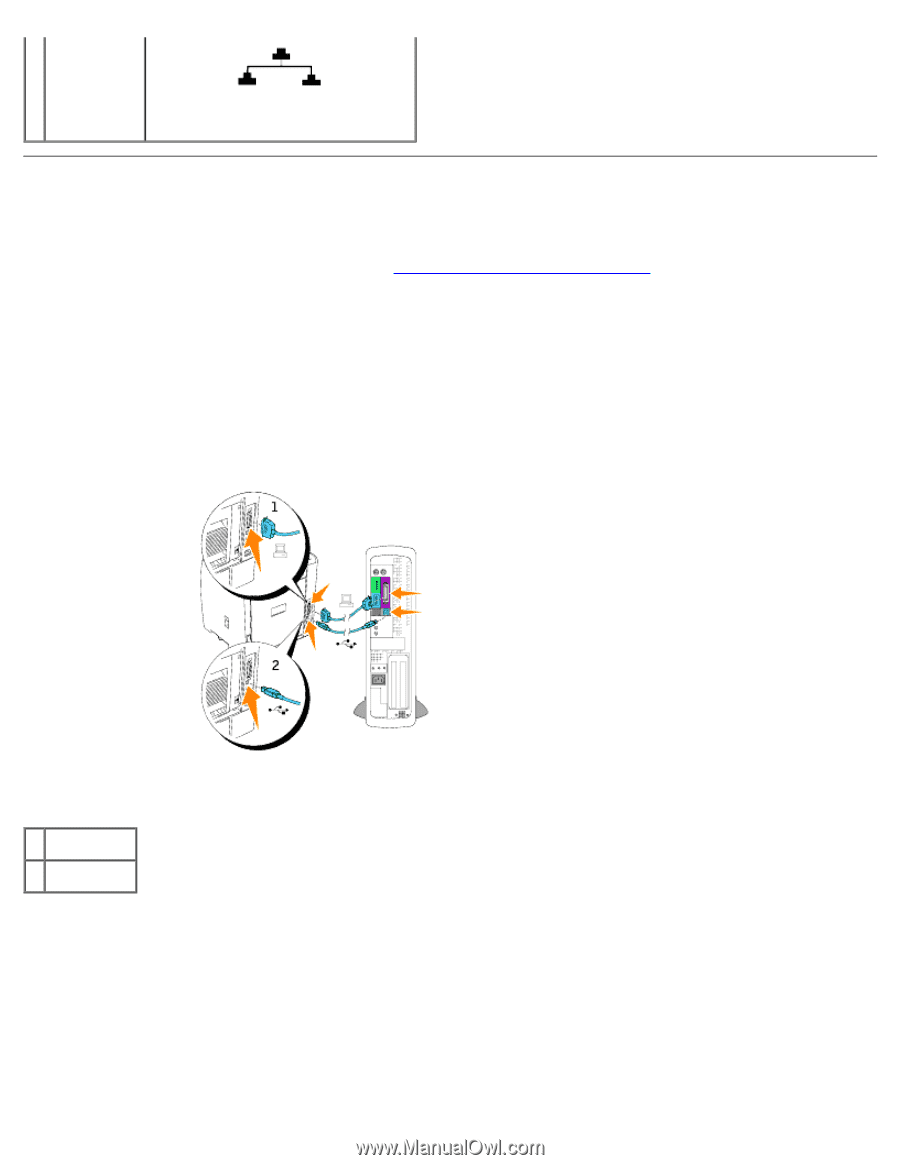
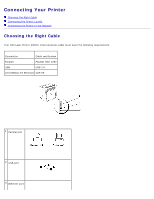
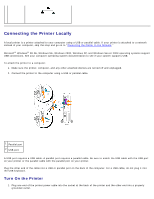
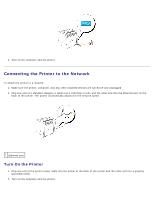
Connecting the Printer Locally A local printer is a printer attached to your computer using a USB or parallel cable. If your printer is attached to a network instead of your computer, skip this step and go on to "Connecting the Printer to the Network." Microsoft® Windows® 98 SE, Windows Me, Windows 2000, Windows XP, and Windows Server 2003 operating systems support USB connections. See your computer operating system documentation to see if your system supports USB. To attach the printer to a computer: 1. Make sure the printer, computer, and any other attached devices are turned off and unplugged. 2. Connect the printer to the computer using a USB or parallel cable. 1 Parallel port 2 USB port A USB port requires a USB cable. A parallel port requires a parallel cable. Be sure to match the USB cable with the USB port on your printer or the parallel cable with the parallel port on your printer. Plug the other end of the cable into a USB or parallel port on the back of the computer. For a USB cable, do not plug it into the USB keyboard. Turn On the Printer 1. Plug one end of the printer power cable into the socket at the back of the printer and the other end into a properly grounded outlet.
-
 1
1 -
2
-
3
-
4
-
5
-
6
-
7
-
8
-
9
-
10
-
11
-
12
-
13
-
14
-
15
-
16
-
17
-
18
-
19
-
20
-
21
-
22
-
23
-
24
-
25
-
26
-
27
-
28
-
29
-
30
-
31
-
32
-
 33
33 -
 34
34 -
 35
35 -
 36
36 -
 37
37 -
 38
38 -
 39
39 -
 40
40 -
 41
41 -
 42
42 -
 43
43 -
44
-
45
-
46
-
47
-
48
-
49
-
50
-
51
-
52
-
53
-
54
-
55
-
56
-
57
-
58
-
59
-
60
-
61
-
62
-
63
-
64
-
65
-
66
-
67
-
68
-
69
-
70
-
71
-
72
-
73
-
74
-
75
-
76
-
77
-
78
-
79
-
80
-
81
-
82
-
83
-
84
-
85
-
86
-
87
-
88
-
89
-
90
-
91
-
92
-
93
-
94
-
95
-
96
-
97
-
98
-
99
-
100
-
101
-
102
-
103
-
104
-
105
-
106
-
107
-
108
-
109
-
110
-
111
-
112
-
113
-
114
-
115
-
116
-
117
-
118
-
119
-
120
-
121
-
122
-
123
-
124
-
125
-
126
-
127
-
128
-
129
-
130
-
131
-
132
-
133
-
134
-
135
-
136
-
137
-
138
-
139
-
140
-
141
-
142
-
143
-
144
-
145
-
146
-
147
-
148
-
149
-
150
-
151
-
152
-
153
-
154
-
155
-
156
-
157
-
158
-
159
-
160
-
161
-
162
-
163
-
164
-
165
-
166
-
167
-
168
-
169
-
170
-
171
-
172
-
173
-
174
-
175
-
176
-
177
-
178
-
179
-
180
-
181
-
182
-
183
-
184
-
185
-
186
-
187
-
188
-
189
-
190
-
191
-
192
-
193
-
194
 |
 |