Dell Equallogic PS4110X PS4110 Hardware Owners Manual - Page 15
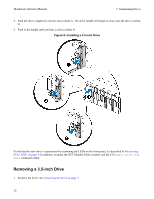
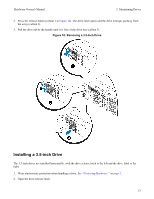
Installing a 2.5-inch Drive, Removing a 2.5-Inch Drive
 |
View all Dell Equallogic PS4110X manuals
Add to My Manuals
Save this manual to your list of manuals |
Page 15 highlights
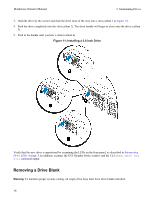
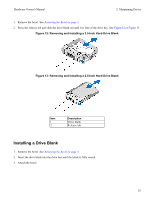
Hardware Owner's Manual Figure 8: Removing a 2.5-Inch Drive 2 Maintaining Drives Installing a 2.5-inch Drive The 2.5-inch drives are installed vertically, with the drive release latch on the top and the drive label on the bottom. 1. Wear electrostatic protection when handling a drive. See "Protecting Hardware " on page 2. 2. Open the drive release latch. 3. Hold the drive by the carrier and slide the drive most of the way into a slot (callout 1 in Figure 9). 11
-
 1
1 -
2
-
3
-
4
-
5
-
6
-
7
-
8
-
9
-
 10
10 -
 11
11 -
 12
12 -
 13
13 -
 14
14 -
 15
15 -
 16
16 -
 17
17 -
 18
18 -
 19
19 -
 20
20 -
21
-
22
-
23
-
24
-
25
-
26
-
27
-
28
-
29
-
30
-
31
-
32
-
33
-
34
-
35
-
36
-
37
-
38
-
39
-
40
-
41
-
42
-
43
-
44
-
45
-
46
-
47
-
48
 |
 |

Hardware Owner's Manual
2 Maintaining Drives
Figure 8: Removing a 2.5-Inch Drive
Installing a 2.5-inch Drive
The 2.5-inch drives are installed vertically, with the drive release latch on the top and the drive label on the
bottom.
1.
Wear electrostatic protection when handling a drive.
See "Protecting Hardware " on page 2
.
2.
Open the drive release latch.
3.
Hold the drive by the carrier and slide the drive most of the way into a slot (callout 1 in
Figure 9
).
11