Dell OptiPlex NX1 Service Manual - Page 106
hard-disk drive bracket into position be sure that the opening in the lower-back
 |
View all Dell OptiPlex NX1 manuals
Add to My Manuals
Save this manual to your list of manuals |
Page 106 highlights
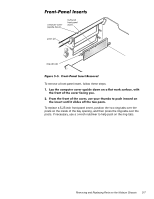
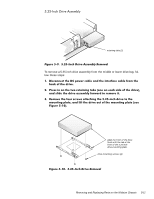
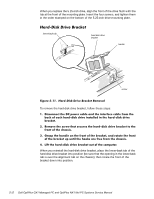
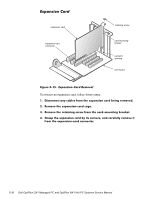
When you replace the 5.25-inch drive, align the front of the drive flush with the tab at the front of the mounting plate. Insert the four screws, and tighten them in the order stamped on the bottom of the 5.25-inch drive-mounting plate. lower-back tab hard-disk drive bracket handle screw To remove the hard-disk drive bracket, follow these steps: When you reinstall the hard-disk drive bracket, place the lower-back tab of the hard-disk drive bracket into position (be sure that the opening in the lower-back tab is over the alignment tab on the chassis); then rotate the front of the bracket down into position. 5-12
-
 1
1 -
2
-
3
-
4
-
5
-
6
-
7
-
8
-
9
-
10
-
11
-
12
-
13
-
14
-
15
-
16
-
17
-
18
-
19
-
20
-
21
-
22
-
23
-
24
-
25
-
26
-
27
-
28
-
29
-
30
-
31
-
32
-
33
-
34
-
35
-
36
-
37
-
38
-
39
-
40
-
41
-
42
-
43
-
44
-
45
-
46
-
47
-
48
-
49
-
50
-
51
-
52
-
53
-
54
-
55
-
56
-
57
-
58
-
59
-
60
-
61
-
62
-
63
-
64
-
65
-
66
-
67
-
68
-
69
-
70
-
71
-
72
-
73
-
74
-
75
-
76
-
77
-
78
-
79
-
80
-
81
-
82
-
83
-
84
-
85
-
86
-
87
-
88
-
89
-
90
-
91
-
92
-
93
-
94
-
95
-
96
-
97
-
98
-
99
-
100
-
 101
101 -
 102
102 -
 103
103 -
 104
104 -
 105
105 -
 106
106 -
 107
107 -
 108
108 -
 109
109 -
 110
110 -
 111
111 -
112
-
113
-
114
-
115
-
116
-
117
-
118
-
119
-
120
-
121
-
122
-
123
-
124
-
125
-
126
-
127
-
128
-
129
-
130
-
131
-
132
-
133
-
134
-
135
-
136
-
137
-
138
-
139
-
140
-
141
-
142
-
143
-
144
-
145
-
146
-
147
-
148
-
149
-
150
-
151
-
152
-
153
-
154
-
155
-
156
-
157
-
158
-
159
-
160
-
161
-
162
-
163
-
164
-
165
-
166
-
167
-
168
-
169
-
170
-
171
-
172
-
173
-
174
-
175
-
176
-
177
-
178
 |
 |
5-12
’HOO±2SWL3OH[±*;²±0DQDJHG±3&±DQG±2SWL3OH[±1;²±1HW±3&±6\VWHPV±6HUYLFH±0DQXDO
When you replace the 5.25-inch drive, align the front of the drive flush with the
tab at the front of the mounting plate. Insert the four screws, and tighten them
in the order stamped on the bottom of the 5.25-inch drive-mounting plate.
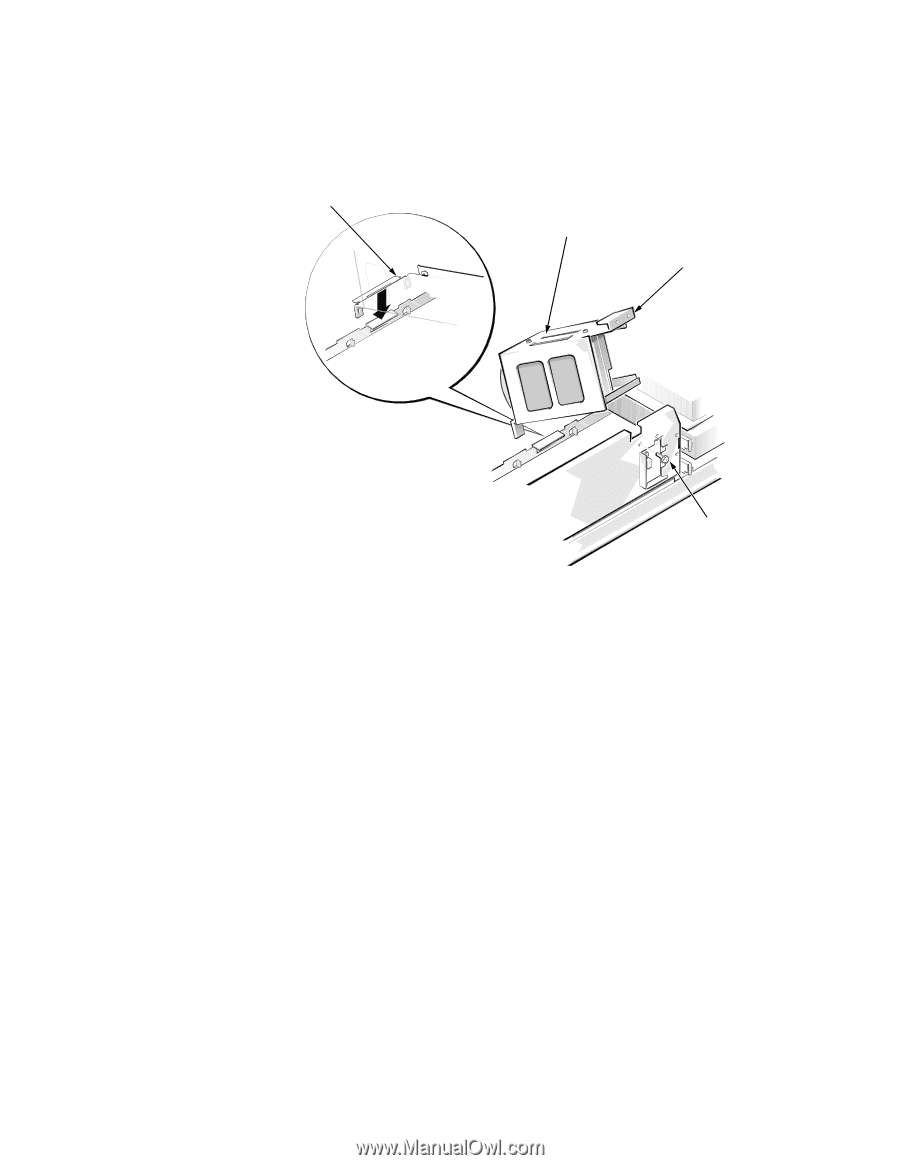
+DUG´’LVN±’ULYH±%UDFNHW
)LJXUH±¸´²²³±±+DUG´’LVN±’ULYH±%UDFNHW±5HPRYDO±±±
To remove the hard-disk drive bracket, follow these steps:
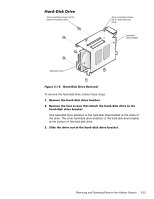
¸³
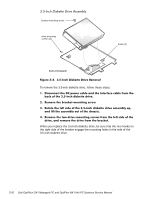
’LVFRQQHFW²WKH²’&²SRZHU²FDEOH²DQG²WKH²LQWHUIDFH²FDEOH²IURP²WKH²
EDFN²RI²HDFK²KDUG´GLVN²GULYH²LQVWDOOHG²LQ²WKH²KDUG´GLVN²GULYH²
EUDFNHW³
º³
5HPRYH²WKH²VFUHZ²WKDW²VHFXUHV²WKH²KDUG´GLVN²GULYH²EUDFNHW²WR²WKH²
IURQW²RI²WKH²FKDVVLV³
»³
*UDVS²WKH²KDQGOH²RQ²WKH²IURQW²RI²WKH²EUDFNHW¶²DQG²URWDWH²WKH²IURQW²
RI²WKH²EUDFNHW²XS²XQWLO²WKH²KRRNV²DUH²IUHH²IURP²WKH²FKDVVLV³
¾³
/LIW²WKH²KDUG´GLVN²GULYH²EUDFNHW²RXW²RI²WKH²FRPSXWHU³
When you reinstall the hard-disk drive bracket, place the lower-back tab of the
hard-disk drive bracket into position (be sure that the opening in the lower-back
tab is over the alignment tab on the chassis); then rotate the front of the
bracket down into position.
handle
screw
lower-back tab
hard-disk drive
bracket