Dell OptiPlex NX1 Service Manual - Page 84
slip the end of the ISA expansion card into the plastic ISA expansion-card end
 |
View all Dell OptiPlex NX1 manuals
Add to My Manuals
Save this manual to your list of manuals |
Page 84 highlights
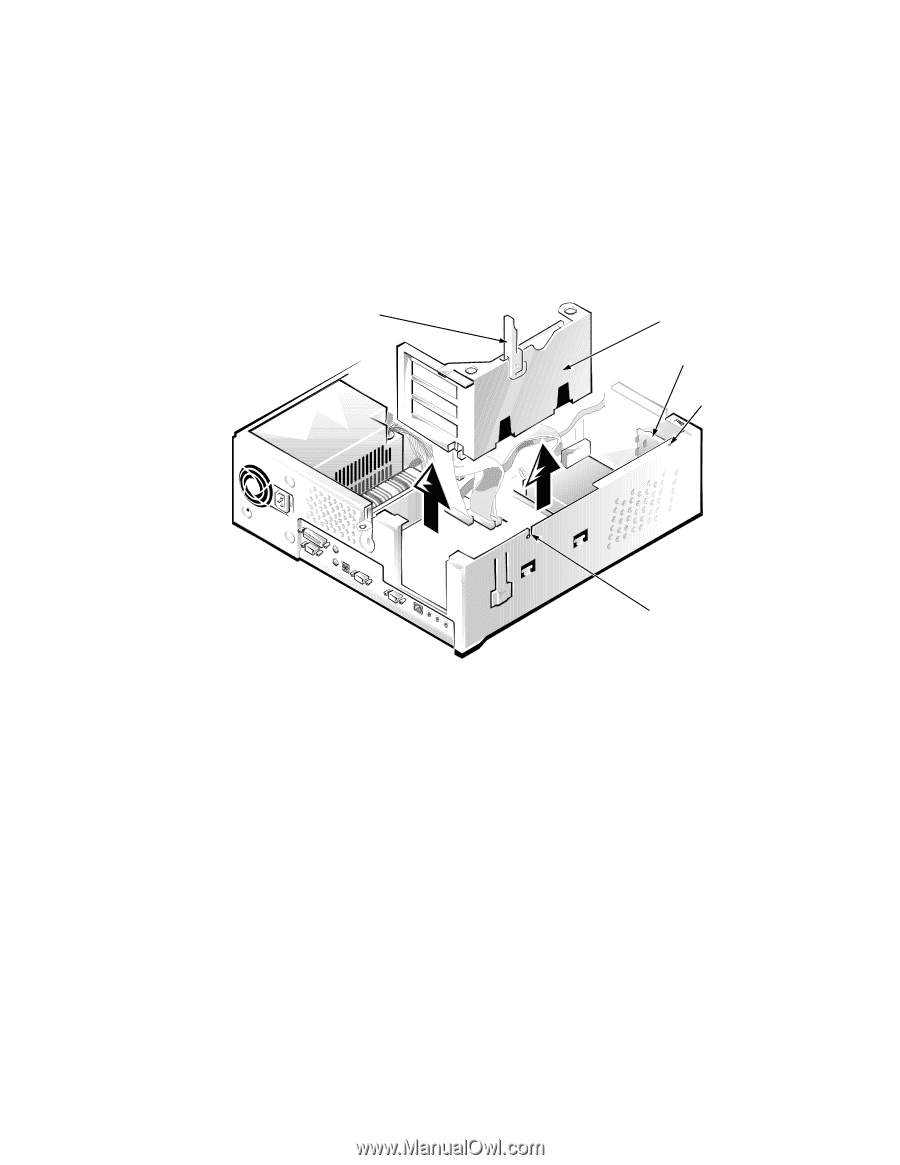
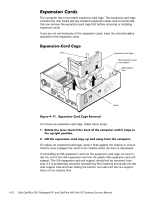
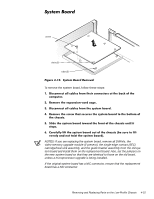
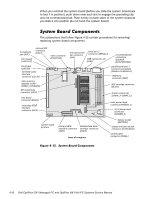
The computer has a removable expansion-card cage. The expansion-card cage contains the riser board and any installed expansion cards. Dell recommends that you remove the expansion-card cage first before removing or installing expansion cards. If you are not removing any of the expansion cards, leave the external cables attached to the expansion cards. lever expansion-card cage ISA expansion-card end support side support hole notch To remove an expansion-card cage, follow these steps: To replace an expansion-card cage, keep it flush against the chassis to ensure that the lever engages the notch in the chassis when the lever is depressed. If reinstalling an ISA expansion card into the expansion-card cage, be sure to slip the end of the ISA expansion card into the plastic ISA expansion-card end support. The ISA expansion-card end support should not be removed; however, if it is accidentally removed, reinstall it by first inserting its top tab into the side support hole and then sliding the bottom two tabs into the two support holes on the chassis floor. 4-12
-
 1
1 -
2
-
3
-
4
-
5
-
6
-
7
-
8
-
9
-
10
-
11
-
12
-
13
-
14
-
15
-
16
-
17
-
18
-
19
-
20
-
21
-
22
-
23
-
24
-
25
-
26
-
27
-
28
-
29
-
30
-
31
-
32
-
33
-
34
-
35
-
36
-
37
-
38
-
39
-
40
-
41
-
42
-
43
-
44
-
45
-
46
-
47
-
48
-
49
-
50
-
51
-
52
-
53
-
54
-
55
-
56
-
57
-
58
-
59
-
60
-
61
-
62
-
63
-
64
-
65
-
66
-
67
-
68
-
69
-
70
-
71
-
72
-
73
-
74
-
75
-
76
-
77
-
78
-
 79
79 -
 80
80 -
 81
81 -
 82
82 -
 83
83 -
 84
84 -
 85
85 -
 86
86 -
 87
87 -
 88
88 -
 89
89 -
90
-
91
-
92
-
93
-
94
-
95
-
96
-
97
-
98
-
99
-
100
-
101
-
102
-
103
-
104
-
105
-
106
-
107
-
108
-
109
-
110
-
111
-
112
-
113
-
114
-
115
-
116
-
117
-
118
-
119
-
120
-
121
-
122
-
123
-
124
-
125
-
126
-
127
-
128
-
129
-
130
-
131
-
132
-
133
-
134
-
135
-
136
-
137
-
138
-
139
-
140
-
141
-
142
-
143
-
144
-
145
-
146
-
147
-
148
-
149
-
150
-
151
-
152
-
153
-
154
-
155
-
156
-
157
-
158
-
159
-
160
-
161
-
162
-
163
-
164
-
165
-
166
-
167
-
168
-
169
-
170
-
171
-
172
-
173
-
174
-
175
-
176
-
177
-
178
 |
 |