Dell XPS 720 Black Owner's Manual - Page 54
Start, My Computer, Local Disk C, Properties, Tools, Check Now
 |
View all Dell XPS 720 Black manuals
Add to My Manuals
Save this manual to your list of manuals |
Page 54 highlights
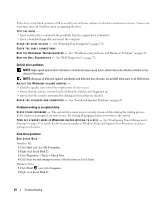
If the drive is not listed, perform a full scan with your antivirus software to check for and remove viruses. Viruses can sometimes prevent Windows from recognizing the drive. TEST THE DRIVE - • Insert another disc to eliminate the possibility that the original drive is defective. • Insert a bootable floppy disk and restart the computer. C L E A N T H E D R I V E O R D I S K - See "Cleaning Your Computer" on page 176. CHECK THE CABLE CONNECTIONS R U N T H E H A R D W A R E TR O U B L E S H O O T E R - See "Troubleshooting Software and Hardware Problems" on page 83. R U N T H E D E L L D I A G N O S T I C S - See "Dell Diagnostics" on page 72. Optical drive problems NOTE: High-speed optical drive vibration is normal and may cause noise, which does not indicate a defect in the drive or the media. NOTE: Because of different regions worldwide and different disc formats, not all DVD titles work in all DVD drives. ADJUST THE WINDOWS VOLUME CONTROL - • Click the speaker icon in the lower-right corner of your screen. • Ensure that the volume is turned up by clicking the slidebar and dragging it up. • Ensure that the sound is not muted by clicking any boxes that are checked. C H E C K T H E S P E A K E R S A N D S U B W O O F E R - See "Sound and Speaker Problems" on page 63. Problems writing to an optical drive C L O S E O T H E R P R O G R A M S - The optical drive must receive a steady stream of data during the writing process. If the stream is interrupted, an error occurs. Try closing all programs before you write to the optical. TU R N O F F S T A N D B Y M O D E I N W I N D O W S B E F O R E W R I T I N G T O A D I S C - See "Configuring Power Management Settings" on page 47 or search for the keyword standby in Windows Help and Support for information on power management modes. Hard drive problems RUN CHECK DISK - Windows XP: 1 Click Start and click My Computer. 2 Right-click Local Disk C:. 3 Click Properties→ Tools→ Check Now. 4 Click Scan for and attempt recovery of bad sectors and click Start. Windows Vista: 1 Click Start and click Computer. 2 Right-click Local Disk C:. 54 Troubleshooting
-
 1
1 -
2
-
3
-
4
-
5
-
6
-
7
-
8
-
9
-
10
-
11
-
12
-
13
-
14
-
15
-
16
-
17
-
18
-
19
-
20
-
21
-
22
-
23
-
24
-
25
-
26
-
27
-
28
-
29
-
30
-
31
-
32
-
33
-
34
-
35
-
36
-
37
-
38
-
39
-
40
-
41
-
42
-
43
-
44
-
45
-
46
-
47
-
48
-
 49
49 -
 50
50 -
 51
51 -
 52
52 -
 53
53 -
 54
54 -
 55
55 -
 56
56 -
 57
57 -
 58
58 -
 59
59 -
60
-
61
-
62
-
63
-
64
-
65
-
66
-
67
-
68
-
69
-
70
-
71
-
72
-
73
-
74
-
75
-
76
-
77
-
78
-
79
-
80
-
81
-
82
-
83
-
84
-
85
-
86
-
87
-
88
-
89
-
90
-
91
-
92
-
93
-
94
-
95
-
96
-
97
-
98
-
99
-
100
-
101
-
102
-
103
-
104
-
105
-
106
-
107
-
108
-
109
-
110
-
111
-
112
-
113
-
114
-
115
-
116
-
117
-
118
-
119
-
120
-
121
-
122
-
123
-
124
-
125
-
126
-
127
-
128
-
129
-
130
-
131
-
132
-
133
-
134
-
135
-
136
-
137
-
138
-
139
-
140
-
141
-
142
-
143
-
144
-
145
-
146
-
147
-
148
-
149
-
150
-
151
-
152
-
153
-
154
-
155
-
156
-
157
-
158
-
159
-
160
-
161
-
162
-
163
-
164
-
165
-
166
-
167
-
168
-
169
-
170
-
171
-
172
-
173
-
174
-
175
-
176
-
177
-
178
-
179
-
180
-
181
-
182
-
183
-
184
-
185
-
186
-
187
-
188
-
189
-
190
-
191
-
192
-
193
-
194
-
195
-
196
-
197
-
198
-
199
-
200
-
201
-
202
-
203
-
204
-
205
-
206
-
207
-
208
-
209
-
210
-
211
-
212
-
213
-
214
-
215
-
216
-
217
-
218
 |
 |