Dynex DX-24LD230A12 User Manual (English) - Page 28
Changing channel settings - 24
 |
View all Dynex DX-24LD230A12 manuals
Add to My Manuals
Save this manual to your list of manuals |
Page 28 highlights
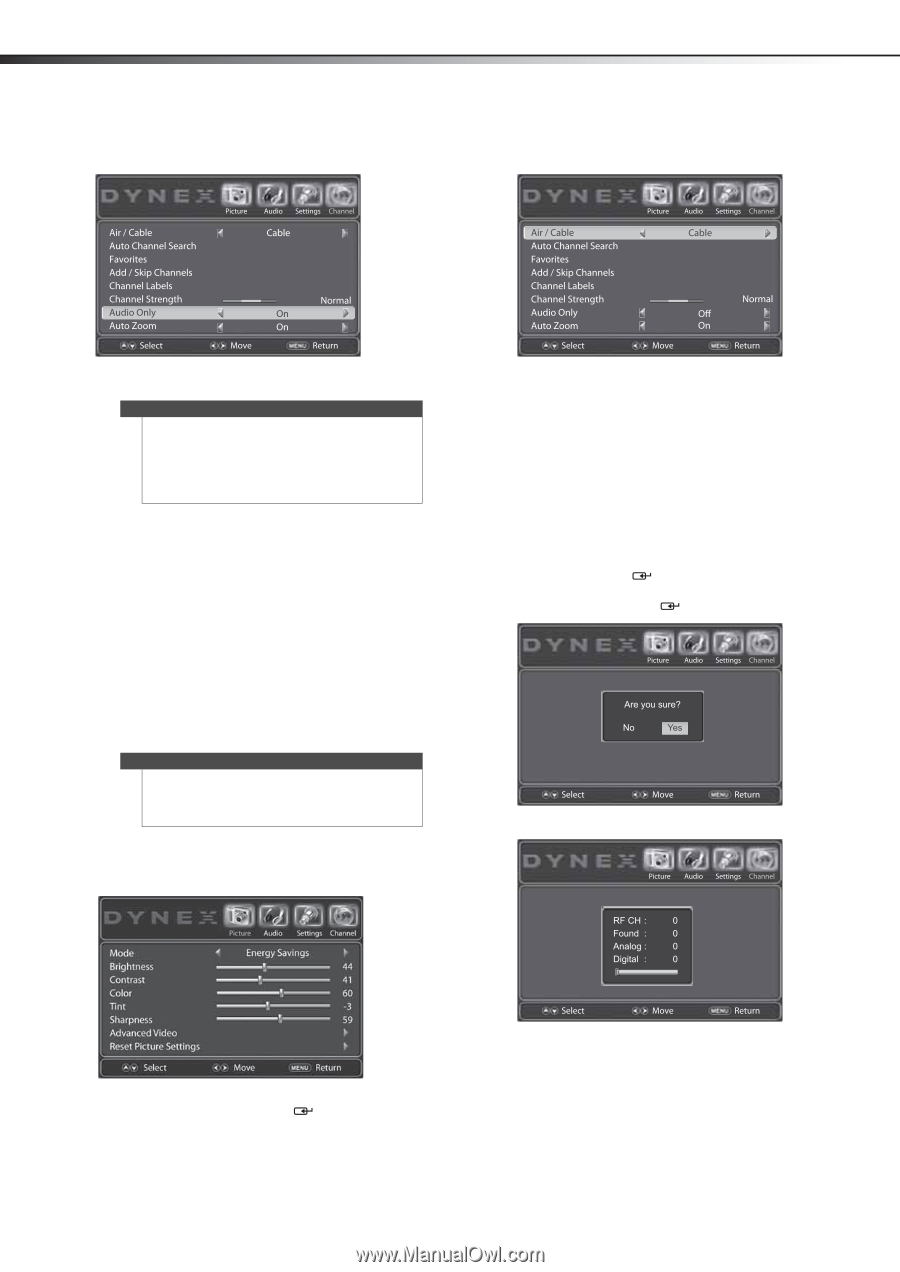
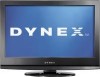
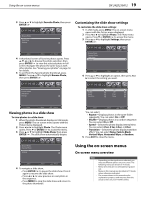
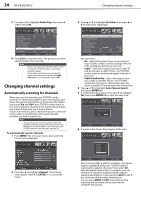
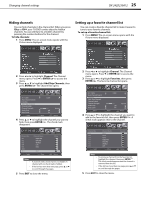
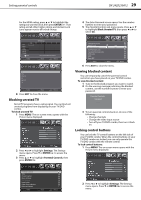
24 DX-24LD230A12 Changing channel settings 3 Press or to highlight Audio Only, then press or to select On. 3 Press or to highlight Air/Cable, then press or to select your signal type. 4 Press EXIT to close the menu. The picture turns off in approximately 3 to 5 seconds. Notes • • Audio only works only when the input source is TV and your TV/DVD combo is receiving a broadcast signal. To exit audio only mode, press any button. When you exit audio only mode, the Audio Only option is automatically reset to Off. Changing channel settings Automatically scanning for channels When you scan for channels, your TV/DVD combo searches for channels available in your viewing area and stores the channel information in the channel list. When you press CH and CH , your TV/DVD combo tunes to the next or previous channel in the channel list and skips any channels that were not stored in the list. You do not need to scan for channels if you are connected using a cable or satellite box, which automatically provides you with a channel list. Note You do not need to scan for channels unless the available channels changed after you ran the Setup Wizard. For more information, see "Turning on your TV/DVD combo for the first time" on page 16. To automatically scan for channels: 1 Press MENU. The on-screen menu opens with the Picture menu displayed. You can select: • Air-Select this option if you use an antenna. Your TV/DVD combo scans for analog (VHF and UHF) and digital channels in your area. • Cable-Select this option if you have cable TV and do not have a cable TV box. Your TV/DVD combo scans for analog and digital channels in your area. • Cable/Satellite Box-Select this option if you use a cable or satellite TV box. Your TV/DVD combo will not scan for channels because the cable or satellite TV box provides the channel list. 4 Press or to highlight Auto Channel Search, then press ENTER/ . 5 A confirmation box opens. Press or to highlight Yes, then press ENTER/ to start the auto scan. 6 A progress box shows the progress of the scan. 2 Press or to highlight Channel. The Channel menu opens. Press or ENTER/ to access the menu. Auto Scan may take a while to complete. A progress report is displayed while your TV/DVD combo is scanning for available channels. If you select Air, after the digital channel scan is complete, you can continue to search for analog channels without pressing any buttons, or you can press EXIT to exit if you do not need the analog channel scan. You can press MENU or EXIT at any time to stop scanning, but you must run the scan later to complete the process.
-
 1
1 -
2
-
3
-
4
-
5
-
6
-
7
-
8
-
9
-
10
-
11
-
12
-
13
-
14
-
15
-
16
-
17
-
18
-
19
-
20
-
21
-
22
-
 23
23 -
 24
24 -
 25
25 -
 26
26 -
 27
27 -
 28
28 -
 29
29 -
 30
30 -
 31
31 -
 32
32 -
 33
33 -
34
-
35
-
36
-
37
-
38
-
39
-
40
-
41
-
42
-
43
-
44
-
45
-
46
-
47
-
48
 |
 |