Dynex DX-24LD230A12 User Manual (English) - Page 37
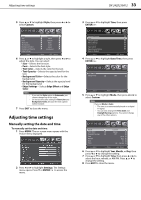
Manually setting the date and time
 |
View all Dynex DX-24LD230A12 manuals
Add to My Manuals
Save this manual to your list of manuals |
Page 37 highlights
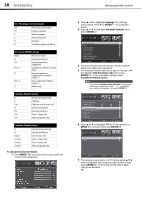
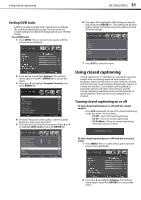
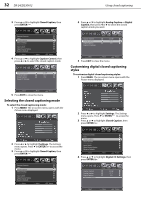
Adjusting time settings DX-24LD230A12 33 5 Press or to highlight Style, then press or to select Custom. 3 Press or to highlight Time, then press ENTER/ . 6 Press or to highlight a style, then press or to adjust the style. You can select: • Size-Selects the font size. • Font-Selects the font style. • Text Color-Selects the color for the text. • Text Opacity-Selects the opacity level for the text. • Background Color-Selects the color for the background. • Background Opacity-Selects the opacity level for the background. • Edge Settings-Selects Edge Effect and Edge Color. Notes • • If you set the Style option to Automatic, you cannot change any of the styles. Do not use the same setting for Text Color and Background Color, because the text caption will be invisible. 7 Press EXIT to close the menu. Adjusting time settings Manually setting the date and time To manually set the date and time: 1 Press MENU. The on-screen menu opens with the Picture menu displayed. Open Source Notice Reset to Default 4 Press or to highlight Date/Time, then press ENTER/ . 5 Press or to highlight Mode, then press or to select Custom. Notes If you set Mode to Auto: • The time is set automatically based on a digital TV signal. • You can only change the Time Zone and Daylight Savings options. You cannot change any of the other options. 2 Press or to highlight Settings. The Settings menu opens. Press or ENTER/ to access the menu. 6 Press or to highlight Year, Month, or Day, then press or to change the setting. 7 Press or to highlight Time, then press or to select the hour, minute, or AM/PM. Press or to change the setting. 8 Press EXIT to close the menu.
-
 1
1 -
2
-
3
-
4
-
5
-
6
-
7
-
8
-
9
-
10
-
11
-
12
-
13
-
14
-
15
-
16
-
17
-
18
-
19
-
20
-
21
-
22
-
23
-
24
-
25
-
26
-
27
-
28
-
29
-
30
-
31
-
 32
32 -
 33
33 -
 34
34 -
 35
35 -
 36
36 -
 37
37 -
 38
38 -
 39
39 -
 40
40 -
 41
41 -
 42
42 -
43
-
44
-
45
-
46
-
47
-
48
 |
 |
