Epson F2000 Users Guide - Page 81
Cleaning the Suction Cap, Head Cap Cleaning, Caution
 |
View all Epson F2000 manuals
Add to My Manuals
Save this manual to your list of manuals |
Page 81 highlights
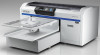
Cleaning the Suction Cap You need to clean the suction cap every week and whenever you see a message on the LCD screen. You may also need to clean the suction cap if you experience difficulty cleaning nozzles after performing a nozzle check. Even if the message is not displayed, follow the steps here to clean the suction cap. Note: If you continue to use the printer without cleaning the suction cap, the ink nozzles may clog and print quality may decline. 1. Turn on the printer. 2. Press the maintenance button. The Maintenance menu appears. 3. Press the up or down arrow button to select Head Cap Cleaning, and press the right arrow button. 4. Press the up or down arrow button to select Yes, and press the OK button. The platen and print head move to the maintenance position. Caution: Do not move the print head or the platen manually. A malfunction may occur. 5. Open the printer cover. 81
-
 1
1 -
2
-
3
-
4
-
5
-
6
-
7
-
8
-
9
-
10
-
11
-
12
-
13
-
14
-
15
-
16
-
17
-
18
-
19
-
20
-
21
-
22
-
23
-
24
-
25
-
26
-
27
-
28
-
29
-
30
-
31
-
32
-
33
-
34
-
35
-
36
-
37
-
38
-
39
-
40
-
41
-
42
-
43
-
44
-
45
-
46
-
47
-
48
-
49
-
50
-
51
-
52
-
53
-
54
-
55
-
56
-
57
-
58
-
59
-
60
-
61
-
62
-
63
-
64
-
65
-
66
-
67
-
68
-
69
-
70
-
71
-
72
-
73
-
74
-
75
-
 76
76 -
 77
77 -
 78
78 -
 79
79 -
 80
80 -
 81
81 -
 82
82 -
 83
83 -
 84
84 -
 85
85 -
 86
86 -
87
-
88
-
89
-
90
-
91
-
92
-
93
-
94
-
95
-
96
-
97
-
98
-
99
-
100
-
101
-
102
-
103
-
104
-
105
-
106
-
107
-
108
-
109
-
110
-
111
-
112
-
113
-
114
-
115
-
116
-
117
-
118
-
119
-
120
-
121
-
122
-
123
-
124
-
125
-
126
-
127
-
128
-
129
-
130
-
131
-
132
-
133
-
134
-
135
-
136
-
137
-
138
-
139
-
140
-
141
-
142
-
143
-
144
-
145
-
146
-
147
-
148
-
149
-
150
-
151
-
152
-
153
-
154
-
155
-
156
-
157
-
158
-
159
-
160
-
161
-
162
-
163
-
164
-
165
-
166
-
167
-
168
-
169
-
170
-
171
-
172
-
173
-
174
-
175
 |
 |
