Epson PhotoPC User Manual - Page 15
Installing Your EasyPhoto Software, From the Windows 3.1 Program Manager screen, select Run
 |
View all Epson PhotoPC manuals
Add to My Manuals
Save this manual to your list of manuals |
Page 15 highlights
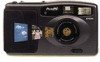
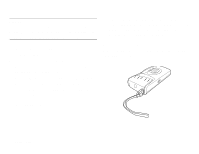
Installing Your EasyPhoto Software PhotoPC comes with EasyPhoto, a software application that lets you transfer your pictures from the camera to your computer and place them into documents. You can also use EasyPhoto to organize, enhance, and print your pictures. Follow these steps to install EasyPhoto: 1 Insert EasyPhoto diskette 1 in your diskette drive. 2 From the Windows 3.1 Program Manager screen, select Run from the File menu. In Windows 95, click the Start button, and then click Run. 3 In the box, type: A:\SETUP. If the diskette drive you are using is not drive A, substitute the correct letter. 4 Click OK and follow the instructions on the screen. NOTE If you want to have the time and date of each picture automatically recorded, see page 5-2 for instructions. You're now ready to take pictures with your PhotoPC. Turn to Chapter 2 for simple, step-by-step instructions. 1 A Getting Started 1-5
-
 1
1 -
2
-
3
-
4
-
5
-
6
-
7
-
8
-
9
-
 10
10 -
 11
11 -
 12
12 -
 13
13 -
 14
14 -
 15
15 -
 16
16 -
 17
17 -
 18
18 -
 19
19 -
 20
20 -
21
-
22
-
23
-
24
-
25
-
26
-
27
-
28
-
29
-
30
-
31
-
32
-
33
-
34
-
35
-
36
-
37
-
38
-
39
-
40
-
41
-
42
-
43
-
44
-
45
-
46
-
47
-
48
-
49
-
50
-
51
-
52
-
53
-
54
-
55
-
56
-
57
-
58
-
59
-
60
-
61
-
62
-
63
 |
 |