Epson PhotoPC User Manual - Page 46
Taking Pictures from Your Computer, COM1, or COM4.
 |
View all Epson PhotoPC manuals
Add to My Manuals
Save this manual to your list of manuals |
Page 46 highlights
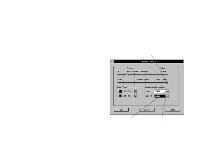
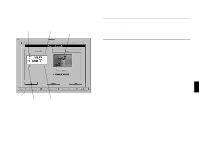
Follow these steps to set the port and speed for your PhotoPC EasyPhoto automatically chooses 38,400 baud, a speed that works connection: with most computers. You can experiment to choose the fastest 1 Connect the camera to your computer and open the Setup screen as described on page 5-1. The Computer Connection box shows the current port settings. 2 Click the arrow to change the Port setting. You can select from speed that works on your system. Increasing your port speed will make pictures transfer much faster from the camera to your computer. 4 When you are finished, click OK. COM1, COM2, COM3, or COM4. Taking Pictures from Your Computer NOTE Do not change the Port setting unless you want to use a different port or you get an error message. When you change the Port When the camera is connected to your computer, you can take pictures and use PhotoPC features through the software on your computer. The only control you can use on the camera itself is the power switch. setting, you lose the connection between the camera and your computer. 5 In most cases, you should select either COM1 or COM2, depending on which serial port you connected the camera to. If you have a serial device connected to one port and an internal modem on the other, you can try COM3 or COM4. You may have A to reconfigure your ports in the Windows Control Panel. If you get an error message, see page 6-3 for more information. 3 Click the arrow to change the Speed setting. Using Advanced Features 5-5
-
 1
1 -
2
-
3
-
4
-
5
-
6
-
7
-
8
-
9
-
10
-
11
-
12
-
13
-
14
-
15
-
16
-
17
-
18
-
19
-
20
-
21
-
22
-
23
-
24
-
25
-
26
-
27
-
28
-
29
-
30
-
31
-
32
-
33
-
34
-
35
-
36
-
37
-
38
-
39
-
40
-
 41
41 -
 42
42 -
 43
43 -
 44
44 -
 45
45 -
 46
46 -
 47
47 -
 48
48 -
 49
49 -
 50
50 -
 51
51 -
52
-
53
-
54
-
55
-
56
-
57
-
58
-
59
-
60
-
61
-
62
-
63
 |
 |