Epson PhotoPC User Manual - Page 29
transfer speed settings, see settings and click Retry. For more information about port
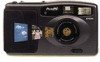 |
View all Epson PhotoPC manuals
Add to My Manuals
Save this manual to your list of manuals |
Page 29 highlights
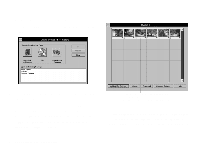
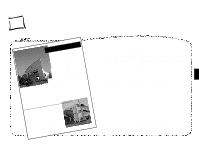
Follow these steps to transfer your pictures to your computer: 1 Double-click the EasyPhoto icon. You see the EasyPhoto opening screen. 2 Click the PhotoPC button. Your pictures appear one-by-one on the PhotoPC screen. If you connected your camera to a port other than COM1, or your port doesn't support the default transfer speed, you will see a message asking you to check your port settings. Select the correct settings and click Retry. For more information about port and transfer speed settings, see page 5-4. Click below a picture to display the date and time when the picture was taken. These are not accurate unless you connected the camera and set the clock before taking the picture. 3 To transfer all pictures to your computer, click Add All to Gallery. To select pictures individually, click on them, and then click Add to Gallery. If you select a single picture, EasyPhoto prompts you to 3-4 Using PhotoPC with Your Computer
-
 1
1 -
2
-
3
-
4
-
5
-
6
-
7
-
8
-
9
-
10
-
11
-
12
-
13
-
14
-
15
-
16
-
17
-
18
-
19
-
20
-
21
-
22
-
23
-
 24
24 -
 25
25 -
 26
26 -
 27
27 -
 28
28 -
 29
29 -
 30
30 -
 31
31 -
 32
32 -
 33
33 -
 34
34 -
35
-
36
-
37
-
38
-
39
-
40
-
41
-
42
-
43
-
44
-
45
-
46
-
47
-
48
-
49
-
50
-
51
-
52
-
53
-
54
-
55
-
56
-
57
-
58
-
59
-
60
-
61
-
62
-
63
 |
 |
