Epson PhotoPC User Manual - Page 39
Cropping, Resizing, Rotating, Adjusting Brightness and Contrast
 |
View all Epson PhotoPC manuals
Add to My Manuals
Save this manual to your list of manuals |
Page 39 highlights
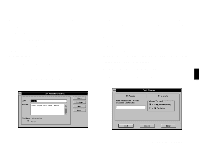
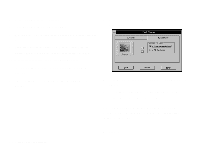
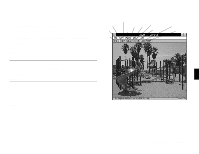
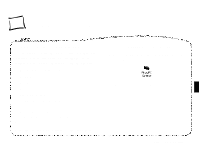
Cropping You can crop your pictures by selecting either a rectangular area or a freehand area to keep; everything outside of the area is cut away. Follow these steps: 1 Click either the Select Rectangle button or the Select Freehand button. 2 Drag the mouse to enclose the area you want to keep. A dotted line moves around the selected area. 3 Click the Crop button. EasyPhoto deletes everything outside of the selected area. Resizing When you change the size of your picture, EasyPhoto automatically keeps the original proportions, so your picture is never distorted. Follow these steps: 1 Click the Resize button. Arrows appear in the corners of your picture. 2 Drag one of the arrows to change your picture's size. Size information is displayed at the bottom of the window. 3 Release the mouse button when the picture is the size you want. NOTE You can also use your word processor or other software to change the size of a picture after you import it. Rotating You can rotate your picture and tilt it at any angle you want. Follow these steps: 1 Click the Rotate button. Curved arrows appear around your picture. 2 Drag one of the arrows to rotate your picture. Rotation information is displayed at the bottom of the window. 3 Release the mouse button when the picture is turned the way you want it. Adjusting Brightness and Contrast Changing the brightness of a picture lets you make it lighter or darker; changing the contrast adjusts the difference between the picture's light and dark areas. Follow these steps: 1 Click the Brightness and Contrast button. You see a screen like the one below. 4-6 Working with Your Pictures
-
 1
1 -
2
-
3
-
4
-
5
-
6
-
7
-
8
-
9
-
10
-
11
-
12
-
13
-
14
-
15
-
16
-
17
-
18
-
19
-
20
-
21
-
22
-
23
-
24
-
25
-
26
-
27
-
28
-
29
-
30
-
31
-
32
-
33
-
 34
34 -
 35
35 -
 36
36 -
 37
37 -
 38
38 -
 39
39 -
 40
40 -
 41
41 -
 42
42 -
 43
43 -
 44
44 -
45
-
46
-
47
-
48
-
49
-
50
-
51
-
52
-
53
-
54
-
55
-
56
-
57
-
58
-
59
-
60
-
61
-
62
-
63
 |
 |