Epson PhotoPC User Manual - Page 40
Adjusting Colors, Saving, Moving, and Printing Your Pictures
 |
View all Epson PhotoPC manuals
Add to My Manuals
Save this manual to your list of manuals |
Page 40 highlights
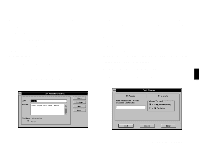
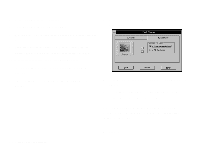
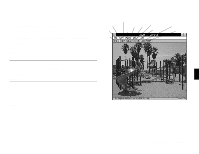
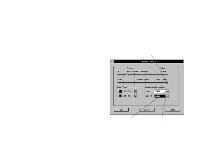
2 Drag the sliders to make the adjustments you want. The Before and After samples show you the results of your changes. 3 Click OK when you are ready to make the changes to your picture. 3 Click OK when you are ready to make the changes to your picture. Zoom in Zoom out Drag to adjust brightness Drag to adjust contrast Drag to move picture in window Drag to adjust colors D dj l 4 Saving, Moving, and Printing Your Pictures Adjusting Colors You can change the way your picture looks by adjusting the intensity When you're finished working with your picture in the Photo Workshop, you can save it, move it to a document, or print it out. and relationship of the three primary colors on your screen: red, green, and blue. Follow these steps: ƒ Click the Save button to save your picture. ƒ To move your picture to a document, follow the instructions on 1 Click the Adjust Color button. You see a screen like the one below. page 3-7, but click the Move button before you drag the picture A 2 Drag the sliders to change the red, green, and blue colors in your from the Photo Workshop screen. picture. The Before and After samples show you the results of your ƒ To print your picture, choose Print from the File menu. changes. Working with Your Pictures 4-7
-
 1
1 -
2
-
3
-
4
-
5
-
6
-
7
-
8
-
9
-
10
-
11
-
12
-
13
-
14
-
15
-
16
-
17
-
18
-
19
-
20
-
21
-
22
-
23
-
24
-
25
-
26
-
27
-
28
-
29
-
30
-
31
-
32
-
33
-
34
-
 35
35 -
 36
36 -
 37
37 -
 38
38 -
 39
39 -
 40
40 -
 41
41 -
 42
42 -
 43
43 -
 44
44 -
 45
45 -
46
-
47
-
48
-
49
-
50
-
51
-
52
-
53
-
54
-
55
-
56
-
57
-
58
-
59
-
60
-
61
-
62
-
63
 |
 |
