Epson PhotoPC User Manual - Page 47
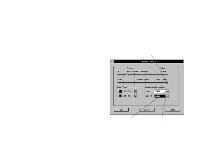
Click the Camera Options button. The Camera Controls screen, appears, as shown
 |
View all Epson PhotoPC manuals
Add to My Manuals
Save this manual to your list of manuals |
Page 47 highlights
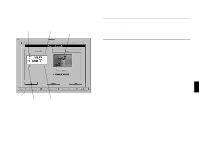
When you take pictures from your computer, you can see each image on your screen before you capture it. This "live preview" feature works something like a video camera, except that the image moves more slowly. Live preview is especially helpful when you are using a close-up lens. NOTE Taking pictures from your computer with live preview uses a lot of battery power. If you don't have the PhotoPC AC adapter, you may want to consider purchasing it. See Appendix A for more information about using the AC adapter. The auto shut-off feature remains in effect when the camera is connected to your computer (except when you use live preview). However, it takes place after 5 minutes of inactivity. To turn the camera back on, slide the power switch off and on again. Follow these steps to take pictures from your computer: 1 Connect the camera to your computer as described in Chapter 3. 2 Position the camera facing the subject. Using a tripod will give you the maximum flexibility in setting up your shots. 3 Turn on both the camera and your computer system. 4 Double-click the EasyPhoto icon. The EasyPhoto opening screen appears. 5 Click the PhotoPC button. The PhotoPC screen appears. 6 Click the Camera Options button. The Camera Controls screen appears, as shown on page 5-7. 7 Click Show Live Preview to display your image in the viewfinder window. You can move or tilt the camera until you see the image you want to capture in the window. The image is updated every three seconds. You can click the buttons on your screen to set the resolution, flash, timer and erase features, just as you use the buttons on the camera. The control panel on your screen displays the same information as the control panel on the camera itself. For more information about the control panel, see Chapter 2. 5-6 Using Advanced Features
-
 1
1 -
2
-
3
-
4
-
5
-
6
-
7
-
8
-
9
-
10
-
11
-
12
-
13
-
14
-
15
-
16
-
17
-
18
-
19
-
20
-
21
-
22
-
23
-
24
-
25
-
26
-
27
-
28
-
29
-
30
-
31
-
32
-
33
-
34
-
35
-
36
-
37
-
38
-
39
-
40
-
41
-
 42
42 -
 43
43 -
 44
44 -
 45
45 -
 46
46 -
 47
47 -
 48
48 -
 49
49 -
 50
50 -
 51
51 -
 52
52 -
53
-
54
-
55
-
56
-
57
-
58
-
59
-
60
-
61
-
62
-
63
 |
 |