Epson PowerLite 4300 User's Guide - Page 63
Starting the Projector with a Password, function is enabled. For details on creating a custom screen
 |
View all Epson PowerLite 4300 manuals
Add to My Manuals
Save this manual to your list of manuals |
Page 63 highlights
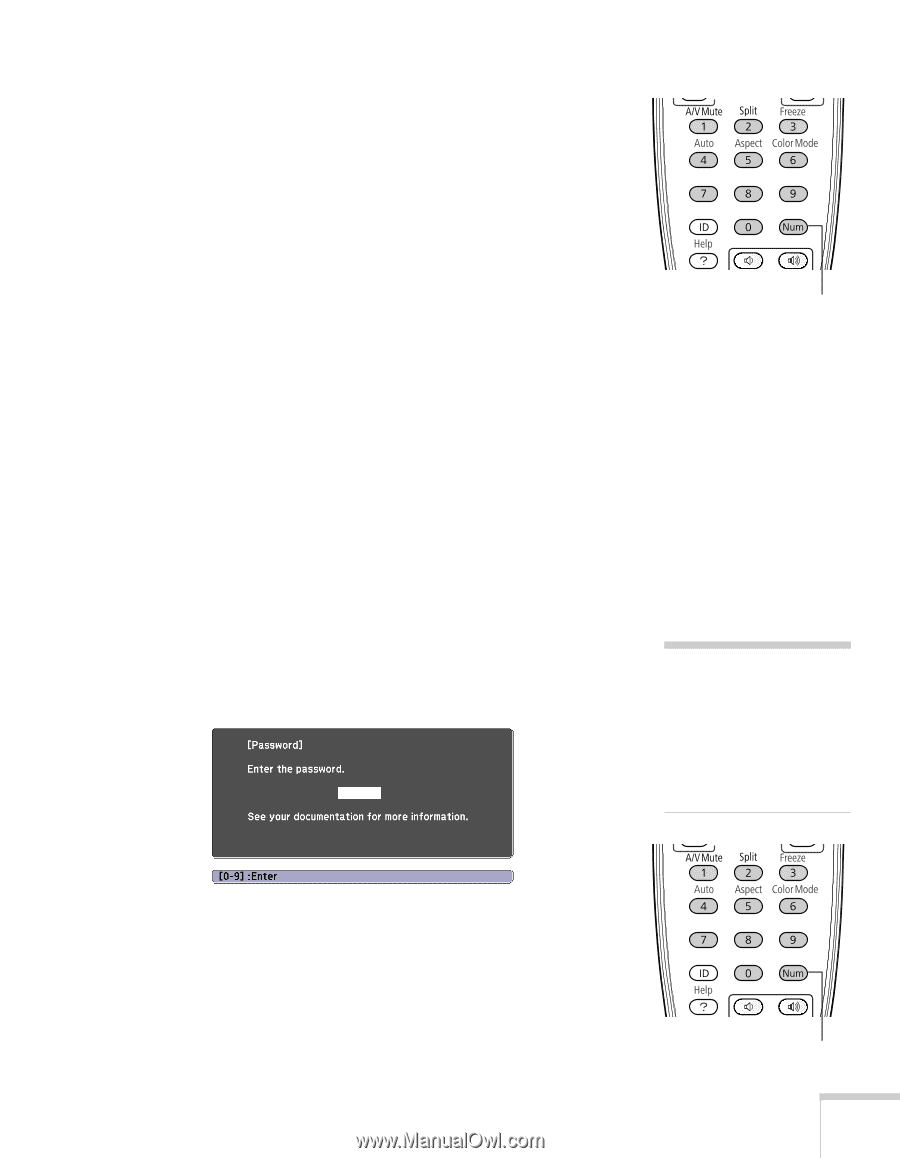
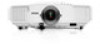
4. Hold down the Num button on the remote control and use the numeric keypad to enter a four digit password. (The default setting is 0000.) 5. When you see a confirmation message, reenter the password. Then press the Menu button to exit the screen. To set security options, access the Password Protect screen as described on page 62, and then turn on any of the following options: ■ Power On Protect to prevent unauthorized use of the projector. After the projector is plugged in and turned on, you must enter a password to use the projector. For details, see "Starting the Projector with a Password" below. ■ User's Logo Protect to prevent your custom screen and display settings from being changed. None of the User's Logo features in the Extended menu can be changed when the User's Logo Protect function is enabled. For details on creating a custom screen, see page 64. ■ Network Protect to lock the Network settings in the menu system. Starting the Projector with a Password When the password function is enabled, you see this screen when you plug in and turn on the projector: Hold down note If you leave the projector plugged in, the Password screen will not appear. It appears only if you unplug and reconnect the power cord. Hold down the Num button on the remote control and use the numeric keypad to enter the four digit password. The password screen closes and projection begins. Hold down Fine-Tuning the Projector 63
-
 1
1 -
2
-
3
-
4
-
5
-
6
-
7
-
8
-
9
-
10
-
11
-
12
-
13
-
14
-
15
-
16
-
17
-
18
-
19
-
20
-
21
-
22
-
23
-
24
-
25
-
26
-
27
-
28
-
29
-
30
-
31
-
32
-
33
-
34
-
35
-
36
-
37
-
38
-
39
-
40
-
41
-
42
-
43
-
44
-
45
-
46
-
47
-
48
-
49
-
50
-
51
-
52
-
53
-
54
-
55
-
56
-
57
-
 58
58 -
 59
59 -
 60
60 -
 61
61 -
 62
62 -
 63
63 -
 64
64 -
 65
65 -
 66
66 -
 67
67 -
 68
68 -
69
-
70
-
71
-
72
-
73
-
74
-
75
-
76
-
77
-
78
-
79
-
80
-
81
-
82
-
83
-
84
-
85
-
86
-
87
-
88
-
89
-
90
-
91
-
92
-
93
-
94
-
95
-
96
-
97
-
98
-
99
-
100
-
101
-
102
-
103
-
104
-
105
-
106
-
107
-
108
-
109
-
110
-
111
-
112
-
113
-
114
-
115
-
116
-
117
-
118
-
119
-
120
-
121
-
122
-
123
-
124
 |
 |