Epson PowerLite 50c User Manual - Page 13
ll be projecting from overhead, you, ll need to square-up the sides of image by pressing - ceiling mount
 |
View all Epson PowerLite 50c manuals
Add to My Manuals
Save this manual to your list of manuals |
Page 13 highlights
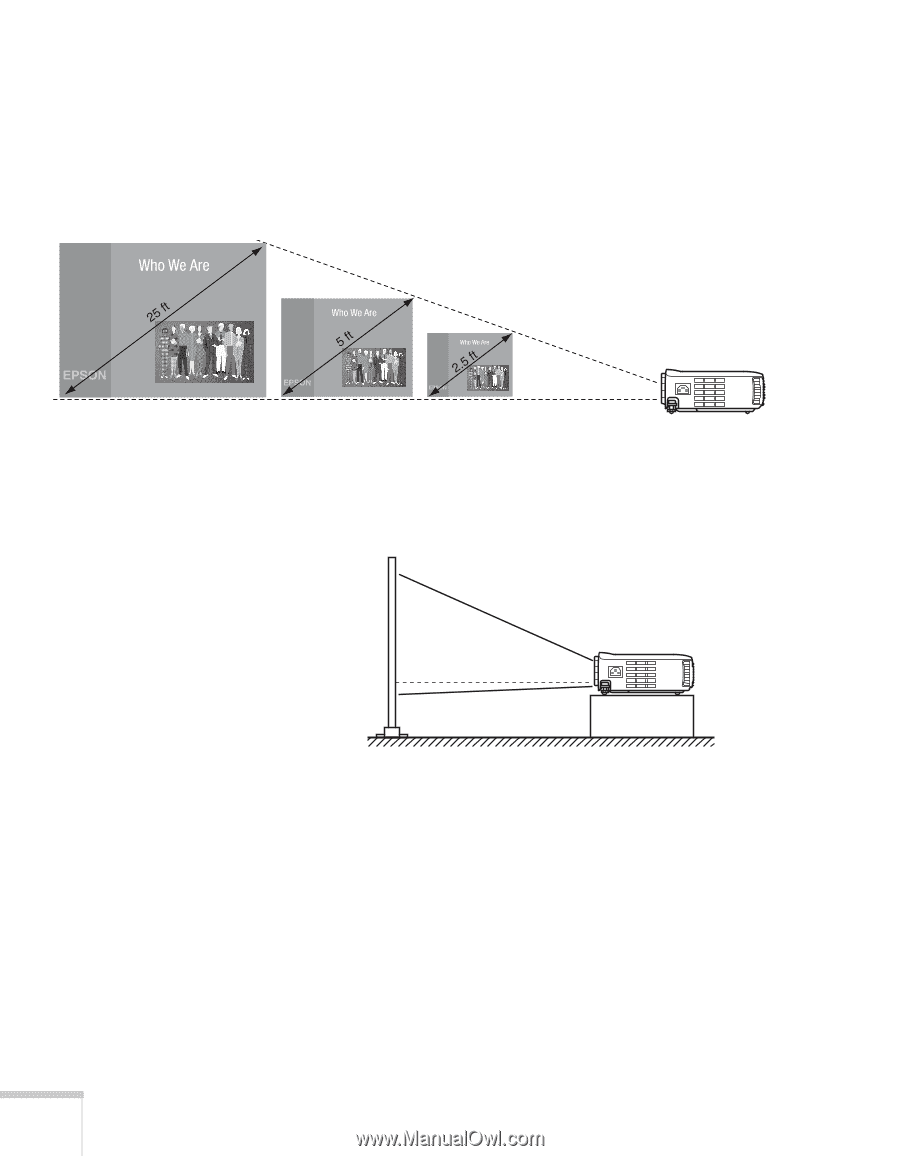
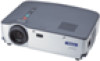
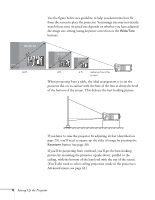
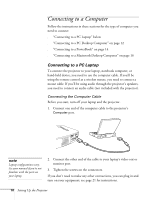
Use the figure below as a guideline to help you determine how far from the screen to place the projector. Your image size may not exactly match these sizes; its actual size depends on whether you have adjusted the image size setting (using keystone correction or the Wide/Tele button). 40 ft. 8 ft. 4 ft. distance from the screen When projecting from a table, the ideal arrangement is to set the projector flat on its surface with the base of the lens at about the level of the bottom of the screen. This delivers the best-looking picture. If you have to raise the projector by adjusting its feet (described on page 29), you'll need to square-up the sides of image by pressing the Keystone button (see page 30). If you'll be projecting from overhead, you'll get the best-looking picture by mounting the projector upside-down, parallel to the ceiling, with the bottom of the lens level with the top of the screen. (You'll also need to select ceiling projection mode in the projector's Advanced menu; see page 42.) 8 Setting Up the Projector
-
 1
1 -
2
-
3
-
4
-
5
-
6
-
7
-
 8
8 -
 9
9 -
 10
10 -
 11
11 -
 12
12 -
 13
13 -
 14
14 -
 15
15 -
 16
16 -
 17
17 -
 18
18 -
19
-
20
-
21
-
22
-
23
-
24
-
25
-
26
-
27
-
28
-
29
-
30
-
31
-
32
-
33
-
34
-
35
-
36
-
37
-
38
-
39
-
40
-
41
-
42
-
43
-
44
-
45
-
46
-
47
-
48
-
49
-
50
-
51
-
52
-
53
-
54
-
55
-
56
-
57
-
58
-
59
-
60
-
61
-
62
-
63
-
64
-
65
-
66
-
67
-
68
-
69
-
70
-
71
-
72
-
73
-
74
-
75
-
76
-
77
-
78
-
79
-
80
 |
 |