Epson PowerLite Pro Cinema 6010 User's Guide - Page 19
Making Other Connections, for more information.
 |
View all Epson PowerLite Pro Cinema 6010 manuals
Add to My Manuals
Save this manual to your list of manuals |
Page 19 highlights
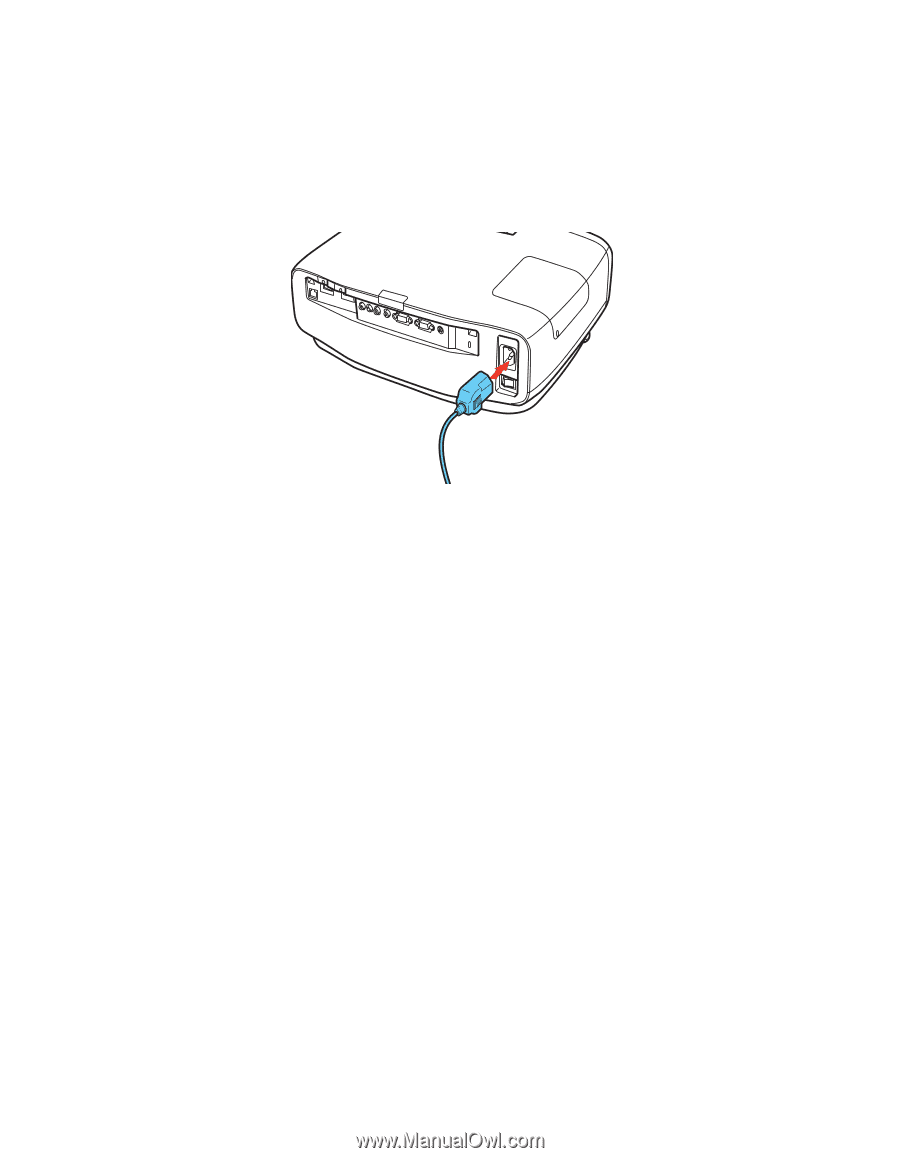
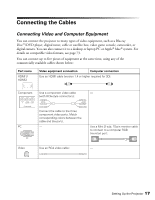
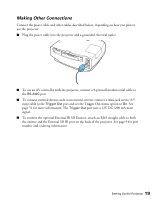
Making Other Connections Connect the power cable and other cables described below, depending on how you plan to use the projector. ■ Plug the power cable into the projector and a grounded electrical outlet. ■ To use an AV controller with the projector, connect a 9-pin null modem serial cable to the RS-232C port. ■ To connect external devices such as motorized screens, connect a mini-jack stereo (3.5 mm) cable to the Trigger Out port and set the Trigger Out menu option to On. See page 51 for more information. The Trigger Out port uses a 12V DC (200 mA max) signal. ■ To connect the optional External IR 3D Emitter, attach an RJ45 straight cable to both the emitter and the External 3D IR port on the back of the projector. See page 9 for part number and ordering information. Setting Up the Projector 19
-
 1
1 -
2
-
3
-
4
-
5
-
6
-
7
-
8
-
9
-
10
-
11
-
12
-
13
-
 14
14 -
 15
15 -
 16
16 -
 17
17 -
 18
18 -
 19
19 -
 20
20 -
 21
21 -
 22
22 -
 23
23 -
 24
24 -
25
-
26
-
27
-
28
-
29
-
30
-
31
-
32
-
33
-
34
-
35
-
36
-
37
-
38
-
39
-
40
-
41
-
42
-
43
-
44
-
45
-
46
-
47
-
48
-
49
-
50
-
51
-
52
-
53
-
54
-
55
-
56
-
57
-
58
-
59
-
60
-
61
-
62
-
63
-
64
-
65
-
66
-
67
-
68
-
69
-
70
-
71
-
72
-
73
-
74
-
75
-
76
-
77
-
78
-
79
 |
 |