Epson PowerLite Pro Cinema 6010 User's Guide - Page 43
Adjustments for Computer Images, Split Screen Setup, Screen Size
 |
View all Epson PowerLite Pro Cinema 6010 manuals
Add to My Manuals
Save this manual to your list of manuals |
Page 43 highlights
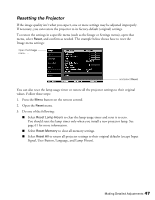
Adjustments for Computer Images In addition to the settings described previously, you can adjust the Tracking and Sync settings for analog RGB computer images. Normally, these settings are adjusted automatically by the projector. If you notice that the image is blurry or contains dark vertical bands, you may need to adjust the settings yourself. ■ Auto Setup Signal > Auto Setup Leave this setting on so that the projector automatically adjusts the tracking, sync, and position of the image. ■ Tracking Signal > Tracking Adjust the tracking to eliminate vertical bands. It is easiest to adjust the tracking when the image contains a lot of fine detail (such as black text on a white background). Note: This setting is only available with a signal input through the PC port. ■ Sync. Signal > Sync. Adjust the synchronization to eliminate blurriness. For best results, make sure the tracking is properly adjusted first. Note: This setting is only available with a signal input through the PC port. Split Screen Setup Press the Menu button while in Split Screen mode to access this menu. ■ Screen Size Split Screen Setup > Screen Size Adjusts the size of the two screens. Choose Larger Left to increase the size of the left screen, Larger Right to increase the size of the right screen, or Equal to split the display evenly between the two screens. Making Detailed Adjustments 43
-
 1
1 -
2
-
3
-
4
-
5
-
6
-
7
-
8
-
9
-
10
-
11
-
12
-
13
-
14
-
15
-
16
-
17
-
18
-
19
-
20
-
21
-
22
-
23
-
24
-
25
-
26
-
27
-
28
-
29
-
30
-
31
-
32
-
33
-
34
-
35
-
36
-
37
-
 38
38 -
 39
39 -
 40
40 -
 41
41 -
 42
42 -
 43
43 -
 44
44 -
 45
45 -
 46
46 -
 47
47 -
 48
48 -
49
-
50
-
51
-
52
-
53
-
54
-
55
-
56
-
57
-
58
-
59
-
60
-
61
-
62
-
63
-
64
-
65
-
66
-
67
-
68
-
69
-
70
-
71
-
72
-
73
-
74
-
75
-
76
-
77
-
78
-
79
 |
 |