Epson Z9870UNL User Manual - Page 92
Correcting Image Shape with Curved Surface, Enter, Parent topic, Related references, Related tasks
 |
View all Epson Z9870UNL manuals
Add to My Manuals
Save this manual to your list of manuals |
Page 92 highlights
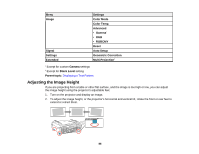
You see the Quick Corner adjustment screen: 6. Use the arrow buttons on the projector or the remote control to select the corner of the image you want to adjust. Then press Enter. 7. Press the arrow buttons to adjust the image shape as necessary. 8. When you are finished, press Esc. Parent topic: Image Shape Related references Projector Feature Settings - Settings Menu Related tasks Displaying a Test Pattern Correcting Image Shape with Curved Surface You can use the projector's Curved Surface setting to adjust the shape of an image projected on a curved or spherical surface. Note: For the best results, keep the lens centered using lens shift. The image may not be evenly focused throughout even after performing the steps here. 92
-
 1
1 -
2
-
3
-
4
-
5
-
6
-
7
-
8
-
9
-
10
-
11
-
12
-
13
-
14
-
15
-
16
-
17
-
18
-
19
-
20
-
21
-
22
-
23
-
24
-
25
-
26
-
27
-
28
-
29
-
30
-
31
-
32
-
33
-
34
-
35
-
36
-
37
-
38
-
39
-
40
-
41
-
42
-
43
-
44
-
45
-
46
-
47
-
48
-
49
-
50
-
51
-
52
-
53
-
54
-
55
-
56
-
57
-
58
-
59
-
60
-
61
-
62
-
63
-
64
-
65
-
66
-
67
-
68
-
69
-
70
-
71
-
72
-
73
-
74
-
75
-
76
-
77
-
78
-
79
-
80
-
81
-
82
-
83
-
84
-
85
-
86
-
 87
87 -
 88
88 -
 89
89 -
 90
90 -
 91
91 -
 92
92 -
 93
93 -
 94
94 -
 95
95 -
 96
96 -
 97
97 -
98
-
99
-
100
-
101
-
102
-
103
-
104
-
105
-
106
-
107
-
108
-
109
-
110
-
111
-
112
-
113
-
114
-
115
-
116
-
117
-
118
-
119
-
120
-
121
-
122
-
123
-
124
-
125
-
126
-
127
-
128
-
129
-
130
-
131
-
132
-
133
-
134
-
135
-
136
-
137
-
138
-
139
-
140
-
141
-
142
-
143
-
144
-
145
-
146
-
147
-
148
-
149
-
150
-
151
-
152
-
153
-
154
-
155
-
156
-
157
-
158
-
159
-
160
-
161
-
162
-
163
-
164
-
165
-
166
-
167
-
168
-
169
-
170
-
171
-
172
-
173
-
174
-
175
-
176
-
177
-
178
-
179
-
180
-
181
-
182
-
183
-
184
-
185
-
186
-
187
-
188
-
189
-
190
-
191
-
192
-
193
-
194
-
195
-
196
-
197
-
198
-
199
-
200
-
201
-
202
-
203
-
204
-
205
-
206
-
207
-
208
-
209
-
210
-
211
-
212
-
213
-
214
-
215
-
216
-
217
-
218
-
219
-
220
-
221
-
222
-
223
-
224
-
225
-
226
-
227
-
228
-
229
-
230
-
231
-
232
-
233
-
234
-
235
-
236
-
237
-
238
-
239
-
240
-
241
-
242
-
243
-
244
-
245
-
246
-
247
-
248
-
249
-
250
-
251
-
252
-
253
-
254
-
255
-
256
-
257
-
258
-
259
-
260
-
261
-
262
-
263
-
264
-
265
-
266
-
267
-
268
-
269
-
270
-
271
-
272
-
273
-
274
-
275
-
276
-
277
-
278
-
279
-
280
-
281
-
282
-
283
-
284
-
285
-
286
-
287
-
288
 |
 |
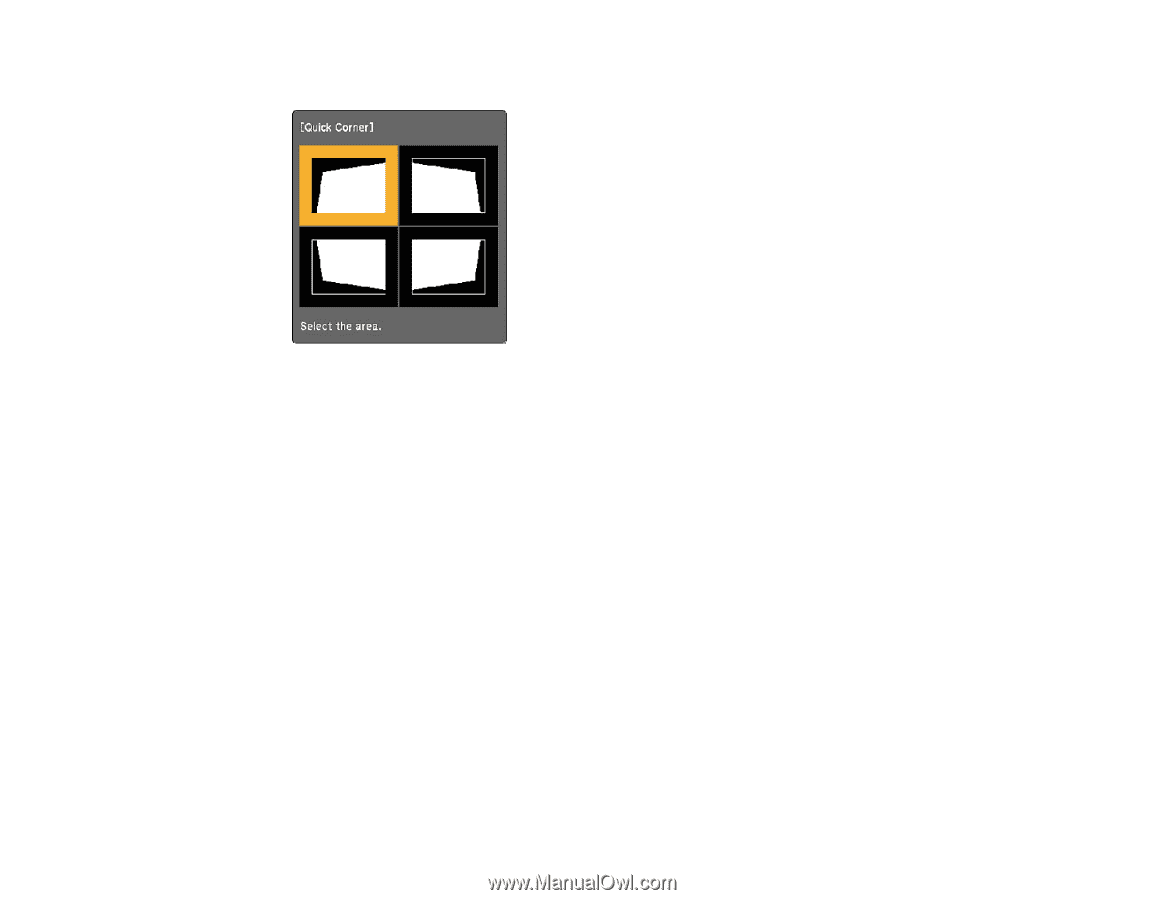
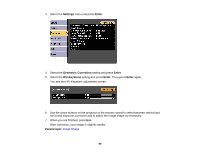
You see the Quick Corner adjustment screen:
6.
Use the arrow buttons on the projector or the remote control to select the corner of the image you
want to adjust. Then press
Enter
.
7.
Press the arrow buttons to adjust the image shape as necessary.
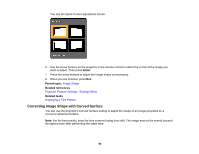
8.
When you are finished, press
Esc
.
Parent topic:
Image Shape
Related references
Projector Feature Settings - Settings Menu
Related tasks
Displaying a Test Pattern
Correcting Image Shape with Curved Surface
You can use the projector's Curved Surface setting to adjust the shape of an image projected on a
curved or spherical surface.
Note:
For the best results, keep the lens centered using lens shift. The image may not be evenly focused
throughout even after performing the steps here.
92