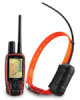
Garmin Astro 320 Astro and DC 30 Owner's Manual - Page 39
Track, Using DEM Digital Elevation Models, Navigating a Saved Track, Profiles - topo maps
 |
View all Garmin Astro 320 manuals
Add to My Manuals
Save this manual to your list of manuals |
Page 39 highlights
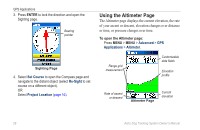
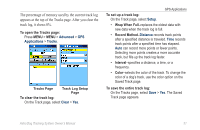
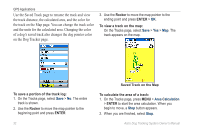
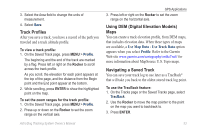
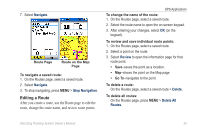
3. Select the Area field to change the units of measurement. 4. Select Save. Track Profiles After you save a track, you have a record of the path you traveled and a track altitude profile. To view a track profile: 1. On the Saved Track page, press MENU > Profile. The beginning and the end of the track are marked by a flag. Press left or right on the Rocker to scroll across the track profile. As you scroll, the elevation for each point appears at the top of the page, and the distance from the Begin point and the End point appear at the bottom. 2. While scrolling, press ENTER to show the highlighted point on the map. To set the zoom ranges for the track profile: 1. On the Saved Track page, press MENU > Profile. 2. Press up or down on the Rocker to set the zoom range on the vertical axis. Astro Dog Tracking System Owner's Manual GPS Applications 3. Press left or right on the Rocker to set the zoom range on the horizontal axis. Using DEM (Digital Elevation Models) Maps You can create a track elevation profile, from DEM maps, that includes elevation data. When these types of maps are available, a Use Map Data - Use Track Data option appears when you select Profile. Refer to the Garmin Web site www.garmin.com/cartography/ontheTrail/ for more information about MapSource U.S. Topo maps. Navigating a Saved Track You can save your track log to use later as a TracBack® that will take you back to the oldest stored track log point. To use the TracBack feature: 1. On the Tracks page or the Saved Tracks page, select TracBack. 2. Use the Rocker to move the map pointer to the point on the map you want to backtrack to. 3. Press ENTER. 33
-
 1
1 -
2
-
3
-
4
-
5
-
6
-
7
-
8
-
9
-
10
-
11
-
12
-
13
-
14
-
15
-
16
-
17
-
18
-
19
-
20
-
21
-
22
-
23
-
24
-
25
-
26
-
27
-
28
-
29
-
30
-
31
-
32
-
33
-
 34
34 -
 35
35 -
 36
36 -
 37
37 -
 38
38 -
 39
39 -
 40
40 -
 41
41 -
 42
42 -
 43
43 -
 44
44 -
45
-
46
-
47
-
48
-
49
-
50
-
51
-
52
-
53
-
54
-
55
-
56
-
57
-
58
-
59
-
60
-
61
-
62
-
63
-
64
-
65
-
66
-
67
-
68
-
69
-
70
-
71
-
72
-
73
-
74
-
75
-
76
 |
 |