HP 2300d HP LaserJet 2300 printer - User Guide - Page 22
Installing the software after the parallel or USB cable has been connected
 |
UPC - 808736471091
View all HP 2300d manuals
Add to My Manuals
Save this manual to your list of manuals |
Page 22 highlights
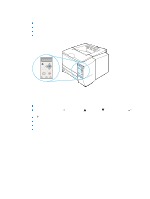
Installing the software after the parallel or USB cable has been connected If you have already connected a parallel or USB cable to a Windows computer, the New Hardware Found dialog box appears when you turn on the computer. To install the software for Windows 95, Windows 98, or Windows Me 1 In the New Hardware Found dialog box, click Search CD-ROM drive. 2 Click Next. 3 Follow the instructions on the computer screen. 4 Print a page from any software program to make sure that the software is correctly installed. If installation fails, reinstall the software. If this fails, check the installation notes and Readme files on the printer CD-ROM or the flyer that came in the printer box, or go to http://www.hp.com/support/lj2300 for help or more information. To install the software for Windows 2000 or Windows XP 1 In the New Hardware Found dialog box, click Search. 2 On the Locate Driver Files screen, select the Specify a Location check box, clear all other check boxes, and then click Next. 3 Type the following (where X is the letter of the CD-ROM drive): X:\2000XP 4 Click Next. 5 Follow the instructions on the computer screen. 6 Click Finish when installation has completed. 7 Select a language and follow the instructions on the computer screen. 8 Print a page from any software program to make sure that the software is correctly installed. If installation fails, reinstall the software. If this fails, check the installation notes and Readme files on the printer CD-ROM or the flyer that came in the printer box, or go to http://www.hp.com/support/lj2300 for help or more information. 20 Chapter 1 Printer basics ENWW
-
 1
1 -
2
-
3
-
4
-
5
-
6
-
7
-
8
-
9
-
10
-
11
-
12
-
13
-
14
-
15
-
16
-
 17
17 -
 18
18 -
 19
19 -
 20
20 -
 21
21 -
 22
22 -
 23
23 -
 24
24 -
 25
25 -
 26
26 -
 27
27 -
28
-
29
-
30
-
31
-
32
-
33
-
34
-
35
-
36
-
37
-
38
-
39
-
40
-
41
-
42
-
43
-
44
-
45
-
46
-
47
-
48
-
49
-
50
-
51
-
52
-
53
-
54
-
55
-
56
-
57
-
58
-
59
-
60
-
61
-
62
-
63
-
64
-
65
-
66
-
67
-
68
-
69
-
70
-
71
-
72
-
73
-
74
-
75
-
76
-
77
-
78
-
79
-
80
-
81
-
82
-
83
-
84
-
85
-
86
-
87
-
88
-
89
-
90
-
91
-
92
-
93
-
94
-
95
-
96
-
97
-
98
-
99
-
100
-
101
-
102
-
103
-
104
-
105
-
106
-
107
-
108
-
109
-
110
-
111
-
112
-
113
-
114
-
115
-
116
-
117
-
118
-
119
-
120
-
121
-
122
-
123
-
124
-
125
-
126
-
127
-
128
-
129
-
130
-
131
-
132
-
133
-
134
-
135
-
136
-
137
-
138
-
139
-
140
-
141
-
142
-
143
-
144
-
145
-
146
-
147
-
148
-
149
-
150
-
151
-
152
-
153
-
154
-
155
-
156
-
157
-
158
-
159
-
160
-
161
-
162
-
163
-
164
-
165
-
166
-
167
-
168
-
169
-
170
-
171
-
172
-
173
-
174
-
175
-
176
-
177
-
178
-
179
-
180
-
181
-
182
-
183
-
184
-
185
-
186
-
187
-
188
-
189
-
190
-
191
-
192
-
193
-
194
-
195
-
196
 |
 |
