HP 4150 HP OmniBook 4150 - User's Guide - Page 51
To replace a plug-in module - omnibook replacement hard drive
 |
UPC - 725184276088
View all HP 4150 manuals
Add to My Manuals
Save this manual to your list of manuals |
Page 51 highlights
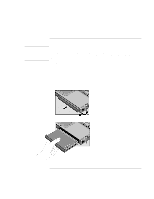
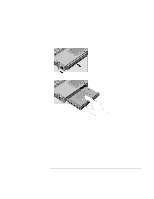
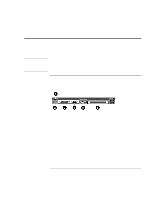
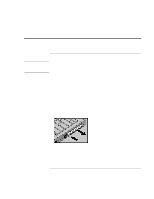
Expanding the OmniBook Using Plug-In Modules CAUTION Note To replace a plug-in module For Windows 95 or Windows 98, if Agaté Tioman hot-swap software is installed, a plugin module icon appears at the right end of the taskbar. This software lets you disconnect most plug-in modules without shutting down the computer. For a hard drive module, you must shut down the computer. Windows 2000 displays the Unplug or Eject Hardware icon at the right end of the taskbar when a drive module is present. If you are connecting or disconnecting a CD-ROM drive, DVD drive, or any other type of drive, you must use the icon in the taskbar or shut down the computer- otherwise, you could lose data. Do not touch the metallic pins in OmniBook connectors, module connectors, or cable connectors. Static electricity can damage internal components. 1. Close all files that are open from the plug-in module. 2. For Windows 95 or 98, if the plug-in module icon is present in the taskbar, right-click the icon, then click Remove Device. When prompted to remove the module, click OK. (You do not have to do this if the bay is empty or contains a battery.) -or- For Windows 2000, left-click the Unplug or Eject Hardware icon on the taskbar, and select the module you want to remove. When prompted to remove the module, click OK. (You do not have to do this if the bay is empty or contains a battery.) -or- For any version of Windows, including Windows NT, click Start, Shut Down to shut down the computer. (You must do this if you are removing or inserting a hard disk drive in the module bay.) If you're removing or inserting a battery, you do not have to do step 2. User's Handbook 51
-
 1
1 -
2
-
3
-
4
-
5
-
6
-
7
-
8
-
9
-
10
-
11
-
12
-
13
-
14
-
15
-
16
-
17
-
18
-
19
-
20
-
21
-
22
-
23
-
24
-
25
-
26
-
27
-
28
-
29
-
30
-
31
-
32
-
33
-
34
-
35
-
36
-
37
-
38
-
39
-
40
-
41
-
42
-
43
-
44
-
45
-
 46
46 -
 47
47 -
 48
48 -
 49
49 -
 50
50 -
 51
51 -
 52
52 -
 53
53 -
 54
54 -
 55
55 -
 56
56 -
57
-
58
-
59
-
60
-
61
-
62
-
63
-
64
-
65
-
66
-
67
-
68
-
69
-
70
-
71
-
72
-
73
-
74
-
75
-
76
-
77
-
78
-
79
-
80
-
81
-
82
-
83
-
84
-
85
-
86
-
87
-
88
-
89
-
90
-
91
-
92
-
93
-
94
-
95
-
96
-
97
-
98
-
99
-
100
-
101
-
102
-
103
-
104
-
105
-
106
-
107
-
108
 |
 |