HP 8100 Maintenance and Service Guide: HP Compaq 8100 and 8180 Elite Business - Page 143
Hood Sensor,
 |
View all HP 8100 manuals
Add to My Manuals
Save this manual to your list of manuals |
Page 143 highlights
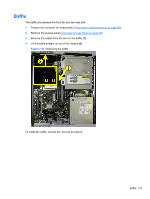
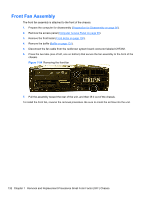
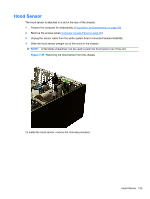
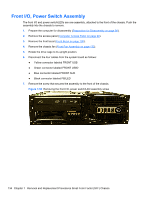
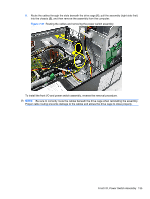
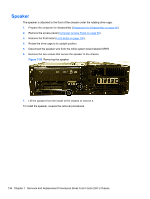
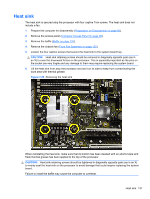
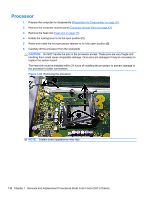
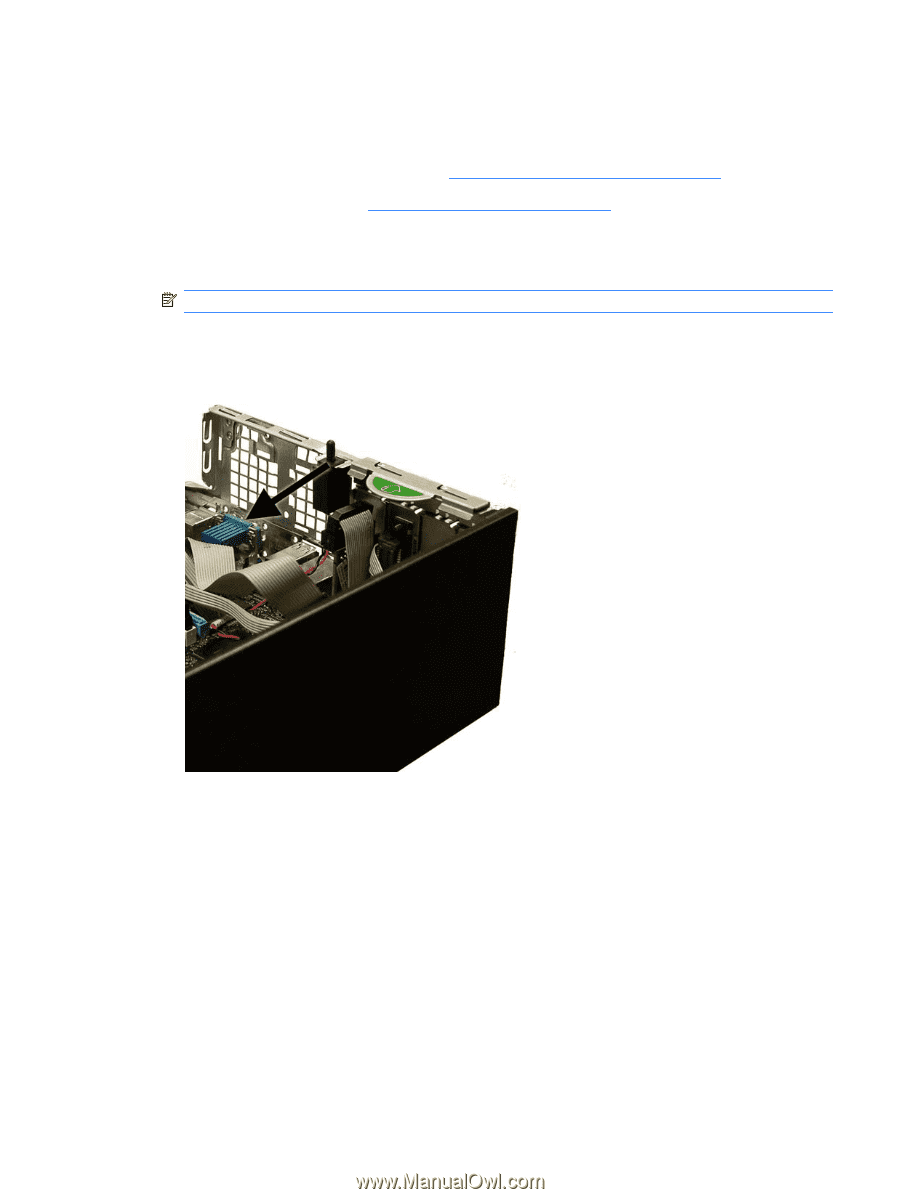
Hood Sensor The hood sensor is attached in a slot in the rear of the chassis. 1. Prepare the computer for disassembly (Preparation for Disassembly on page 90). 2. Remove the access panel (Computer Access Panel on page 99). 3. Unplug the sensor cable from the white system board connected labeled HSENSE. 4. Slide the hood sensor straight out of the notch in the chassis. NOTE: A flat blade screwdriver can be used to push the hood sensor out of the slot. Figure 7-55 Removing the hood sensor from the chassis To install the hood sensor, reverse the removal procedure. Hood Sensor 133
-
 1
1 -
2
-
3
-
4
-
5
-
6
-
7
-
8
-
9
-
10
-
11
-
12
-
13
-
14
-
15
-
16
-
17
-
18
-
19
-
20
-
21
-
22
-
23
-
24
-
25
-
26
-
27
-
28
-
29
-
30
-
31
-
32
-
33
-
34
-
35
-
36
-
37
-
38
-
39
-
40
-
41
-
42
-
43
-
44
-
45
-
46
-
47
-
48
-
49
-
50
-
51
-
52
-
53
-
54
-
55
-
56
-
57
-
58
-
59
-
60
-
61
-
62
-
63
-
64
-
65
-
66
-
67
-
68
-
69
-
70
-
71
-
72
-
73
-
74
-
75
-
76
-
77
-
78
-
79
-
80
-
81
-
82
-
83
-
84
-
85
-
86
-
87
-
88
-
89
-
90
-
91
-
92
-
93
-
94
-
95
-
96
-
97
-
98
-
99
-
100
-
101
-
102
-
103
-
104
-
105
-
106
-
107
-
108
-
109
-
110
-
111
-
112
-
113
-
114
-
115
-
116
-
117
-
118
-
119
-
120
-
121
-
122
-
123
-
124
-
125
-
126
-
127
-
128
-
129
-
130
-
131
-
132
-
133
-
134
-
135
-
136
-
137
-
 138
138 -
 139
139 -
 140
140 -
 141
141 -
 142
142 -
 143
143 -
 144
144 -
 145
145 -
 146
146 -
 147
147 -
 148
148 -
149
-
150
-
151
-
152
-
153
-
154
-
155
-
156
-
157
-
158
-
159
-
160
-
161
-
162
-
163
-
164
-
165
-
166
-
167
-
168
-
169
-
170
-
171
-
172
-
173
-
174
-
175
-
176
-
177
-
178
-
179
-
180
-
181
-
182
-
183
-
184
-
185
-
186
-
187
-
188
-
189
-
190
-
191
-
192
-
193
-
194
-
195
-
196
-
197
-
198
-
199
-
200
-
201
-
202
-
203
-
204
-
205
-
206
-
207
-
208
-
209
-
210
-
211
-
212
-
213
-
214
-
215
-
216
-
217
-
218
-
219
-
220
-
221
-
222
-
223
-
224
-
225
-
226
-
227
-
228
-
229
-
230
-
231
-
232
-
233
-
234
-
235
-
236
-
237
-
238
-
239
-
240
-
241
-
242
-
243
-
244
-
245
-
246
-
247
-
248
 |
 |
Hood Sensor
The hood sensor is attached in a slot in the rear of the chassis.
1.
Prepare the computer for disassembly (
Preparation for Disassembly
on page
90
).
2.
Remove the access panel (
Computer Access Panel
on page
99
).
3.
Unplug the sensor cable from the white system board connected labeled HSENSE.
4.
Slide the hood sensor straight out of the notch in the chassis.
NOTE:
A flat blade screwdriver can be used to push the hood sensor out of the slot.
Figure 7-55
Removing the hood sensor from the chassis
To install the hood sensor, reverse the removal procedure.
Hood Sensor
133