HP A440 User Guide - Page 14
Print from a docked camera, View photos to print, Print photos - printer dock
 |
UPC - 808736862721
View all HP A440 manuals
Add to My Manuals
Save this manual to your list of manuals |
Page 14 highlights
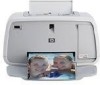
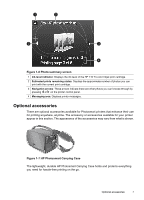
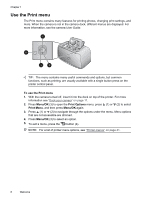
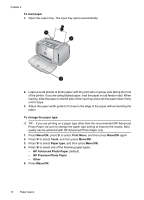
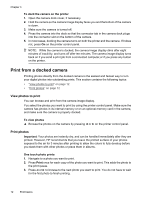
Chapter 3 To dock the camera on the printer 1. Open the camera dock cover, if necessary. 2. Hold the camera so the camera image display faces you and the bottom of the camera is down. 3. Make sure the camera is turned off. 4. Press the camera into the dock so that the connector tab in the camera dock plugs into the connector slot on the bottom of the camera. 5. In most cases, docking the camera turns on both the printer and the camera. If it does not, press On on the printer control panel. NOTE: While the camera is docked, the camera image display dims after eight minutes of inactivity, and turns off after ten minutes. The camera image display turns back on if you send a print job from a connected computer,or if you press any button on the printer. Print from a docked camera Printing photos directly from the docked camera is the easiest and fastest way to turn your digital photos into outstanding prints. This section contains the following topics: • "View photos to print" on page 12 • "Print photos" on page 12 View photos to print You can browse and print from the camera image display. You select the photos you want to print by using the printer control panel. Make sure the camera has photos in its internal memory or on an optional memory card in the camera, and make sure the camera is properly docked. To view photos ▲ Browse the photos on the camera by pressing or on the printer control panel. Print photos Important: Your photos are instantly dry, and can be handled immediately after they are printed. However, HP recommends that you leave the printed surface of your photos exposed to the air for 3 minutes after printing to allow the colors to fully develop before you stack them with other photos or place them in albums. One touch photo prints 1. Navigate to a photo you want to print. 2. Press Print once for each copy of the photo you want to print. This adds the photo to the print queue. 3. Press or to browse to the next photo you want to print. You do not have to wait for the first photo to finish printing. 12 Print basics
-
 1
1 -
2
-
3
-
4
-
5
-
6
-
7
-
8
-
 9
9 -
 10
10 -
 11
11 -
 12
12 -
 13
13 -
 14
14 -
 15
15 -
 16
16 -
 17
17 -
 18
18 -
 19
19 -
20
-
21
-
22
-
23
-
24
-
25
-
26
-
27
-
28
-
29
-
30
-
31
-
32
-
33
-
34
-
35
-
36
-
37
-
38
-
39
-
40
-
41
-
42
-
43
-
44
-
45
-
46
-
47
-
48
-
49
-
50
 |
 |