HP Brio 83xx HP BRIO 82XX and 83XX Series PCs - Hard Disk Drives - Page 31
Installing Video Memory on the System Board, START | Settings | Control Panel | Display | Settings
 |
View all HP Brio 83xx manuals
Add to My Manuals
Save this manual to your list of manuals |
Page 31 highlights
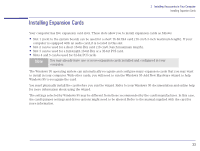
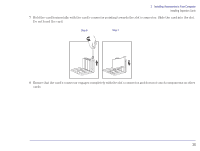
2 Installing Accessories in Your Computer Installing Video Memory Installing Video Memory on the System Board 1 Remove the computer's cover (refer to "Removing the Cover" on page 23). 2 Align the video memory module directly over the socket, making sure that the tapered end of the module is facing the rear of the computer. The small circle on the module should match up with a small arrow on the socket. System Board Arrow Circle 3 Firmly press the memory module completely into the socket. 4 Repeat steps 2 and 3 for the second memory module. 5 Install any other accessories before replacing the cover and reconnecting the power supply cords and any telecommunications cables. 6 Turn on the display, let it warm up, and then turn on the computer. 7 Once your computer is up and running, use the Display icon in the Windows 95 Control Panel (accessible from the Windows 95 START | Settings | Control Panel | Display | Settings) to change the video resolution and the number of colors displayed. 31
-
 1
1 -
2
-
3
-
4
-
5
-
6
-
7
-
8
-
9
-
10
-
11
-
12
-
13
-
14
-
15
-
16
-
17
-
18
-
19
-
20
-
21
-
22
-
23
-
24
-
25
-
 26
26 -
 27
27 -
 28
28 -
 29
29 -
 30
30 -
 31
31 -
 32
32 -
 33
33 -
 34
34 -
 35
35 -
 36
36 -
37
-
38
-
39
-
40
-
41
-
42
-
43
-
44
-
45
-
46
-
47
-
48
-
49
-
50
-
51
-
52
-
53
-
54
-
55
-
56
-
57
-
58
-
59
-
60
-
61
-
62
-
63
-
64
-
65
-
66
 |
 |
