HP Brio 83xx HP BRIO 82XX and 83XX Series PCs - Hard Disk Drives - Page 56
Installing a Processor Upgrade, Removing the Old, Processor, Installing the New
 |
View all HP Brio 83xx manuals
Add to My Manuals
Save this manual to your list of manuals |
Page 56 highlights
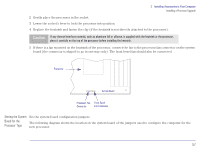
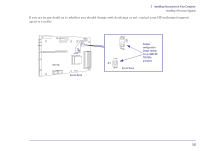
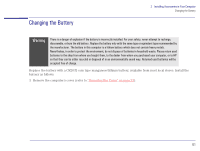
2 Installing Accessories in Your Computer Installing a Processor Upgrade Installing a Processor Upgrade You may be able to install a processor upgrade in your computer. Contact your HP-authorized support agent or reseller for more details about the availability of processor upgrades for your computer. Removing the Old Processor 1 Remove the computer's cover (refer to "Removing the Cover" on page 23). 2 If the heatsink is not directly attached to the processor, unclip the heatsink. (Be careful not to let the heatsink fall when you unclip it.) 3 Unlock the socket and lift out the old processor. (Be careful not to let the processor fall when you unlock and lift it out.) Heatsink Processor If any thermal interface material, such as aluminum foil or silicone, is supplied with the heatsink or the processor, place it carefully on the top of the processor before installing the heatsink. Note Certain higher speed processors may require a fan mounted on the heatsink. Contact your HP-authorized support agent or reseller for more information. Installing the New Processor 1 Position the processor over the socket, with the processor's corner marker facing the socket's corner marker. Locating the markers: • on the processor-a dot or notch ("broken" corner) • on the processor socket-no pin hole in the corner. 56
-
 1
1 -
2
-
3
-
4
-
5
-
6
-
7
-
8
-
9
-
10
-
11
-
12
-
13
-
14
-
15
-
16
-
17
-
18
-
19
-
20
-
21
-
22
-
23
-
24
-
25
-
26
-
27
-
28
-
29
-
30
-
31
-
32
-
33
-
34
-
35
-
36
-
37
-
38
-
39
-
40
-
41
-
42
-
43
-
44
-
45
-
46
-
47
-
48
-
49
-
50
-
 51
51 -
 52
52 -
 53
53 -
 54
54 -
 55
55 -
 56
56 -
 57
57 -
 58
58 -
 59
59 -
 60
60 -
 61
61 -
62
-
63
-
64
-
65
-
66
 |
 |
