HP Color LaserJet Enterprise MFP M680 User Guide 1 - Page 164
Visually inspect the toner cartridge, Check paper and the printing environment
 |
View all HP Color LaserJet Enterprise MFP M680 manuals
Add to My Manuals
Save this manual to your list of manuals |
Page 164 highlights
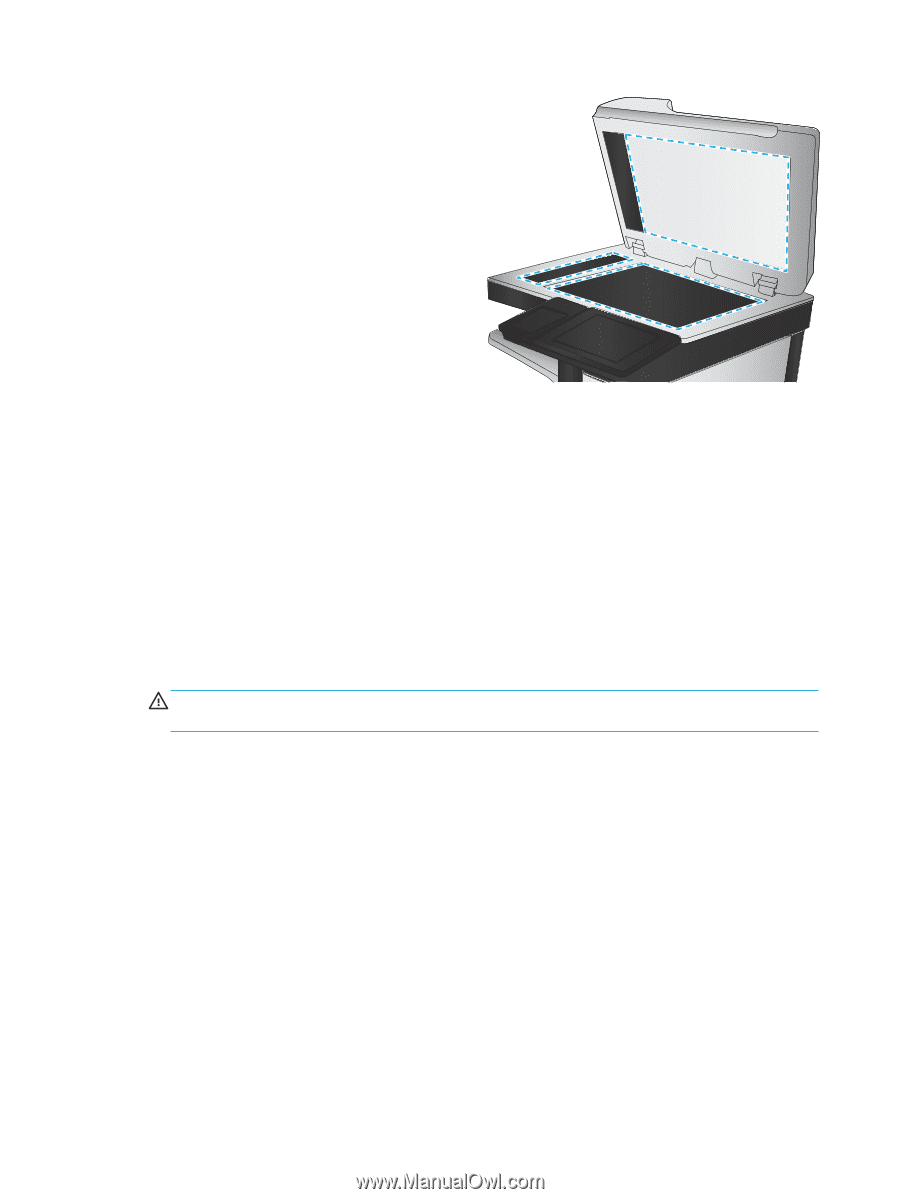
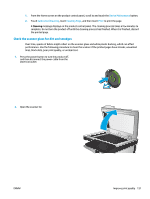
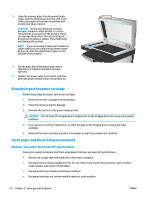
3. Clean the scanner glass, the document feeder strips, and the white plastic backing with a soft cloth or sponge that has been moistened with nonabrasive glass cleaner. CAUTION: Do not use abrasives, acetone, benzene, ammonia, ethyl alcohol, or carbon tetrachloride on any part of the product; these can damage the product. Do not place liquids directly on the glass or platen. They might seep and damage the product. NOTE: If you are having trouble with streaks on copies when you are using the document feeder, be sure to clean the small strip of glass on the left side of the scanner. 4. Dry the glass and white plastic parts with a chamois or a cellulose sponge to prevent spotting. 5. Connect the power cable to an outlet, and then press the power button to turn the product on. Visually inspect the toner cartridge Follow these steps to inspect each toner cartridge. 1. Remove the toner cartridge from the product. 2. Check the memory chip for damage. 3. Examine the surface of the green imaging drum. CAUTION: Do not touch the imaging drum. Fingerprints on the imaging drum can cause print-quality problems. 4. If you see any scratches, fingerprints, or other damage on the imaging drum, replace the toner cartridge. 5. Reinstall the toner cartridge, and print a few pages to see if the problem has resolved. Check paper and the printing environment Step one: Use paper that meets HP specifications Some print-quality problems arise from using paper that does not meet HP specifications. ● Always use a paper type and weight that this product supports. ● Use paper that is of good quality and free of cuts, nicks, tears, spots, loose particles, dust, wrinkles, voids, staples, and curled or bent edges. ● Use paper that has not been previously printed on. ● Use paper that does not contain metallic material, such as glitter. 152 Chapter 9 Solve general problems ENWW
-
 1
1 -
2
-
3
-
4
-
5
-
6
-
7
-
8
-
9
-
10
-
11
-
12
-
13
-
14
-
15
-
16
-
17
-
18
-
19
-
20
-
21
-
22
-
23
-
24
-
25
-
26
-
27
-
28
-
29
-
30
-
31
-
32
-
33
-
34
-
35
-
36
-
37
-
38
-
39
-
40
-
41
-
42
-
43
-
44
-
45
-
46
-
47
-
48
-
49
-
50
-
51
-
52
-
53
-
54
-
55
-
56
-
57
-
58
-
59
-
60
-
61
-
62
-
63
-
64
-
65
-
66
-
67
-
68
-
69
-
70
-
71
-
72
-
73
-
74
-
75
-
76
-
77
-
78
-
79
-
80
-
81
-
82
-
83
-
84
-
85
-
86
-
87
-
88
-
89
-
90
-
91
-
92
-
93
-
94
-
95
-
96
-
97
-
98
-
99
-
100
-
101
-
102
-
103
-
104
-
105
-
106
-
107
-
108
-
109
-
110
-
111
-
112
-
113
-
114
-
115
-
116
-
117
-
118
-
119
-
120
-
121
-
122
-
123
-
124
-
125
-
126
-
127
-
128
-
129
-
130
-
131
-
132
-
133
-
134
-
135
-
136
-
137
-
138
-
139
-
140
-
141
-
142
-
143
-
144
-
145
-
146
-
147
-
148
-
149
-
150
-
151
-
152
-
153
-
154
-
155
-
156
-
157
-
158
-
 159
159 -
 160
160 -
 161
161 -
 162
162 -
 163
163 -
 164
164 -
 165
165 -
 166
166 -
 167
167 -
 168
168 -
 169
169 -
170
-
171
-
172
-
173
-
174
-
175
-
176
-
177
-
178
-
179
-
180
-
181
-
182
-
183
-
184
-
185
-
186
-
187
-
188
-
189
-
190
-
191
-
192
-
193
-
194
-
195
-
196
 |
 |