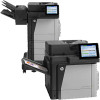
HP Color LaserJet Enterprise MFP M680 User Guide 1 - Page 38
Con the default staple location, Administration, Stapler/Stacker Settings, Stapling
 |
View all HP Color LaserJet Enterprise MFP M680 manuals
Add to My Manuals
Save this manual to your list of manuals |
Page 38 highlights
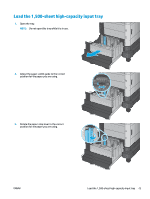
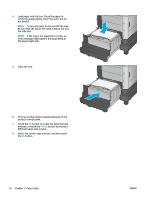
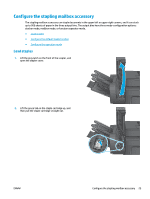
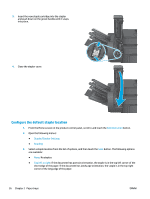
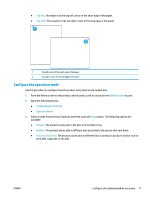
3. Insert the new staple cartridge into the stapler and push down on the green handle until it snaps into place. 4. Close the stapler cover. Configure the default staple location 1. From the Home screen on the product control panel, scroll to and touch the Administration button. 2. Open the following menus: ● Stapler/Stacker Settings ● Stapling 3. Select a staple location from the list of options, and then touch the Save button. The following options are available: ● None: No staples ● Top left or right: If the document has portrait orientation, the staple is in the top left corner of the short edge of the paper. If the document has landscape orientation, the staple is in the top right corner of the long edge of the paper. 26 Chapter 2 Paper trays ENWW
-
 1
1 -
2
-
3
-
4
-
5
-
6
-
7
-
8
-
9
-
10
-
11
-
12
-
13
-
14
-
15
-
16
-
17
-
18
-
19
-
20
-
21
-
22
-
23
-
24
-
25
-
26
-
27
-
28
-
29
-
30
-
31
-
32
-
 33
33 -
 34
34 -
 35
35 -
 36
36 -
 37
37 -
 38
38 -
 39
39 -
 40
40 -
 41
41 -
 42
42 -
 43
43 -
44
-
45
-
46
-
47
-
48
-
49
-
50
-
51
-
52
-
53
-
54
-
55
-
56
-
57
-
58
-
59
-
60
-
61
-
62
-
63
-
64
-
65
-
66
-
67
-
68
-
69
-
70
-
71
-
72
-
73
-
74
-
75
-
76
-
77
-
78
-
79
-
80
-
81
-
82
-
83
-
84
-
85
-
86
-
87
-
88
-
89
-
90
-
91
-
92
-
93
-
94
-
95
-
96
-
97
-
98
-
99
-
100
-
101
-
102
-
103
-
104
-
105
-
106
-
107
-
108
-
109
-
110
-
111
-
112
-
113
-
114
-
115
-
116
-
117
-
118
-
119
-
120
-
121
-
122
-
123
-
124
-
125
-
126
-
127
-
128
-
129
-
130
-
131
-
132
-
133
-
134
-
135
-
136
-
137
-
138
-
139
-
140
-
141
-
142
-
143
-
144
-
145
-
146
-
147
-
148
-
149
-
150
-
151
-
152
-
153
-
154
-
155
-
156
-
157
-
158
-
159
-
160
-
161
-
162
-
163
-
164
-
165
-
166
-
167
-
168
-
169
-
170
-
171
-
172
-
173
-
174
-
175
-
176
-
177
-
178
-
179
-
180
-
181
-
182
-
183
-
184
-
185
-
186
-
187
-
188
-
189
-
190
-
191
-
192
-
193
-
194
-
195
-
196
 |
 |
