HP Designjet 4200 HP Designjet 4200 Scanner - User Guide - Page 19
If a new Account has been created, every time you press, the Copy button
 |
View all HP Designjet 4200 manuals
Add to My Manuals
Save this manual to your list of manuals |
Page 19 highlights
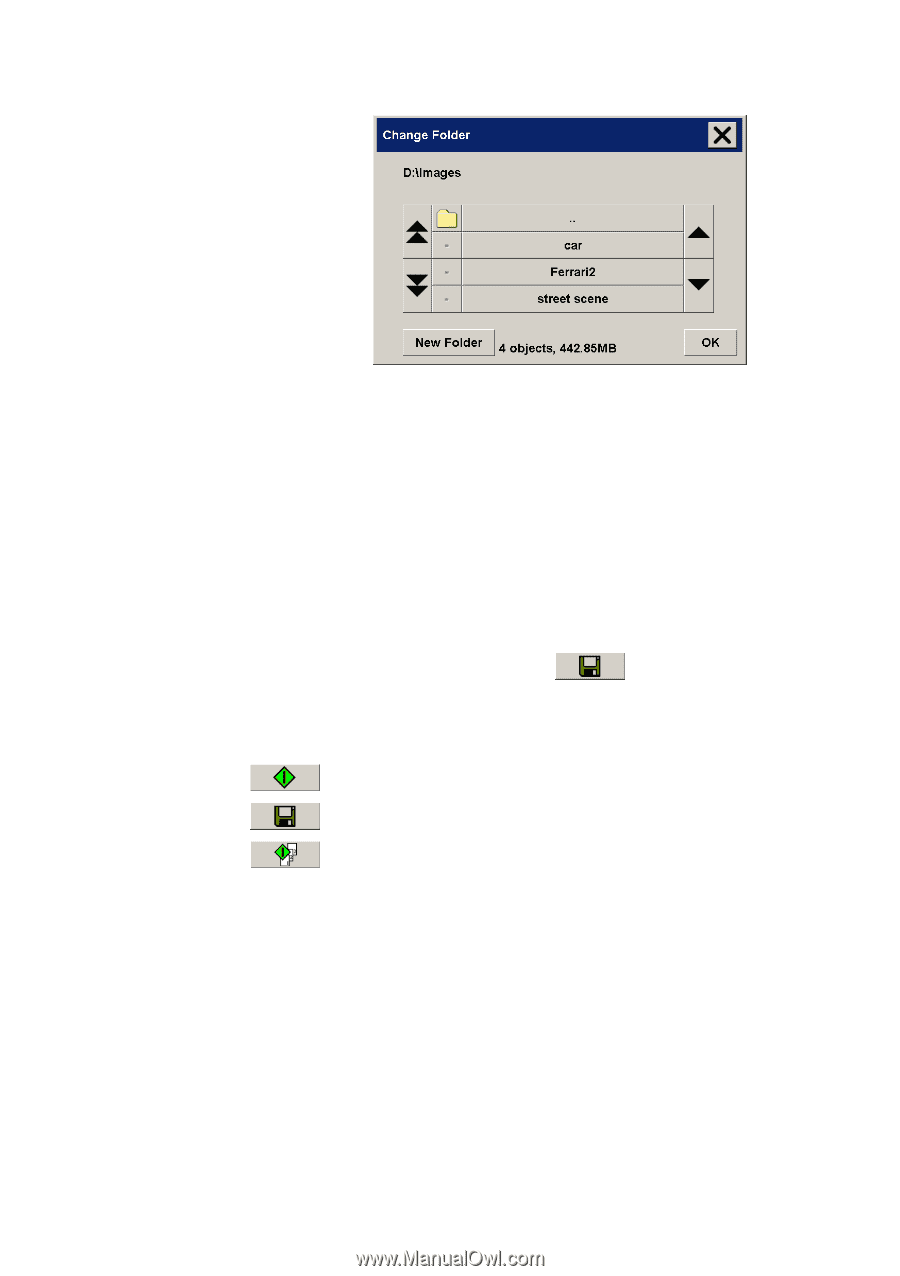
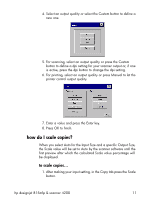
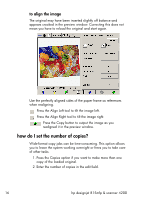
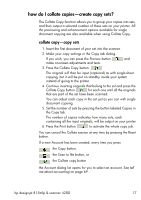
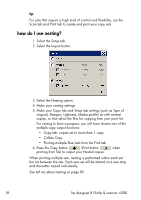
• to another Folder group, press the File Folder button. In the Change Folder dialog you can: • use the arrows to select the folder on your disk. • use the folder up button (marked "..") to move up a level. • create a new folder in the current folder with the New Folder button. • press a folder name to move your search to that folder's level. Click OK in the Change Folder dialog when you have selected the destination folder for your file. 3. Press the Scan to file button process and save the image. to start the scan-to-file If a new Account has been created, every time you press: the Copy button, the Scan to file button, or the Collate copy button the Account dialog list opens for you to select an account. See tell me about accounting on page 69. Each file will be saved with the Scan tab settings that applied when you pressed the Scan to File button. hp designjet 815mfp & scanner 4200 13
-
 1
1 -
2
-
3
-
4
-
5
-
6
-
7
-
8
-
9
-
10
-
11
-
12
-
13
-
 14
14 -
 15
15 -
 16
16 -
 17
17 -
 18
18 -
 19
19 -
 20
20 -
 21
21 -
 22
22 -
 23
23 -
 24
24 -
25
-
26
-
27
-
28
-
29
-
30
-
31
-
32
-
33
-
34
-
35
-
36
-
37
-
38
-
39
-
40
-
41
-
42
-
43
-
44
-
45
-
46
-
47
-
48
-
49
-
50
-
51
-
52
-
53
-
54
-
55
-
56
-
57
-
58
-
59
-
60
-
61
-
62
-
63
-
64
-
65
-
66
-
67
-
68
-
69
-
70
-
71
-
72
-
73
-
74
-
75
-
76
-
77
-
78
-
79
-
80
-
81
-
82
-
83
-
84
-
85
-
86
-
87
-
88
-
89
-
90
-
91
-
92
-
93
-
94
-
95
-
96
-
97
-
98
-
99
-
100
-
101
-
102
-
103
-
104
-
105
-
106
-
107
-
108
-
109
-
110
 |
 |