HP Designjet 4200 HP Designjet 4200 Scanner - User Guide - Page 63
tell me about scanner maintenance, about
 |
View all HP Designjet 4200 manuals
Add to My Manuals
Save this manual to your list of manuals |
Page 63 highlights
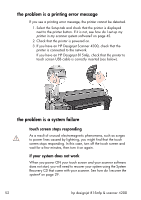
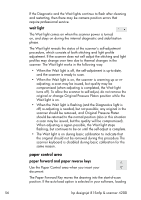
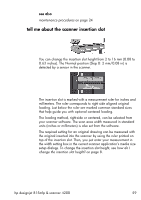
will take place automatically as soon as the original enters the insertion slot. A delay factor can be set for automatic paper loading giving you time to position the original correctly. Pressing the Paper Forward Key during scanning will stop the scanning process and the original will be fed through the scanner while the key is held down. The Reverse key stops the current scanning process and reverses the original. The original will be fed backwards through the scanner while the key is held down. paper ready light The Paper Ready light comes on as soon as the drawing is inserted into the original's insertion slot and correctly positioned. Then the original can be moved into the start-of-scan position either by pressing the Paper Forward Key or through automatic loading. The Paper Ready light is green for normal thin media and yellow for thick media. The Paper Ready light stays ON, signifying that the scanner is ready to be controlled from the computer. During scanning the Ready light will blink. At end of scanning the Ready light will stop blinking, signifying that scanning can be repeated from the computer, or else terminated by ejecting the drawing from the scanner. tell me about scanner maintenance Keep out dust and reduce maintenance time. Cover your scanner with the plastic dust cover when not in use. Caution: Make sure the scanner power is OFF when using the scanner dust cover. about Scanner calibration should become a habit for those who value high quality and precision in their results. Much too often, incorrect output on expensive media would have been avoided if the scanner had recently been calibrated. hp designjet 815mfp & scanner 4200 57
-
 1
1 -
2
-
3
-
4
-
5
-
6
-
7
-
8
-
9
-
10
-
11
-
12
-
13
-
14
-
15
-
16
-
17
-
18
-
19
-
20
-
21
-
22
-
23
-
24
-
25
-
26
-
27
-
28
-
29
-
30
-
31
-
32
-
33
-
34
-
35
-
36
-
37
-
38
-
39
-
40
-
41
-
42
-
43
-
44
-
45
-
46
-
47
-
48
-
49
-
50
-
51
-
52
-
53
-
54
-
55
-
56
-
57
-
 58
58 -
 59
59 -
 60
60 -
 61
61 -
 62
62 -
 63
63 -
 64
64 -
 65
65 -
 66
66 -
 67
67 -
 68
68 -
69
-
70
-
71
-
72
-
73
-
74
-
75
-
76
-
77
-
78
-
79
-
80
-
81
-
82
-
83
-
84
-
85
-
86
-
87
-
88
-
89
-
90
-
91
-
92
-
93
-
94
-
95
-
96
-
97
-
98
-
99
-
100
-
101
-
102
-
103
-
104
-
105
-
106
-
107
-
108
-
109
-
110
 |
 |