HP Deskjet 1280 HP Deskjet 1280 - User Guide - Page 10
For Macintosh, Hardware-first installation, Mac OS X - drivers
 |
View all HP Deskjet 1280 manuals
Add to My Manuals
Save this manual to your list of manuals |
Page 10 highlights
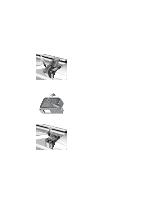
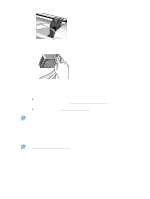
Hardware-first installation If you have connected a USB cable to the ports on the computer and the printer before installing the printer software, the Found New Hardware wizard appears on the computer screen. If you have connected a parallel cable and restarted the system, the Found New Hardware wizard appears on the computer screen. 1 Click Next in the Found New Hardware wizard. 2 Click Search for the best driver for your device (recommended), and then click Next. 3 Insert the Starter CD into the CD-ROM drive. If the CD menu appears, click Exit twice to close the CD menu. 4 Select Specify a location. 5 Click Browse to locate the root directory on the Starter CD, and then click OK. 6 Click Next and follow the onscreen instructions. 7 Click Next, and then click Finish. Upon completion of the hardware-first installation process, the Found New Hardware wizard will automatically launch the setup program. This gives you the option to install non-driver components such as the Toolbox. For Macintosh You can connect your printer to Macintosh computers through the USB port. Mac OS X 1 Insert the Starter CD into your CD-ROM drive and double-click the CD icon on the Mac desktop. 2 Double-click the installer icon. 3 Follow the onscreen instructions to complete the installation. 4 Connect the USB cable to the printer and computer. 5 Open the Print Center. 6 Click the Add Printer button. 7 Select USB from the menu. 8 Select the printer from the printer list. 9 Click the Add button. Follow these steps to set the printer as the computer's default printer: 1 Open the Print Center. 2 Click the printer. 3 Do one of the following: • From the Printers menu, select Make Default. • Press Command + D. The printer name becomes bold, or a blue bullet appears next to the printer name to indicate that it is the default printer. 2-3 ENWW
-
 1
1 -
2
-
3
-
4
-
 5
5 -
 6
6 -
 7
7 -
 8
8 -
 9
9 -
 10
10 -
 11
11 -
 12
12 -
 13
13 -
 14
14 -
 15
15 -
16
-
17
-
18
-
19
-
20
-
21
-
22
-
23
-
24
-
25
-
26
-
27
-
28
-
29
-
30
-
31
-
32
-
33
-
34
-
35
-
36
-
37
-
38
-
39
-
40
-
41
-
42
-
43
-
44
-
45
-
46
-
47
-
48
-
49
-
50
-
51
-
52
-
53
-
54
-
55
-
56
-
57
-
58
-
59
-
60
-
61
-
62
-
63
-
64
 |
 |