HP Disk System 2300 HP StorageWorks Disk System 2300 User's Guide(This manual - Page 128
Top Cover (HP-Qualified Only), Tools, Procedure, Torx T25 screwdriver
 |
View all HP Disk System 2300 manuals
Add to My Manuals
Save this manual to your list of manuals |
Page 128 highlights
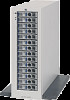
Top Cover (HP-Qualified Only) The following procedure is for HP-qualified personnel only. Remove and replace the top cover (not a replaceable part) in order to replace the power switch assembly, light pipes, or the midplane. You will need to turn the power off to perform this procedure. Tools ■ Small flat-blade screwdriver ■ Torx T25 screwdriver ■ Torx T10 screwdriver Procedure Caution Disk slots must be empty before removing the top cover. 1 Remove disk modules and fillers and place them on an appropriate anti-static surface. See page 110. 2 Disconnect all power and SCSI cables. 3 Remove the power supply/fan modules. See page 123. 4 Remove the disk system retention screws. See page 126. 5 Remove the disk system from the rack and place it on an appropriate antistatic surface. See page 125. Caution Removing the top cover with the power switch in the ON (in) position can damage the internal switch. 6 Remove the three flathead screws from the top of the top cover (A in Figure 59). 7 Rotate the cover upward; then lift it away from the disk system. 128 Removal and Replacement
-
 1
1 -
2
-
3
-
4
-
5
-
6
-
7
-
8
-
9
-
10
-
11
-
12
-
13
-
14
-
15
-
16
-
17
-
18
-
19
-
20
-
21
-
22
-
23
-
24
-
25
-
26
-
27
-
28
-
29
-
30
-
31
-
32
-
33
-
34
-
35
-
36
-
37
-
38
-
39
-
40
-
41
-
42
-
43
-
44
-
45
-
46
-
47
-
48
-
49
-
50
-
51
-
52
-
53
-
54
-
55
-
56
-
57
-
58
-
59
-
60
-
61
-
62
-
63
-
64
-
65
-
66
-
67
-
68
-
69
-
70
-
71
-
72
-
73
-
74
-
75
-
76
-
77
-
78
-
79
-
80
-
81
-
82
-
83
-
84
-
85
-
86
-
87
-
88
-
89
-
90
-
91
-
92
-
93
-
94
-
95
-
96
-
97
-
98
-
99
-
100
-
101
-
102
-
103
-
104
-
105
-
106
-
107
-
108
-
109
-
110
-
111
-
112
-
113
-
114
-
115
-
116
-
117
-
118
-
119
-
120
-
121
-
122
-
 123
123 -
 124
124 -
 125
125 -
 126
126 -
 127
127 -
 128
128 -
 129
129 -
 130
130 -
 131
131 -
 132
132 -
 133
133 -
134
-
135
-
136
-
137
-
138
-
139
-
140
-
141
-
142
-
143
-
144
-
145
-
146
-
147
-
148
-
149
-
150
-
151
-
152
-
153
-
154
-
155
-
156
-
157
-
158
 |
 |
