HP LaserJet Pro MFP M28-M31 User Guide - Page 12
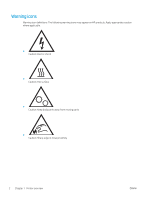
Control panel view, Wireless models - wireless setup
 |
View all HP LaserJet Pro MFP M28-M31 manuals
Add to My Manuals
Save this manual to your list of manuals |
Page 12 highlights
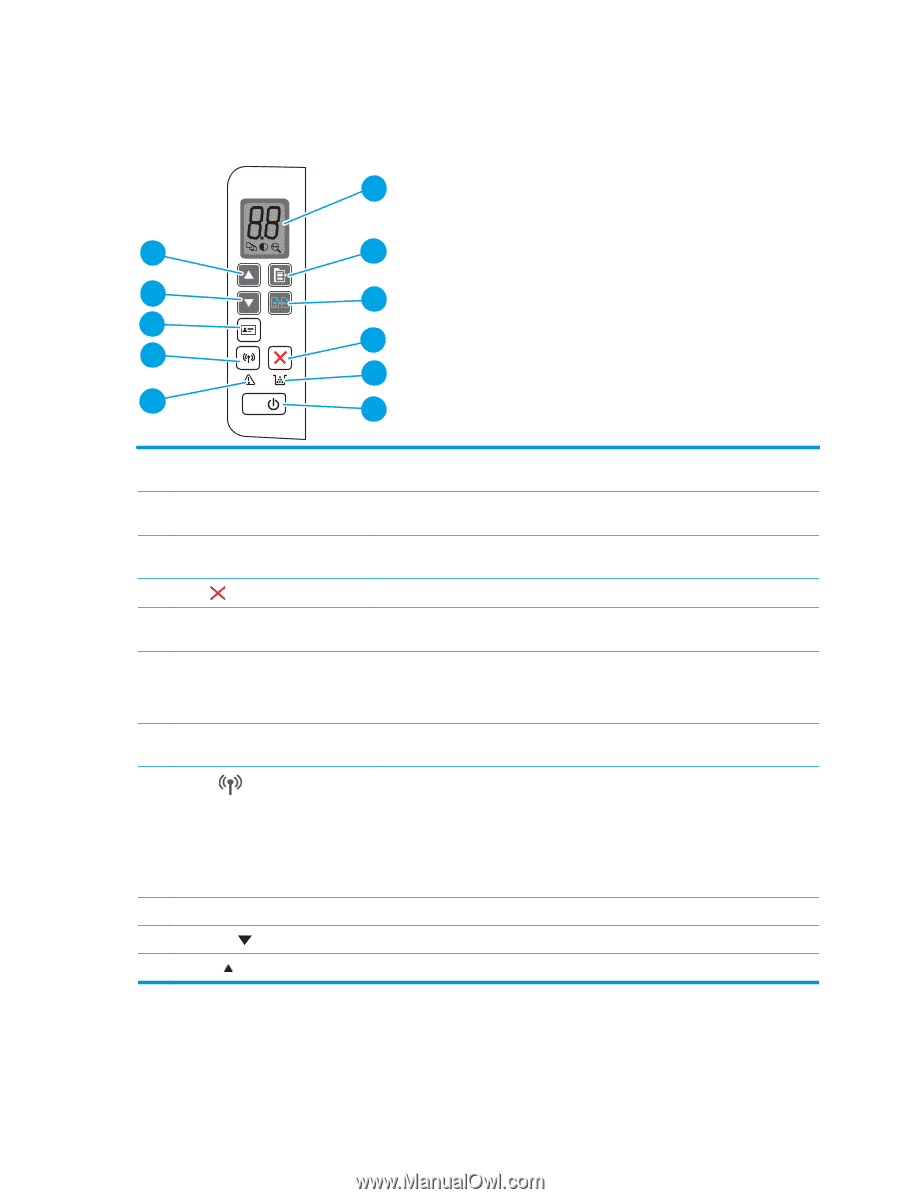
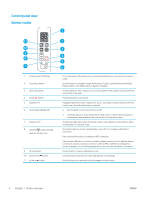
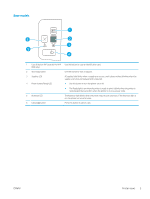
Control panel view Wireless models 1 11 10 9 8 7 1 Control panel LED display 2 Copy Setup button 3 Start Copy button 4 Cancel button 5 Supplies LED 6 Power button/Ready LED 7 Attention LED 8 Wireless button and LED (wireless models only) 9 ID Copy button 10 Down Arrow button 11 Up Arrow button 2 3 4 5 6 The control panel LED display shows numerical information for copy settings and event codes. Use this button to navigate through the Number of Copies, Lighter/Darker, and Reduce/ Enlarge options. The default option is Number of Copies. Use this button to start a copy job. Or, in manual duplex mode, use this button to print the second side of the page. Press this button to cancel a job. A Supplies light blinks when a supply error occurs, and it glows without blinking when the supply is very low and replacement is required. ● Use this button to turn the printer on or off. ● The Ready light is on when the printer is ready to print. It blinks when the printer is receiving print data and dims when the printer is in a low-power state. The Attention light blinks when the printer requires user attention. If the Attention light is on, the printer is in an error state. Press this button to turn the wireless feature on or off, or to configure a WiFi Direct connection. Press and hold this button to configure a WPS connection. If the wireless LED light is on, there is a stable wireless connection. If it is blinking, there is currently no wireless connection, or there is either a WPS or WiFi Direct configuration process in progress. If it is blinking rapidly, there is an issue with the wireless connection. Use this button to copy an identification card. Use this button to decrease the value that appears on the display. Use this button to increase the value that appears on the display. 4 Chapter 1 Printer overview ENWW
-
 1
1 -
2
-
3
-
4
-
5
-
6
-
 7
7 -
 8
8 -
 9
9 -
 10
10 -
 11
11 -
 12
12 -
 13
13 -
 14
14 -
 15
15 -
 16
16 -
 17
17 -
18
-
19
-
20
-
21
-
22
-
23
-
24
-
25
-
26
-
27
-
28
-
29
-
30
-
31
-
32
-
33
-
34
-
35
-
36
-
37
-
38
-
39
-
40
-
41
-
42
-
43
-
44
-
45
-
46
-
47
-
48
-
49
-
50
-
51
-
52
-
53
-
54
-
55
-
56
-
57
-
58
-
59
-
60
-
61
-
62
-
63
-
64
-
65
-
66
-
67
-
68
-
69
-
70
-
71
-
72
-
73
-
74
-
75
-
76
-
77
-
78
-
79
-
80
-
81
-
82
-
83
-
84
-
85
-
86
-
87
-
88
-
89
-
90
-
91
-
92
-
93
-
94
-
95
-
96
-
97
-
98
-
99
-
100
-
101
-
102
-
103
-
104
 |
 |