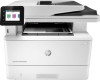
HP LaserJet Pro MFP M329 User Guide - Page 84
Method two: Set up the Scan to Email feature via the HP Embedded Web Server
 |
View all HP LaserJet Pro MFP M329 manuals
Add to My Manuals
Save this manual to your list of manuals |
Page 84 highlights
Method two: Set up the Scan to Email feature via the HP Embedded Web Server Use the HP Embedded Web Server (EWS) to set up the Scan to Email feature. This method is available for all supported operating systems. ● Step one: Access the HP Embedded Web Server (EWS) ● Step two: Configure the Scan to Email feature Step one: Access the HP Embedded Web Server (EWS) Locate the printer's IP address and then enter it into a Web browser to access the EWS. Your printer must be connected to an IP-based network before you can access the EWS. 1. From the Home screen on the printer control panel, touch the Wireless icon or the Ethernet icon to view the printer's IP address or host name. 2. Open a web browser, and in the address line, type the IP address or host name exactly as it displays on the printer control panel. Press the Enter key on the computer keyboard. The EWS opens. NOTE: If a message displays in the web browser indicating that the website might not be safe, select the option to continue to the website. Accessing this website will not harm the computer. Step two: Configure the Scan to Email feature Use the Embedded Web Server (EWS) to set up the Scan to Email feature. Define the email settings and the default scan and file options, and add contacts to the Address Book. 1. On the Home tab in the EWS, click Scan to Email. 2. On the Outgoing Email Settings page that appears, do the following: ● If your organization uses one email server for all its emails: Set up your email addresses and the SMTP server information. Click Apply. ● If your organization uses multiple email servers for its emails: Set up the email addresses, names, and security PINs for each email profile. Click Apply. After completing the email settings, the EWS displays the Scan tab. 3. On the Scan tab, click Scan to Email, and then click Default Settings. Select your default scan and file settings, and then click Apply. 4. Set up your contact list or lists. On the Scan tab, click Address Book. ● A local address book can be set up on the device. Click Contacts to configure a local address book. ● A Network Directory Server (LDAP) can be set up to search for users within a company. Click Address Book Settings to configure LDAP. 5. After setting up your contacts, click Apply. 72 Chapter 6 Scan ENWW
-
 1
1 -
2
-
3
-
4
-
5
-
6
-
7
-
8
-
9
-
10
-
11
-
12
-
13
-
14
-
15
-
16
-
17
-
18
-
19
-
20
-
21
-
22
-
23
-
24
-
25
-
26
-
27
-
28
-
29
-
30
-
31
-
32
-
33
-
34
-
35
-
36
-
37
-
38
-
39
-
40
-
41
-
42
-
43
-
44
-
45
-
46
-
47
-
48
-
49
-
50
-
51
-
52
-
53
-
54
-
55
-
56
-
57
-
58
-
59
-
60
-
61
-
62
-
63
-
64
-
65
-
66
-
67
-
68
-
69
-
70
-
71
-
72
-
73
-
74
-
75
-
76
-
77
-
78
-
 79
79 -
 80
80 -
 81
81 -
 82
82 -
 83
83 -
 84
84 -
 85
85 -
 86
86 -
 87
87 -
 88
88 -
 89
89 -
90
-
91
-
92
-
93
-
94
-
95
-
96
-
97
-
98
-
99
-
100
-
101
-
102
-
103
-
104
-
105
-
106
-
107
-
108
-
109
-
110
-
111
-
112
-
113
-
114
-
115
-
116
-
117
-
118
-
119
-
120
-
121
-
122
-
123
-
124
-
125
-
126
-
127
-
128
-
129
-
130
-
131
-
132
-
133
-
134
-
135
-
136
-
137
-
138
-
139
-
140
-
141
-
142
-
143
-
144
-
145
-
146
-
147
-
148
-
149
-
150
-
151
-
152
-
153
-
154
-
155
-
156
-
157
-
158
-
159
-
160
-
161
-
162
-
163
-
164
-
165
-
166
-
167
-
168
-
169
-
170
-
171
-
172
-
173
-
174
-
175
-
176
-
177
-
178
-
179
-
180
-
181
-
182
-
183
-
184
-
185
-
186
-
187
-
188
-
189
-
190
-
191
-
192
-
193
-
194
 |
 |
