HP LaserJet Pro MFP M329 User Guide - Page 91
Scan to email, Scan to a network folder
 |
View all HP LaserJet Pro MFP M329 manuals
Add to My Manuals
Save this manual to your list of manuals |
Page 91 highlights
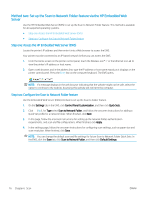
● To preview the scan, touch the Preview icon or Touch to Preview (the scan preview option varies depending on the printer model). ● For additional scan options, touch the Settings icon . 7. Touch Save . Scan to email Use the printer control panel to scan a file directly to an email address or contact list. The scanned file is sent to the address as an email message attachment. In order to use this feature, the printer must be connected to a network and the Scan to Email feature must be configured by using the Scan to Email Setup Wizard (Windows) or the HP Embedded Web Server. 1. Load the document on the scanner glass or into the document feeder according to the indicators on the printer. 2. From the Home screen on the printer control panel, touch the Scan icon, and then touch E-mail. 3. If prompted, enter your login information in the Sign In screen. This will set the From (or sender) address to the email address associated with your login. 4. Enter the email recipient or recipients: ● Touch Enter email address to enter an email address using the keypad. Touch Done. ● Touch the Address Book icon to select an individual or group contact in an address book. 1. Select the Address Book you want to use from the list, and enter the password if required. 2. Select the individual or group contacts you want to send to. 3. Touch Continue. 5. Touch Subject to add a subject line. 6. If you want to preview the scan or change the scan options, do the following: ● To preview the scan, touch the Preview icon or Touch to Preview (the scan preview option varies depending on the printer model). ● For additional scan options, touch the Settings icon . 7. Touch Send or Start Scan . Scan to a network folder Use the printer control panel to scan a document and save it to a folder on the network. In order to use this feature, the printer must be connected to a network and the Scan to Network Folder feature must be configured by using the Scan to Network Folder Setup Wizard (Windows) or the HP Embedded Web Server. ENWW Scan to email 79
-
 1
1 -
2
-
3
-
4
-
5
-
6
-
7
-
8
-
9
-
10
-
11
-
12
-
13
-
14
-
15
-
16
-
17
-
18
-
19
-
20
-
21
-
22
-
23
-
24
-
25
-
26
-
27
-
28
-
29
-
30
-
31
-
32
-
33
-
34
-
35
-
36
-
37
-
38
-
39
-
40
-
41
-
42
-
43
-
44
-
45
-
46
-
47
-
48
-
49
-
50
-
51
-
52
-
53
-
54
-
55
-
56
-
57
-
58
-
59
-
60
-
61
-
62
-
63
-
64
-
65
-
66
-
67
-
68
-
69
-
70
-
71
-
72
-
73
-
74
-
75
-
76
-
77
-
78
-
79
-
80
-
81
-
82
-
83
-
84
-
85
-
 86
86 -
 87
87 -
 88
88 -
 89
89 -
 90
90 -
 91
91 -
 92
92 -
 93
93 -
 94
94 -
 95
95 -
 96
96 -
97
-
98
-
99
-
100
-
101
-
102
-
103
-
104
-
105
-
106
-
107
-
108
-
109
-
110
-
111
-
112
-
113
-
114
-
115
-
116
-
117
-
118
-
119
-
120
-
121
-
122
-
123
-
124
-
125
-
126
-
127
-
128
-
129
-
130
-
131
-
132
-
133
-
134
-
135
-
136
-
137
-
138
-
139
-
140
-
141
-
142
-
143
-
144
-
145
-
146
-
147
-
148
-
149
-
150
-
151
-
152
-
153
-
154
-
155
-
156
-
157
-
158
-
159
-
160
-
161
-
162
-
163
-
164
-
165
-
166
-
167
-
168
-
169
-
170
-
171
-
172
-
173
-
174
-
175
-
176
-
177
-
178
-
179
-
180
-
181
-
182
-
183
-
184
-
185
-
186
-
187
-
188
-
189
-
190
-
191
-
192
-
193
-
194
 |
 |
