HP LaserJet Pro P1606 HP LaserJet Professional P1560 and P1600 Series Printer - Page 151
Clear jams, Common causes of jams, Jam locations, CAUTION
 |
View all HP LaserJet Pro P1606 manuals
Add to My Manuals
Save this manual to your list of manuals |
Page 151 highlights
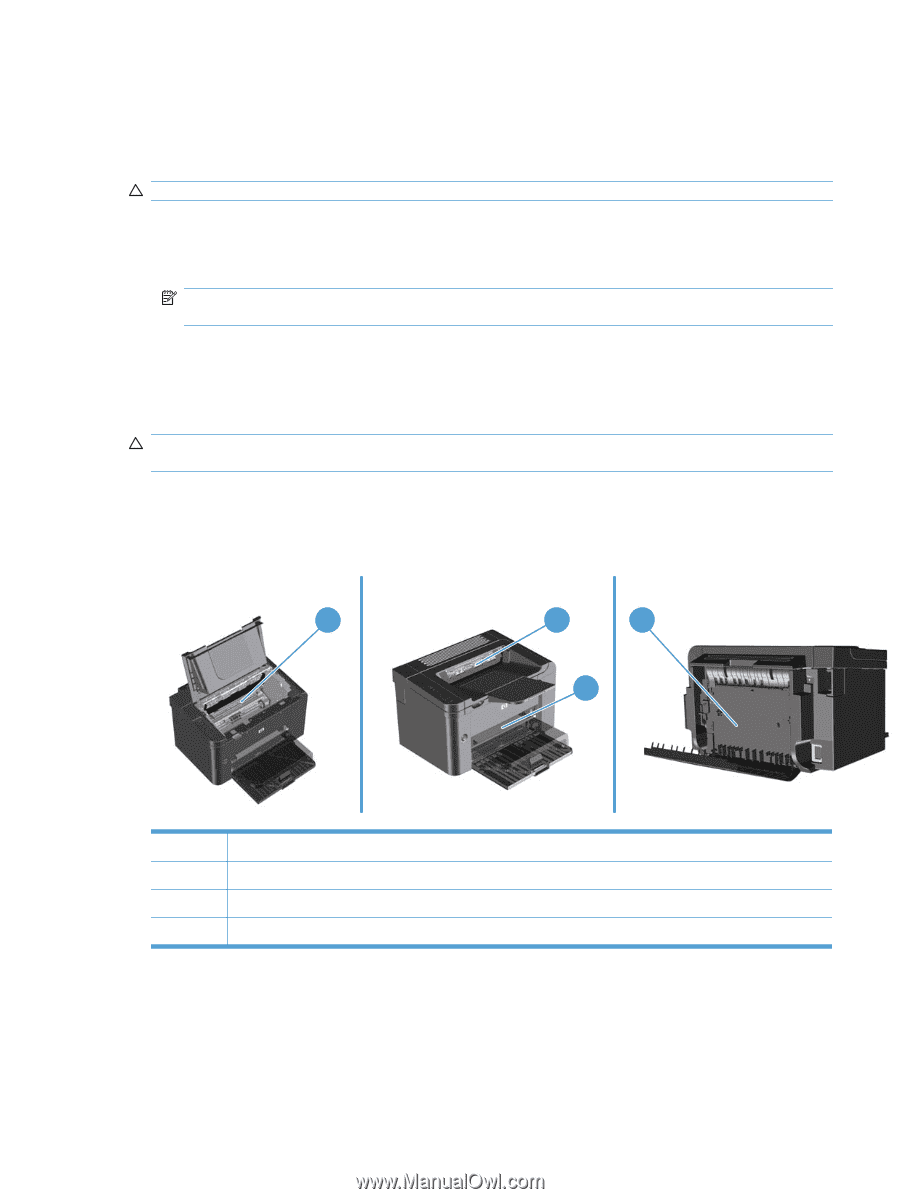
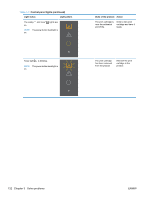
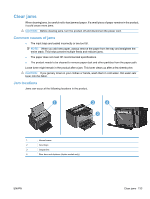
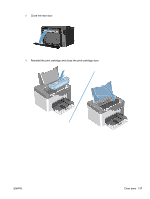
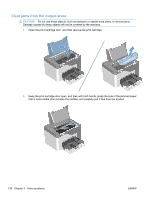
Clear jams When clearing jams, be careful not to tear jammed paper. If a small piece of paper remains in the product, it could cause more jams. CAUTION: Before clearing jams, turn the product off and disconnect the power cord. Common causes of jams ● The input trays are loaded incorrectly or are too full. NOTE: When you add new paper, always remove the paper from the tray and straighten the entire stack. This helps prevent multiple feeds and reduces jams. ● The paper does not meet HP-recommended specifications. ● The product needs to be cleaned to remove paper dust and other particles from the paper path. Loose toner might remain in the product after a jam. This toner clears up after a few sheets print. CAUTION: If you get any toner on your clothes or hands, wash them in cold water. Hot water sets toner into the fabric. Jam locations Jams can occur at the following locations in the product. 1 3 4 2 1 Internal areas 2 Input trays 3 Output bins 4 Rear door and duplexer (duplex models only) ENWW Clear jams 133
-
 1
1 -
2
-
3
-
4
-
5
-
6
-
7
-
8
-
9
-
10
-
11
-
12
-
13
-
14
-
15
-
16
-
17
-
18
-
19
-
20
-
21
-
22
-
23
-
24
-
25
-
26
-
27
-
28
-
29
-
30
-
31
-
32
-
33
-
34
-
35
-
36
-
37
-
38
-
39
-
40
-
41
-
42
-
43
-
44
-
45
-
46
-
47
-
48
-
49
-
50
-
51
-
52
-
53
-
54
-
55
-
56
-
57
-
58
-
59
-
60
-
61
-
62
-
63
-
64
-
65
-
66
-
67
-
68
-
69
-
70
-
71
-
72
-
73
-
74
-
75
-
76
-
77
-
78
-
79
-
80
-
81
-
82
-
83
-
84
-
85
-
86
-
87
-
88
-
89
-
90
-
91
-
92
-
93
-
94
-
95
-
96
-
97
-
98
-
99
-
100
-
101
-
102
-
103
-
104
-
105
-
106
-
107
-
108
-
109
-
110
-
111
-
112
-
113
-
114
-
115
-
116
-
117
-
118
-
119
-
120
-
121
-
122
-
123
-
124
-
125
-
126
-
127
-
128
-
129
-
130
-
131
-
132
-
133
-
134
-
135
-
136
-
137
-
138
-
139
-
140
-
141
-
142
-
143
-
144
-
145
-
 146
146 -
 147
147 -
 148
148 -
 149
149 -
 150
150 -
 151
151 -
 152
152 -
 153
153 -
 154
154 -
 155
155 -
 156
156 -
157
-
158
-
159
-
160
-
161
-
162
-
163
-
164
-
165
-
166
-
167
-
168
-
169
-
170
-
171
-
172
-
173
-
174
-
175
-
176
-
177
-
178
-
179
-
180
-
181
-
182
-
183
-
184
-
185
-
186
-
187
-
188
-
189
-
190
-
191
-
192
-
193
-
194
-
195
-
196
-
197
-
198
-
199
-
200
-
201
-
202
-
203
-
204
-
205
-
206
-
207
-
208
-
209
-
210
-
211
-
212
-
213
-
214
-
215
-
216
-
217
-
218
-
219
-
220
-
221
-
222
-
223
-
224
-
225
-
226
 |
 |