HP P6300 HP P6300/P6500 EVA Installation Guide (5697-2485, September 2013) - Page 24
Pull the locking latch to release the scissor locking latch and squeeze the scissor latch 1
 |
View all HP P6300 manuals
Add to My Manuals
Save this manual to your list of manuals |
Page 24 highlights
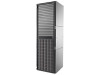
Consider the following when installing the rails: • Installing the rails does not require any tools for assembly. • HP recommends that you install all the rail kits before installing any other components. • Ensure that the rails are level before installing any other components. WARNING! Before you begin, ensure that the rack is sufficiently stable. If provided, lower the rack leveler feet and make sure any required stabilizers are installed. If provided, extend the anti-tip device. Failure to extend the anti-tip device could cause personal injury or damage if the rack tips over. To install the controller enclosure rails: NOTE: Although the disk enclosure rails do not have scissor latches, you can use these steps as a guideline to install the disk enclosure rails. 1. Insert the rear end of the rail into the inside back of the rack until the pin in the bottom hole (2, Figure 10 (page 24)) extends through the hole in the rack mounting rail. 2. Install a washer onto one screw and insert the screw into the top hole of the rail to secure the rear rack mounting rail (3, Figure 10 (page 24)). 3. Pull the locking latch to release the scissor locking latch and squeeze the scissor latch (1, Figure 10 (page 24)) together to insert the rail and pins through the rack mounting rail until the latch engages. Figure 10 Attaching the rear rail 4. Extend the front end of the rail toward the inside front of the rack. 5. Pull the locking latch to release the scissors latch (1, Figure 11 (page 25)) and squeeze the scissors latch together to insert the rail and pins through the rack mounting rail until the latch engages. 24 Installing components
-
 1
1 -
2
-
3
-
4
-
5
-
6
-
7
-
8
-
9
-
10
-
11
-
12
-
13
-
14
-
15
-
16
-
17
-
18
-
 19
19 -
 20
20 -
 21
21 -
 22
22 -
 23
23 -
 24
24 -
 25
25 -
 26
26 -
 27
27 -
 28
28 -
 29
29 -
30
-
31
-
32
-
33
-
34
-
35
-
36
-
37
-
38
-
39
-
40
-
41
-
42
-
43
-
44
-
45
-
46
-
47
-
48
-
49
-
50
-
51
-
52
-
53
-
54
-
55
-
56
-
57
-
58
-
59
-
60
-
61
-
62
-
63
-
64
-
65
-
66
-
67
-
68
-
69
-
70
-
71
-
72
-
73
-
74
-
75
-
76
-
77
-
78
-
79
-
80
-
81
-
82
 |
 |
