HP P6300 HP P6300/P6500 EVA Installation Guide (5697-2485, September 2013) - Page 25
Install the enclosures, that all locking latches are engaged in the scissor latches.
 |
View all HP P6300 manuals
Add to My Manuals
Save this manual to your list of manuals |
Page 25 highlights
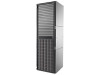
Figure 11 Attaching the front rail CAUTION: Ensure that the scissor locking latch engages the scissor latch when you push the end of the rail into the rack mounting rail. 6. Loosen the locking screw (1, Figure 12 (page 25)) on the shipping retaining bracket (2) and slide the bracket to the farthest position on the rear of the rail. This moves the bracket out of the way to allow you to install the chassis in the rails. NOTE: Figure 12 (page 25) shows a disk enclosure rail and bracket. If you are installing a longer chassis into your cabinet, such as a chassis for a controller enclosure, see "Attach the brackets for a longer chassis" (page 22) for additional information. Figure 12 Locking screw and retaining bracket 7. After installing the rail, gently grip and move it to be sure it is firmly engaged in the rack and that all locking latches are engaged in the scissor latches. 8. Repeat Step 3 through Step 7 for the other rail. Install the enclosures NOTE: The disk enclosures can either be large form factor (LFF), supporting 12 disk drives, or small form factor (SFF), supporting 25 disk drives. The disk enclosures shown in this section may not look the same as those you are installing. To install disk and controller enclosures: Install the enclosures 25
-
 1
1 -
2
-
3
-
4
-
5
-
6
-
7
-
8
-
9
-
10
-
11
-
12
-
13
-
14
-
15
-
16
-
17
-
18
-
19
-
 20
20 -
 21
21 -
 22
22 -
 23
23 -
 24
24 -
 25
25 -
 26
26 -
 27
27 -
 28
28 -
 29
29 -
 30
30 -
31
-
32
-
33
-
34
-
35
-
36
-
37
-
38
-
39
-
40
-
41
-
42
-
43
-
44
-
45
-
46
-
47
-
48
-
49
-
50
-
51
-
52
-
53
-
54
-
55
-
56
-
57
-
58
-
59
-
60
-
61
-
62
-
63
-
64
-
65
-
66
-
67
-
68
-
69
-
70
-
71
-
72
-
73
-
74
-
75
-
76
-
77
-
78
-
79
-
80
-
81
-
82
 |
 |
