HP Photosmart 850 HP Photosmart 850 digital camera - (English) User Guide - Page 97
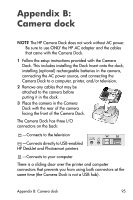
Unloading images to a computer using the dock, Printing images using the dock
 |
View all HP Photosmart 850 manuals
Add to My Manuals
Save this manual to your list of manuals |
Page 97 highlights
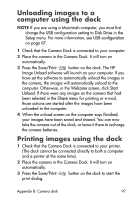
Unloading images to a computer using the dock NOTE If you are using a Macintosh computer, you must first change the USB configuration setting to Disk Drive in the Setup menu. For more information, see USB configuration on page 67. 1 Check that the Camera Dock is connected to your computer. 2 Place the camera in the Camera Dock. It will turn on automatically. 3 Press the Save/Print button on the dock. The HP Image Unload software will launch on your computer. If you have set the software to automatically unload the images in the camera, the images will automatically unload to the computer. Otherwise, in the Welcome screen, click Start Unload. If there were any images on the camera that had been selected in the Share menu for printing or e-mail, those actions are started after the images have been unloaded to the computer. 4 When the unload screen on the computer says Finished, your images have been saved and shared. You can now take the camera out of the dock, or leave it there to recharge the camera batteries. Printing images using the dock 1 Check that the Camera Dock is connected to your printer. (The dock cannot be connected directly to both a computer and a printer at the same time). 2 Place the camera in the Camera Dock. It will turn on automatically. 3 Press the Save/Print print dialog. button on the dock to start the Appendix B: Camera dock 97
-
 1
1 -
2
-
3
-
4
-
5
-
6
-
7
-
8
-
9
-
10
-
11
-
12
-
13
-
14
-
15
-
16
-
17
-
18
-
19
-
20
-
21
-
22
-
23
-
24
-
25
-
26
-
27
-
28
-
29
-
30
-
31
-
32
-
33
-
34
-
35
-
36
-
37
-
38
-
39
-
40
-
41
-
42
-
43
-
44
-
45
-
46
-
47
-
48
-
49
-
50
-
51
-
52
-
53
-
54
-
55
-
56
-
57
-
58
-
59
-
60
-
61
-
62
-
63
-
64
-
65
-
66
-
67
-
68
-
69
-
70
-
71
-
72
-
73
-
74
-
75
-
76
-
77
-
78
-
79
-
80
-
81
-
82
-
83
-
84
-
85
-
86
-
87
-
88
-
89
-
90
-
91
-
 92
92 -
 93
93 -
 94
94 -
 95
95 -
 96
96 -
 97
97 -
 98
98 -
 99
99 -
 100
100 -
 101
101 -
 102
102 -
103
-
104
-
105
-
106
-
107
-
108
-
109
-
110
-
111
-
112
 |
 |
