HP Photosmart 8700 User's Guide - Page 37
Removing a memory card, Deciding which photos to print, Selecting a photo layout
 |
View all HP Photosmart 8700 manuals
Add to My Manuals
Save this manual to your list of manuals |
Page 37 highlights
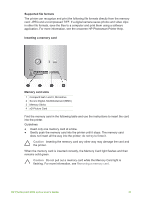
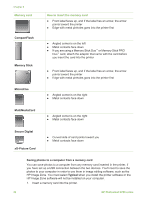
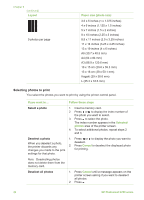
If you are using a Windows computer a. Select Copy pictures to a folder on my computer using Microsoft Scanner and Camera Wizard. b. Follow the onscreen prompts. Note The memory card also appears in Windows Explorer as a removable drive. You can open it and drag photos from the card to any location on your computer. If you are using a Macintosh a. Wait for iPhoto to start and read the contents of the memory card. b. Click Import to save the photos on the card to your Macintosh. Note The memory card also appears on the desktop as a drive icon. You can open it and drag photos from the card to any location on your Macintosh. Removing a memory card Wait until the Memory Card light stops flashing, then gently pull the memory card to remove it from the printer. Caution Do not pull out a memory card while the Memory Card light is flashing. A flashing light means that the printer is accessing the memory card. Removing a memory card while it is being accessed may damage the printer and the memory card or corrupt the information on the memory card. Deciding which photos to print You can decide which photos to print from a memory card by printing a photo index and using the index numbers to select photos. A photo index shows thumbnail views and index numbers for up to 2000 photos on a memory card. When printing an index page, use plain paper instead of photo paper to cut costs. A photo index may be several pages long. To print a photo index: 1. Insert a memory card. 2. Load several sheets of plain paper in the Main tray. 3. Press the Index page button, then press . Selecting a photo layout Press Layout on the printer to select a layout for the photos you want to print. All photos selected from the printer control panel will print in this layout. If you are not HP Photosmart 8700 series User's Guide 33
-
 1
1 -
2
-
3
-
4
-
5
-
6
-
7
-
8
-
9
-
10
-
11
-
12
-
13
-
14
-
15
-
16
-
17
-
18
-
19
-
20
-
21
-
22
-
23
-
24
-
25
-
26
-
27
-
28
-
29
-
30
-
31
-
 32
32 -
 33
33 -
 34
34 -
 35
35 -
 36
36 -
 37
37 -
 38
38 -
 39
39 -
 40
40 -
 41
41 -
 42
42 -
43
-
44
-
45
-
46
-
47
-
48
-
49
-
50
-
51
-
52
-
53
-
54
-
55
-
56
-
57
-
58
-
59
-
60
-
61
-
62
-
63
-
64
-
65
-
66
-
67
-
68
-
69
-
70
-
71
-
72
-
73
-
74
-
75
-
76
-
77
-
78
-
79
-
80
-
81
-
82
-
83
 |
 |