HP Photosmart A620 User Guide - Page 48
Print preview, Print photos, Print borderless photos
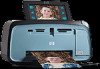 |
View all HP Photosmart A620 manuals
Add to My Manuals
Save this manual to your list of manuals |
Page 48 highlights
Print preview You can preview a document on the computer before printing it. If the print preview does not look the way you want it to, close the preview window and make the necessary adjustments to the document or to the print settings. For more information on changing the print settings, see "Change the print settings for the print job" on page 43. To preview a printed document 1. Open the Printer Properties dialog box. For more information, see "Printer Properties dialog box" on page 39. 2. Click the Features or the Color tab. 3. Select the Show preview before printing check box. 4. Select any other print settings that you want, and then click OK. Before the document prints, a preview is displayed. 5. Do one of the following: • Click OK to print the document. • Click Cancel to cancel the print job. Adjust the print settings as needed before printing the document. Print photos This sections describes how to print several types of photos and contains the following topics: • Print borderless photos • Print photos with a border • Print postcards • Print black and white photos • Print panoramic photos • Print on index cards and other small media Print borderless photos Use borderless printing to print to the edges of the paper. Guidelines • For tips on achieving the best quality prints, see "photo enhancing" on page 42. • Verify that the photo paper you are using is not rippled or curled. • Do not exceed the paper tray capacity when loading media. For more information, see "Printer specifications" on page 81. Prepare to print 1. Verify that the printer is turned on. 2. Load photo paper. For more information, see "Paper basics" on page 19. Print preview 47
-
 1
1 -
2
-
3
-
4
-
5
-
6
-
7
-
8
-
9
-
10
-
11
-
12
-
13
-
14
-
15
-
16
-
17
-
18
-
19
-
20
-
21
-
22
-
23
-
24
-
25
-
26
-
27
-
28
-
29
-
30
-
31
-
32
-
33
-
34
-
35
-
36
-
37
-
38
-
39
-
40
-
41
-
42
-
 43
43 -
 44
44 -
 45
45 -
 46
46 -
 47
47 -
 48
48 -
 49
49 -
 50
50 -
 51
51 -
 52
52 -
 53
53 -
54
-
55
-
56
-
57
-
58
-
59
-
60
-
61
-
62
-
63
-
64
-
65
-
66
-
67
-
68
-
69
-
70
-
71
-
72
-
73
-
74
-
75
-
76
-
77
-
78
-
79
-
80
-
81
-
82
-
83
-
84
-
85
-
86
-
87
-
88
 |
 |