HP ProBook 6550b HP ProBook 6455b, 6555b, 6450b,and 6550b Notebook PCs - Maint - Page 156
caution can result in damage to the system board and the optical drive connector board.
 |
View all HP ProBook 6550b manuals
Add to My Manuals
Save this manual to your list of manuals |
Page 156 highlights
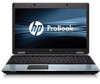
2. Remove the three slotted Torx T8M2.5×7.0 screws (1) and (2) that secure the system board to the base enclosure. The front-most screw 2 is present only on computer models equipped with a 15.6in display assembly. 3. Use the middle of the system board (1) to lift the right side (2) of the system board until it rests at an angle. 4. Remove the system board (3) by sliding it away from the base enclosure at an angle. CAUTION: Do not attempt to remove the optical drive connector board from the system board until after the system board has been removed from the base enclosure. Failure to follow this caution can result in damage to the system board and the optical drive connector board. 148 Chapter 4 Removal and replacement procedures
-
 1
1 -
2
-
3
-
4
-
5
-
6
-
7
-
8
-
9
-
10
-
11
-
12
-
13
-
14
-
15
-
16
-
17
-
18
-
19
-
20
-
21
-
22
-
23
-
24
-
25
-
26
-
27
-
28
-
29
-
30
-
31
-
32
-
33
-
34
-
35
-
36
-
37
-
38
-
39
-
40
-
41
-
42
-
43
-
44
-
45
-
46
-
47
-
48
-
49
-
50
-
51
-
52
-
53
-
54
-
55
-
56
-
57
-
58
-
59
-
60
-
61
-
62
-
63
-
64
-
65
-
66
-
67
-
68
-
69
-
70
-
71
-
72
-
73
-
74
-
75
-
76
-
77
-
78
-
79
-
80
-
81
-
82
-
83
-
84
-
85
-
86
-
87
-
88
-
89
-
90
-
91
-
92
-
93
-
94
-
95
-
96
-
97
-
98
-
99
-
100
-
101
-
102
-
103
-
104
-
105
-
106
-
107
-
108
-
109
-
110
-
111
-
112
-
113
-
114
-
115
-
116
-
117
-
118
-
119
-
120
-
121
-
122
-
123
-
124
-
125
-
126
-
127
-
128
-
129
-
130
-
131
-
132
-
133
-
134
-
135
-
136
-
137
-
138
-
139
-
140
-
141
-
142
-
143
-
144
-
145
-
146
-
147
-
148
-
149
-
150
-
 151
151 -
 152
152 -
 153
153 -
 154
154 -
 155
155 -
 156
156 -
 157
157 -
 158
158 -
 159
159 -
 160
160 -
 161
161 -
162
-
163
-
164
-
165
-
166
-
167
-
168
-
169
-
170
-
171
-
172
-
173
-
174
-
175
-
176
-
177
-
178
-
179
-
180
-
181
-
182
-
183
-
184
-
185
-
186
-
187
-
188
-
189
-
190
-
191
-
192
-
193
-
194
-
195
-
196
-
197
-
198
-
199
-
200
-
201
-
202
-
203
-
204
-
205
-
206
-
207
-
208
-
209
-
210
-
211
-
212
-
213
-
214
-
215
-
216
-
217
-
218
-
219
 |
 |

2.
Remove the three slotted Torx T8M2.5×7.0 screws
(1)
and
(2)
that secure the system board to the
base enclosure. The front-most screw 2 is present only on computer models equipped with a 15.6-
in display assembly.
3.
Use the middle of the system board
(1)
to lift the right side
(2)
of the system board until it rests at
an angle.
4.
Remove the system board
(3)
by sliding it away from the base enclosure at an angle.
CAUTION:
Do not attempt to remove the optical drive connector board from the system board
until after the system board has been removed from the base enclosure. Failure to follow this
caution can result in damage to the system board and the optical drive connector board.
148
Chapter 4
Removal and replacement procedures