HP ProLiant 2500 Compaq ProLiant 2500 Servers Installation Guide - Page 74
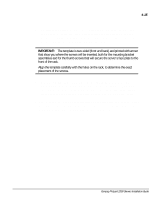
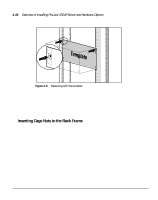
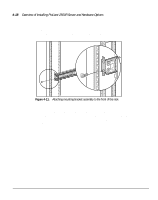
IMPORTANT, two slots marked C on the template. The cage nuts will hold the thumb
 |
View all HP ProLiant 2500 manuals
Add to My Manuals
Save this manual to your list of manuals |
Page 74 highlights
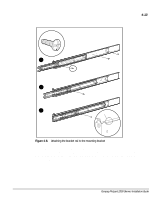
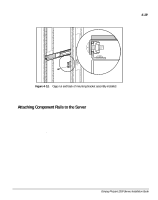
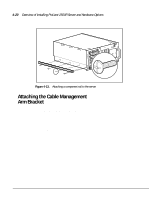
4-15 1. Starting at the bottom of the rack, or at the top of a previously mounted component, measure the screw hole locations for the server's mounting bracket assemblies. Pencil mark the locations on the outside of the rack. Do this on both the front and the back of the rack. IMPORTANT: The template is two-sided (front and back) and printed with arrows that show you where the screws will be inserted, both for the mounting bracket assemblies and for the thumb screws that will secure the server's face plate to the front of the rack. Align the template carefully with the holes on the rack, to determine the exact placement of the screws. 2. When you mark the positioning of the mounting bracket screws, also mark the positioning in the front of the rack for the cage nuts. These are two slots marked "C" on the template. The cage nuts will hold the thumb screws through the server's face plate, as shown in the following figure. Be sure to follow the alignment instructions on the template, and keep the sides of the template squared up with the sides of the rack. Tick marks on the rack's vertical rails will help you maintain the proper alignment. Compaq ProLiant 2500 Servers Installation Guide
-
 1
1 -
2
-
3
-
4
-
5
-
6
-
7
-
8
-
9
-
10
-
11
-
12
-
13
-
14
-
15
-
16
-
17
-
18
-
19
-
20
-
21
-
22
-
23
-
24
-
25
-
26
-
27
-
28
-
29
-
30
-
31
-
32
-
33
-
34
-
35
-
36
-
37
-
38
-
39
-
40
-
41
-
42
-
43
-
44
-
45
-
46
-
47
-
48
-
49
-
50
-
51
-
52
-
53
-
54
-
55
-
56
-
57
-
58
-
59
-
60
-
61
-
62
-
63
-
64
-
65
-
66
-
67
-
68
-
 69
69 -
 70
70 -
 71
71 -
 72
72 -
 73
73 -
 74
74 -
 75
75 -
 76
76 -
 77
77 -
 78
78 -
 79
79 -
80
-
81
-
82
-
83
-
84
-
85
-
86
-
87
-
88
-
89
-
90
-
91
-
92
-
93
-
94
-
95
-
96
-
97
-
98
-
99
-
100
-
101
-
102
-
103
-
104
-
105
-
106
-
107
-
108
-
109
-
110
-
111
 |
 |
