HP ProLiant xw2x220c Remote Graphics Software 5.3.0 User Guide - Page 77
Advanced > Advanced Setting, HP Remote Graphics Receiver, see The Advanced
 |
View all HP ProLiant xw2x220c manuals
Add to My Manuals
Save this manual to your list of manuals |
Page 77 highlights
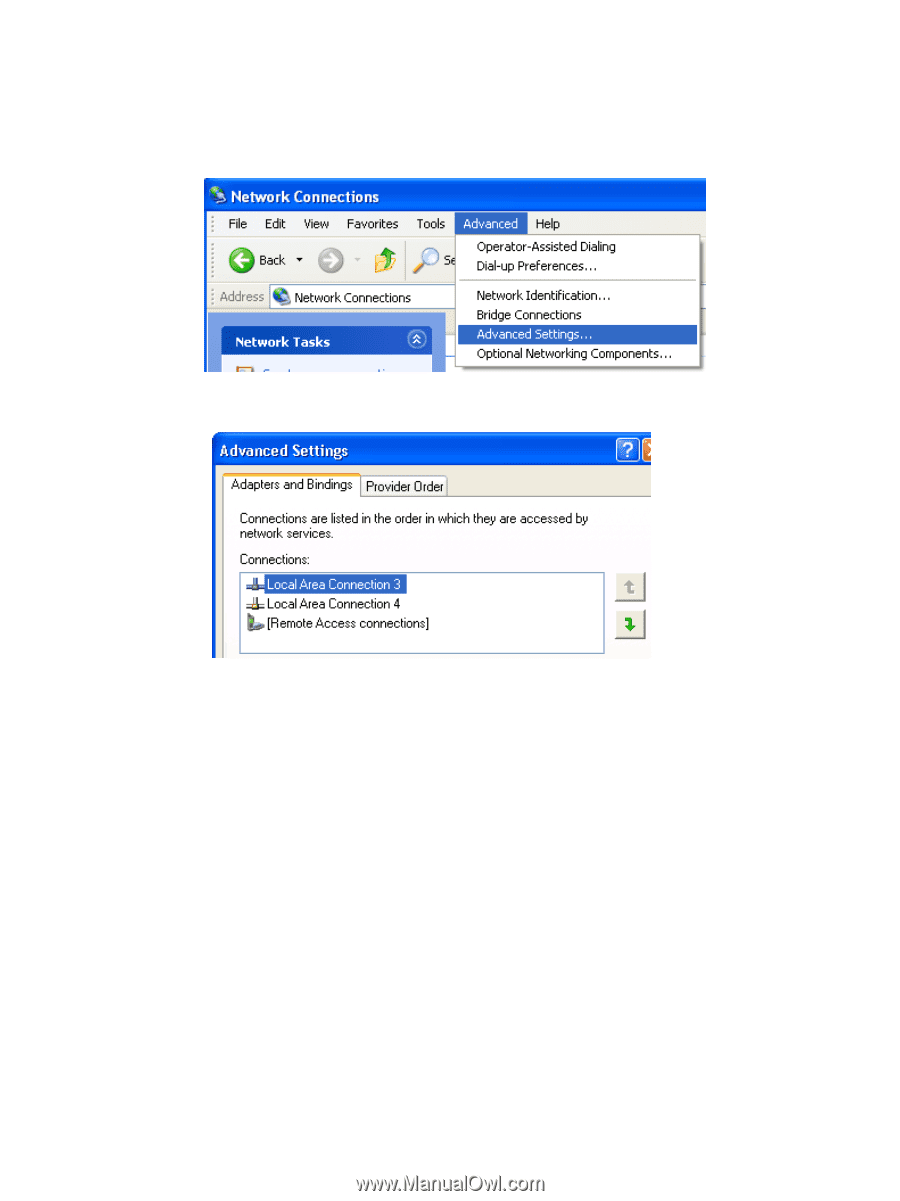
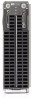
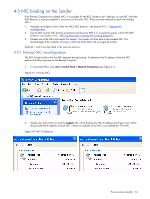
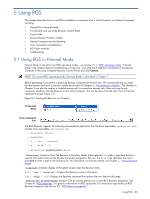
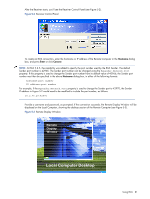
3. To determine which NIC is the first NIC, click Advanced > Advanced Setting (see Figure 4-3). The Advanced Settings dialog is displayed (see Figure 4-4). The "first NIC" is listed at the top in the Connections box. In Figure 4-4, the first NIC is Local Area Connection 3, which (from Figure 4-2) has an IP address of 10.10.42.59. Figure 4-3 Determining the first NIC Figure 4-4 Advanced Settings dialog The arrows to the right of the Connections box in Figure 4-4 can be used to change the order of the NICs and, therefore, which NIC will be used by the RGS Sender. In the above example, the RGS Sender will use Local Area Connection 3 with an IP address of 10.10.42.59. To establish a connection from the RGS Receiver to the blade workstation, enter a hostname or IP address in the HP Remote Graphics Receiver box. If you enter a hostname instead of an IP address, it is possible the hostname will resolve to the IP address of an incorrect NIC. This could be caused by a number of factors, including how your DHCP and DNS servers are configured. If the hostname resolves to the IP address of an incorrect NIC, you can either: • Enter the NIC IP address (instead of hostname) in the HP Remote Graphics Receiver box. • Reconfigure your DHCP and DNS servers so that the hostname resolves to the IP address of the correct (first) NIC. • Use the Nslookup command to determine the IP address that the hostname resolves to. Then, using the arrow buttons to the right of the Connections box on the Advanced Settings screen (see Figure 4-4), change the first NIC to correspond with the IP address returned by Nslookup. After performing this step, you must either reboot the computer, or restart the RGS Sender (see Figure 4-5). Pre-connection checklist 77
-
 1
1 -
2
-
3
-
4
-
5
-
6
-
7
-
8
-
9
-
10
-
11
-
12
-
13
-
14
-
15
-
16
-
17
-
18
-
19
-
20
-
21
-
22
-
23
-
24
-
25
-
26
-
27
-
28
-
29
-
30
-
31
-
32
-
33
-
34
-
35
-
36
-
37
-
38
-
39
-
40
-
41
-
42
-
43
-
44
-
45
-
46
-
47
-
48
-
49
-
50
-
51
-
52
-
53
-
54
-
55
-
56
-
57
-
58
-
59
-
60
-
61
-
62
-
63
-
64
-
65
-
66
-
67
-
68
-
69
-
70
-
71
-
 72
72 -
 73
73 -
 74
74 -
 75
75 -
 76
76 -
 77
77 -
 78
78 -
 79
79 -
 80
80 -
 81
81 -
 82
82 -
83
-
84
-
85
-
86
-
87
-
88
-
89
-
90
-
91
-
92
-
93
-
94
-
95
-
96
-
97
-
98
-
99
-
100
-
101
-
102
-
103
-
104
-
105
-
106
-
107
-
108
-
109
-
110
-
111
-
112
-
113
-
114
-
115
-
116
-
117
-
118
-
119
-
120
-
121
-
122
-
123
-
124
-
125
-
126
-
127
-
128
-
129
-
130
-
131
-
132
-
133
-
134
-
135
-
136
-
137
-
138
-
139
-
140
-
141
-
142
-
143
-
144
-
145
-
146
-
147
-
148
-
149
-
150
-
151
-
152
-
153
-
154
-
155
-
156
-
157
-
158
-
159
-
160
-
161
-
162
-
163
-
164
-
165
-
166
-
167
-
168
-
169
-
170
-
171
-
172
-
173
-
174
-
175
-
176
-
177
-
178
-
179
-
180
-
181
-
182
-
183
-
184
-
185
-
186
-
187
-
188
-
189
-
190
-
191
-
192
-
193
-
194
-
195
-
196
 |
 |