HP Z600 HP Z Workstation series User Guide - Page 30
Converting to desktop configuration - the edge
 |
UPC - 884962074053
View all HP Z600 manuals
Add to My Manuals
Save this manual to your list of manuals |
Page 30 highlights
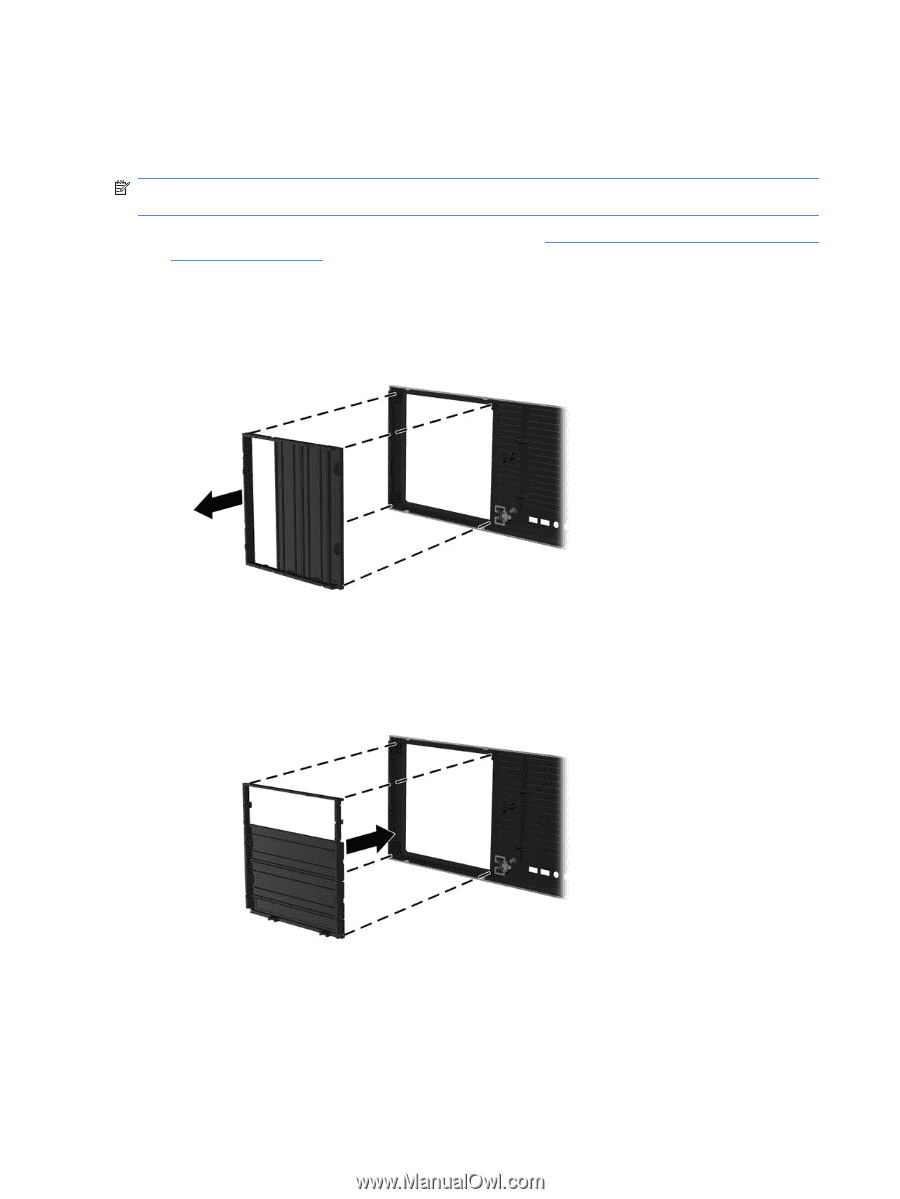
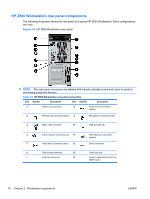
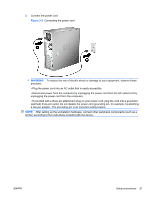
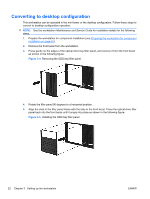
Converting to desktop configuration This workstation can be operated in the mini-tower or the desktop configuration. Follow these steps to convert to desktop configuration operation: NOTE: See the workstation Maintenance and Service Guide for installation details for the following steps. 1. Prepare the workstation for component installation (see Preparing the workstation for component installation on page 40). 2. Remove the front bezel from the workstation. 3. Press gently on the edges of the optical drive bay filler panel, and remove it from the front bezel as shown in the following figure. Figure 3-4 Removing the ODD bay filler panel 4. Rotate the filler panel 90 degrees to a horizontal position. 5. Align the slots in the filler panel frame with the tabs in the front bezel. Press the optical drive filler panel back into the front bezel until it snaps into place as shown in the following figure. Figure 3-5 Installing the ODD bay filler panel 22 Chapter 3 Setting up the workstation ENWW
-
 1
1 -
2
-
3
-
4
-
5
-
6
-
7
-
8
-
9
-
10
-
11
-
12
-
13
-
14
-
15
-
16
-
17
-
18
-
19
-
20
-
21
-
22
-
23
-
24
-
 25
25 -
 26
26 -
 27
27 -
 28
28 -
 29
29 -
 30
30 -
 31
31 -
 32
32 -
 33
33 -
 34
34 -
 35
35 -
36
-
37
-
38
-
39
-
40
-
41
-
42
-
43
-
44
-
45
-
46
-
47
-
48
-
49
-
50
-
51
-
52
-
53
-
54
-
55
-
56
-
57
-
58
-
59
-
60
-
61
-
62
-
63
-
64
-
65
-
66
-
67
-
68
-
69
-
70
-
71
-
72
 |
 |