HP Z600 HP Z Workstation series User Guide - Page 58
Installing PCI/PCIe devices, Expansion card slot identification, Installing an expansion card
 |
UPC - 884962074053
View all HP Z600 manuals
Add to My Manuals
Save this manual to your list of manuals |
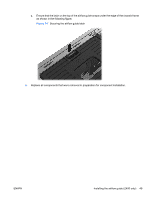
Page 58 highlights
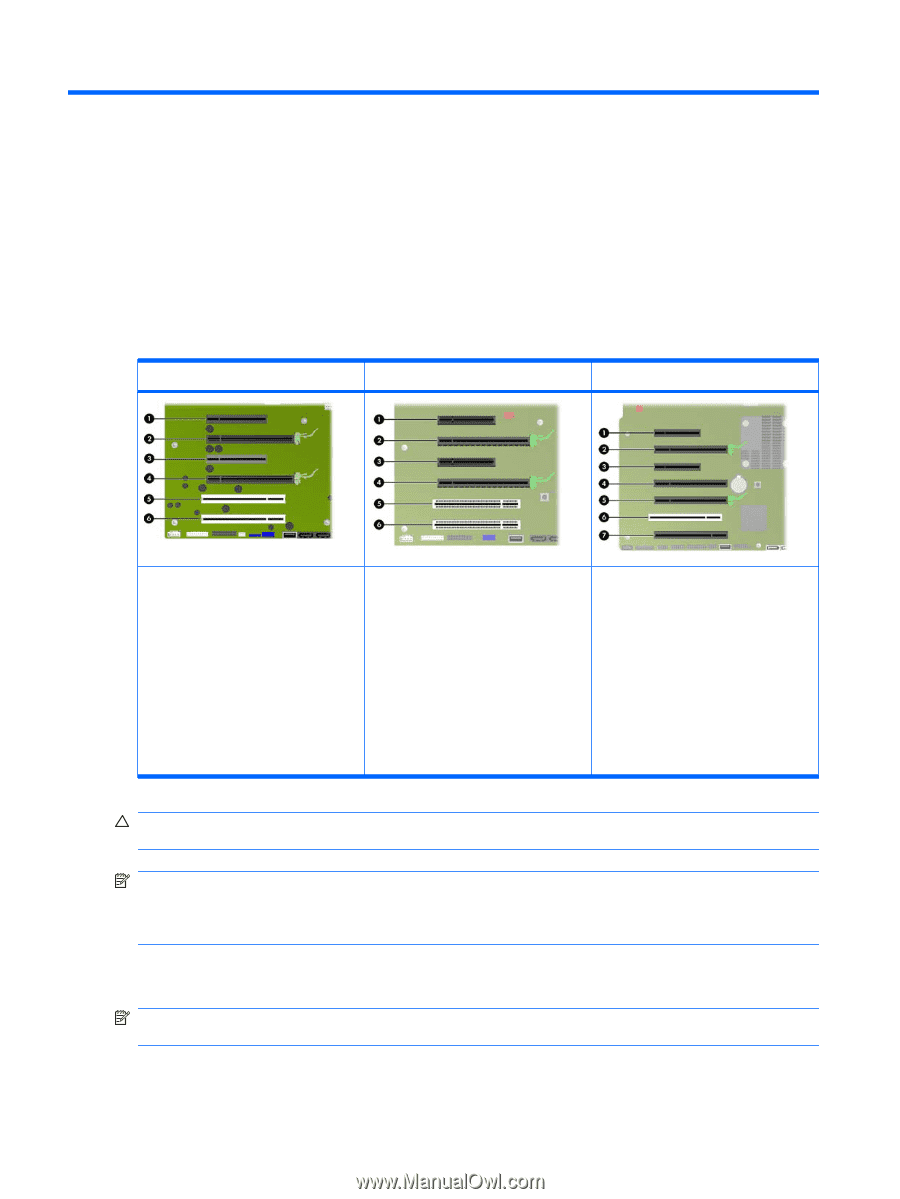
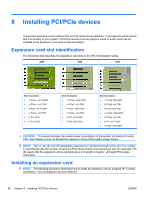
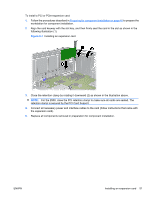
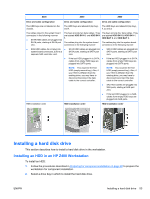
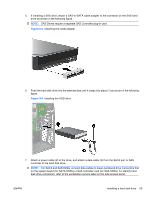
8 Installing PCI/PCIe devices This section describes how to install a PCI or PCIe card in the workstation. To increase the performance and functionality of your system, PCI/PCIe devices such as graphics cards or audio cards can be installed in the expansion card slots on the workstation. Expansion card slot identification The following table describes the expansion card slots in the HP Z Workstation series. Z400 Z600 Z800 Slot description ● 1-PCIe2 - x8 (4) 25W ● 2-PCIe2 - x16 75W ● 3-PCIe - x8 (4) 25W ● 4-PCIe2 - x16 75W ● 5-PCI 32/33 ● 6-PCI 32/33 Slot description ● 1-PCIe2 - x8(4) 25W ● 2-PCIe2 - x16 75W ● 3-PCIe - x8(4) 25W ● 4-PCIe2 - x16 75W ● 5-PCI 32/33 25W ● 6-PCI 32/33 25W Slot description ● 1-PCIe2 x8(4) 25W ● 2-PCIe2 x16 75W ● 3-PCIe x8(4) 25W ● 4-PCIe2 x16(8) 25W ● 5-PCIe2 x16 75W ● 6-PCI 32/33 25W ● 7-PCIe x16(8) 25W CAUTION: To prevent damage, the overall power consumption of the system (including I/O cards, CPU, and memory) must not exceed the maximum rating of the system power supply. NOTE: The x1, x4, x8, and x16 designators describe the mechanical length of the slot. The number in parentheses lists the number of electrical PCIe lanes routed to the expansion slot. For example, x16 (8) means that the expansion slot is mechanically a x16 length connector, with eight PCIe lanes connected. Installing an expansion card NOTE: The following procedure describes how to install an expansion card in a typical HP Z-series workstation. Your workstation may look different. 50 Chapter 8 Installing PCI/PCIe devices ENWW
-
 1
1 -
2
-
3
-
4
-
5
-
6
-
7
-
8
-
9
-
10
-
11
-
12
-
13
-
14
-
15
-
16
-
17
-
18
-
19
-
20
-
21
-
22
-
23
-
24
-
25
-
26
-
27
-
28
-
29
-
30
-
31
-
32
-
33
-
34
-
35
-
36
-
37
-
38
-
39
-
40
-
41
-
42
-
43
-
44
-
45
-
46
-
47
-
48
-
49
-
50
-
51
-
52
-
 53
53 -
 54
54 -
 55
55 -
 56
56 -
 57
57 -
 58
58 -
 59
59 -
 60
60 -
 61
61 -
 62
62 -
 63
63 -
64
-
65
-
66
-
67
-
68
-
69
-
70
-
71
-
72
 |
 |