Hitachi DZHS500A Owners Guide
Hitachi DZHS500A - UltraVision Camcorder - 680 KP Manual
 |
UPC - 050585223943
View all Hitachi DZHS500A manuals
Add to My Manuals
Save this manual to your list of manuals |
Hitachi DZHS500A manual content summary:
- Hitachi DZHS500A | Owners Guide - Page 1
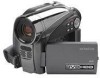
DZ-HS500A DZ-HS500A Instruction manual To obtain the best performance and ensure years of trouble-free use, please read this entire instruction manual. Manual de instrucciones Para obtener el mejor funcionamiento y asegurar muchos años de utilización exenta de problemas, lea todo este manual - Hitachi DZHS500A | Owners Guide - Page 2
ADAPTER/ CHARGER (DZ-ACS3). The DVD video camera/recorder and AC adapter/charger have the following caution marks. CAUTION RISK OF ELECTRIC SHOCK DO NOT OPEN CAUTION: TO REDUCE THE RISK OF ELECTRIC SHOCK, DO NOT OPEN. NO USER-SERVICEABLE PARTS INSIDE. REFER SERVICING TO QUALIFIED SERVICE PERSONNEL - Hitachi DZHS500A | Owners Guide - Page 3
comply with the limits for a Class B digital device, pursuant to Part 15 of the FCC and used in accordance with the instructions, may cause harmful interference to radio determined by turning the equipment off and on, the user is encouraged to try to correct by one or more SD logo is a trademark. 3 - Hitachi DZHS500A | Owners Guide - Page 4
DVD video camera/ recorder and accessory equipment. 1 Read these instructions. 2 Keep these instructions. 3 Heed all warnings. 4 Follow all instructions Refer all servicing to qualified service personnel. Servicing is Charger) shall be used near the socket-outlet and shall be easily accessible. - Hitachi DZHS500A | Owners Guide - Page 5
repair of components other than HDD). Cautions When Using • Hitachi cannot compensate for any damages caused when recording is not made normally or recorded contents cannot be played back because of a defect in the DVD video camera/ recorder, disc or card. Also, Hitachi cannot be responsible for - Hitachi DZHS500A | Owners Guide - Page 6
it against a hard object or let it fall. • When using a tripod, firmly secure the DVD video camera/recorder on it. Do not use the DVD video camera/recorder surface of product: • The surfaces of the DVD video camera/recorder, AC adapter/charger and battery will be slightly warm, but this does not - Hitachi DZHS500A | Owners Guide - Page 7
is not necessary when using this DVD video camera/recorder in the usual way. • Using 8 cm CD lens cleaner could cause this DVD video camera/recorder to be faulty. • If you have to clean the lens, use a Hitachi Maxell cleaner that is exclusively for 8 cm DVD discs. Be careful of moisture condensation - Hitachi DZHS500A | Owners Guide - Page 8
Remove battery − Disconnect AC adapter/charger − Plug or unplug PC connection cable − Remove disc or card − Subject DVD instructions. Also read the instructions attached with optional accessories: • For optional accessories, observe the cautions and follow instruction manuals attached. The battery - Hitachi DZHS500A | Owners Guide - Page 9
malfunctions. Detach the battery from the DVD video camera/recorder and store it in a cool place: • Leaving the battery attached or storing it playback. Copyright: • Data recorded on the HDD/disc/card in this DVD video camera/recorder using other digital/ analog media or devices are protected by the - Hitachi DZHS500A | Owners Guide - Page 10
it using a cotton swab, etc. Do not rub the lens with force: Doing so could scratch the lens. ●Cleaning DVD Video Camera/ Recorder Case Do not wipe the DVD video camera/recorder case hard with any foreign object, such as grit, adhering to it, and do not use rough fabrics to clean the - Hitachi DZHS500A | Owners Guide - Page 11
a DVD-RW/DVD-R/+RW and initializing a DVD-RAM/DVD-RW/+RW. • The section on "Connecting to PC" explains the contents of provided CD-ROM and how to install the software included. • "Subsidiary Information" includes an introduction to products sold separately, and troubleshooting. We want this manual - Hitachi DZHS500A | Owners Guide - Page 12
English About This Manual ●Displays in this manual Understand that the displays are different from those will be used in this text. ● HDD , 1, , 2, / and 3 marks beside headings Some functions of this DVD video camera/recorder are unavailable with HDD/disc/card used. Refer to the marks at right - Hitachi DZHS500A | Owners Guide - Page 13
recorded on the HDD, use the dubbing function to easily create a DVD from the edited original DVD recorder or VCR. ●Create original DVDs on PC (p. 118). You can create an original DVD, using the provided software CD-ROM. The created DVD disc can be played back on DVD player/recorder, DVD-ROM drive - Hitachi DZHS500A | Owners Guide - Page 14
This Manual 12 Introduction 13 Table of Contents 14 Checking Provided Accessories 17 Names of Parts 18 Setups Demonstration Function 21 Setting Up the DVD Video Camera/Recorder 21 HOLDING DVD VIDEO CAMERA/RECORDER 21 ATTACHING SHOULDER STRAP 21 ATTACHING LENS CAP 22 HDD/DVD/Cards 23 HDD - Hitachi DZHS500A | Owners Guide - Page 15
60 RECORDING SUBJECT USING LARGE MAGNIFICATION (DIGITAL ZOOM 60 REDUCING WIND NOISE DURING HDD/DVD/ CARD 105 HDD/DVD/Card Management 105 INITIALIZING HDD/DVD/CARD 105 PROTECTION 106 VERIFYING REMAINING FREE SPACE ON DISC OR CARD (CAPACITY 106 UPDATING CONTROL INFORMATION OF HDD/DVD-RAM/DVD - Hitachi DZHS500A | Owners Guide - Page 16
IN DVD DRIVE BUILT INTO PC.. 125 BEFORE TERMINATING PC CONNECTION (UNPLUGGING PC CONNECTION CABLE)/ CHANGING OVER POWER SWITCH 126 Using ImageMixer 3 for Windows 127 VIEWING IMAGES RECORDED ON HDD/DISC USING PC 127 CREATING DVD-VIDEO USING IMAGES RECORDED ON HDD/DISC 128 Using ImageMixer 3 Mac - Hitachi DZHS500A | Owners Guide - Page 17
, or charge battery. DC power cord: When powering the DVD video camera/ recorder from household AC outlet, use this cord to connect the DVD video camera/recorder and AC adapter/charger. Power cable: Connect between household AC outlet and AC adapter/charger. AV/S input/output cable: Used when - Hitachi DZHS500A | Owners Guide - Page 18
, 65) The red indicator will light during recording. 5 Zoom lever (p. 51, 53, 69) To adjust the zoom or volume. 6 PC connection terminal (TO PC) (p. 123) 7 AV inout/output jack (p. 112, 115) 8 Wide-screen color liquid crystal display (inside) (p. 32) 4 Optical 30× zoom lens (p. 51) 18 - Hitachi DZHS500A | Owners Guide - Page 19
/PC indicator (p. 8, 41) Will blink or light when the HDD/DVD is accessed (write or read), or the DVD video camera/recorder is connected to a PC. 16 BATTERY EJECT button (p. 28) Press this button when removing the battery. 17 Battery attachment platform (p. 28) 18 Record button (REC) (p. 41) 19 - Hitachi DZHS500A | Owners Guide - Page 20
button (p. 56) To switch the DVD video camera /recorder to full automatic. 23 FOCUS button (p. 53) To switch between manual focus and autofocus. 24 MENU button button (p. 108) Press this button to finalize the recorded DVD-RW/DVD-R/+RW. 35 Card insertion block (p. 40) 36 BLC (backlight compensation) - Hitachi DZHS500A | Owners Guide - Page 21
and battery. Demonstration Function This DVD video camera/recorder is equipped with a demonstration function. The default at purchase time is "Auto", which will automatically start the demonstration approx. ten minutes after the DVD video camera/recorder, connected to the AC adapter/charger, is - Hitachi DZHS500A | Owners Guide - Page 22
cap. 2 Attach the longer end of lens cap string to the hand strap of DVD video camera/recorder. 3 Push the both sides of cap inward and attach it the lens. Note: • Always keep the lens cap on when not using the DVD video camera/recorder, to protect the lens. • When recording, attach the lens cap - Hitachi DZHS500A | Owners Guide - Page 23
DVD devices conform to SD memory card. *4: When media that are sold "formatted" are used. If the initialization format differs, the media can be initialized on this DVD video camera/recorder and then used. *5: To additionally record, the finalized disc must be unfinalized. *6: The provided software - Hitachi DZHS500A | Owners Guide - Page 24
on PC or those finalized on another DVD recorder may not be playable on this DVD video camera/recorder, depending on the editing software used or recorded status of DVD-RW/DVD-R/+RW. • If you insert a DVD-R recorded on a DVD video camera/recorder other than DZ-HS500A and not finalized, the Disc - Hitachi DZHS500A | Owners Guide - Page 25
DVD VIDEO CAMERA/RECORDER • CD • CD-R • CD-RW • CD-ROM • DVD-ROM • DVD-Video • DVD-R (4.7 GB) for Authoring Ver. 2.0 • DVD-R DL (Dual Layer) • DVD-RW DL (Dual Layer) • +R DL (Double Layer) • +RW DL (Double Layer) • +R • Discs other than those with diameter of 8 cm AVAILABLE CARDS SD memory cards - Hitachi DZHS500A | Owners Guide - Page 26
DC power cord 1 Connect the power cable to AC adapter/ charger. 2 Plug the power cable into AC outlet. 3 Plug one end of DC power cord into the DC output jack on AC adapter/charger. 4 Attach the other end of DC power cord to the battery attachment platform on DVD video camera/recorder. Use the same - Hitachi DZHS500A | Owners Guide - Page 27
the DZ-BP07PW, DZ-BP14SW (optional) or DZ-BP7SW (optional) battery for the DVD video camera/recorder: Using other batteries could cause the DVD video camera/recorder to malfunction, or result in fire. • Be sure to use the DZ-ACS3 AC adapter/charger to charge the battery: Using other chargers could - Hitachi DZHS500A | Owners Guide - Page 28
on AC adapter/ charger: Charge status During charge Charge complete CHARGE indicator Lit Goes out Note: See "Troubleshooting" on page 145 when the CHARGE indicator blinks. ●Reference for time required to charge battery (at approx. 77ºF (25ºC)) DZ-BP07PW (provided)/DZ-BP7SW (optional): Approx - Hitachi DZHS500A | Owners Guide - Page 29
used with a fully charged battery: With DZ-BP07PW (provided)/DZ-BP7SW (optional) Video mode XTRA FINE STD When using viewfinder When using LCD monitor When using viewfinder When using LCD monitor When using viewfinder When using LCD monitor Continuous use time HDD DVD approx. 100 min approx - Hitachi DZHS500A | Owners Guide - Page 30
for an extended period: It is recommended that you fully charge the battery once a year, attach it to DVD video camera/recorder and use it up; then remove the battery and store it in a cool place again. Battery life: The battery life varies greatly depending on the ambient environment and how often - Hitachi DZHS500A | Owners Guide - Page 31
recording function: Set to "OFF": The DVD video camera/ recorder will turn off Set to "SD": To record photos on an SD memory card and play them back Set to "HDD": To record or dub movie on HDD and play it back Set to "DVD": To record movie on DVDRAM/DVD-RW/DVD-R/ +RW and play it back Note - Hitachi DZHS500A | Owners Guide - Page 32
this could cause the DVD video camera/recorder and LCD monitor to become hot. VIEWING SUBJECT THROUGH VIEWFINDER 1 Pull out the viewfinder. 2 Turn the diopter control knob to adjust the focus to suit your eyesight. Note: • If no image appears in viewfinder, refer to "Troubleshooting" on page 145 - Hitachi DZHS500A | Owners Guide - Page 33
HDD day, year or time. 3 Press the d or c button to select the digit you want to set in sequence. Da t e Se t u p Da t charger to DVD video camera/recorder and connect them to AC outlet, or attach a charged battery to the DVD video camera/recorder, and leave it for at least 24 hours with the DVD - Hitachi DZHS500A | Owners Guide - Page 34
turn off to prevent the battery from discharging needlessly. Off: To cancel power save. Note: • To turn the DVD video camera/recorder on function, set the power switch to "OFF", and then set it to "HDD", "DVD" or "SD". • The Power Save setting will not appear in the onscreen information display - Hitachi DZHS500A | Owners Guide - Page 35
, the demonstration will not start when the power switch on this DVD video camera/ recorder is set to "DVD" and a DVD is loaded, or when the power switch is set to "SD" and a card is loaded. • The demonstration function will not work when the DVD video camera/recorder is connected to PC. • While the - Hitachi DZHS500A | Owners Guide - Page 36
English LCD/EVF Setup HDD 12/3 ADJUSTING BRIGHTNESS OF LCD SCREEN (LCD BRIGHTNESS) AND VIEWFINDER (EVF midway, press the MENU button. • The brightness setting will be stored in memory even after the DVD video camera/recorder is turned off. 2 Use the d/c buttons for adjustment. Press d : The - Hitachi DZHS500A | Owners Guide - Page 37
to end the setting. Note: • To stop the setting midway, press the MENU button. • The color setting will be stored in memory even after the DVD video camera/recorder is turned off. • Even if the brightness or density of LCD monitor screen or viewfinder is changed, the brightness or density of - Hitachi DZHS500A | Owners Guide - Page 38
English 12/ Inserting and Removing Disc 1 Set the power switch to "DVD" or "OFF" . When the power switch is set to "HDD" or "SD", the cover of disc insertion block will not open. When "Please insert DVD." appears during dubbing, however, the cover of disc insertion block will open even when the - Hitachi DZHS500A | Owners Guide - Page 39
recorder will automatically turn off. • Disc cannot be inserted or removed unless a charged battery or AC adapter/charger is connected to the DVD video camera/recorder. • If there is some delay before recording starts, refer to "Troubleshooting" on page 145. • Do not close the cover if a disc is not - Hitachi DZHS500A | Owners Guide - Page 40
1 Open the LCD monitor. 2 Turn the DVD video camera/recorder off. 3 Open the cover of card insertion block. 4 Inserting Card: Insert card with its terminal inward until it locks. Removing Card: Push the center of card edge. The card will come out so that it can be held by fingers. 3 5 Close the - Hitachi DZHS500A | Owners Guide - Page 41
DVD video camera/recorder off. Note: • See "Troubleshooting" on page 145 when recording movie is not possible. • See "Troubleshooting HDD" position from accidentally moving to "DVD" position. • When using a DVD-RW (VF-mode)/DVD approximately 3 seconds. • Hitachi cannot be responsible for video and - Hitachi DZHS500A | Owners Guide - Page 42
page 156 for details of photos on card. • See "Troubleshooting" on page 145 if recording photos is not possible. • If focusing is difficult with auto focus, choose manual focus, and manually correct the focus before recording (see page 53). • Shake of the DVD video camera/recorder may cause blur in - Hitachi DZHS500A | Owners Guide - Page 43
set to "DVD". • No card is loaded although the power switch is set to "SD". • An unusable disc or card is loaded. • The HDD or a loaded DVD or card has no remaining 3x. The settings on manual focus, exposure and rear lighting will also reset to the initial values. • The DVD video camera/recorder in - Hitachi DZHS500A | Owners Guide - Page 44
6. 16:9 mode 1. Recording mode 11. Zoom 12. Exposure correction 13.Manual Focus 14. HDD,DVD/Card type 15. Movie recording quality FINE L IN REC j 00:00:00 17. Remaining space on HDD/DVD/Card 18. Remaining number of recordable scenes 19. Remaining battery level FULL AUTO indicator (p. - Hitachi DZHS500A | Owners Guide - Page 45
HDD/DVD) E : Still (Card) F : External input still (field) (Card) G : External input still (frame) (Card L IN : AV input 10. Digital Zoom: Off) X (Digital Zoom: 120×) Y (Digital Zoom: 1500× only in movie recording mode) 12. Exposure correction (p. 55) No display : Auto : Manual 13. Manual - Hitachi DZHS500A | Owners Guide - Page 46
-R finalized on a device other than this DVD video camera/ recorder (including a DVD-R recorded on a Hitachi DVD video camera/recorder marketed before DZ-HS500A, but not finalized) : +RW : Finalized +RW O : SD memory card P : Locked SD memory card No display*2 15. Movie recording quality - Hitachi DZHS500A | Owners Guide - Page 47
very low, and the display will blink. Operating status/warning message Battery remaining level No warning/message (see page 44) will appear when screen display symbols will blink to inform you of the operation status of DVD video camera/recorder. When the LCD monitor is turned 180º from the position - Hitachi DZHS500A | Owners Guide - Page 48
DVD-RAM/DVD-RW/DVD-R/+RW used. • An unusable disc is loaded. • An attempt to record movie on a card was made. • An unusable card is loaded. • HDD/disc is write-protected. • A locked card the viewfinder. • Although you can switch to the manual focus, exposure and on-screen display modes even during - Hitachi DZHS500A | Owners Guide - Page 49
if you press the MENU button. You can use the f/e/d/c buttons on DVD video camera/recorder to select various setting options in Full Menu and designate them d e F I NE 16:9 On Input Sou r ce CAMERA OSD Ou t pu t On HDD P r o t e c t i o n On ENTER RETURN Press the A button directly to - Hitachi DZHS500A | Owners Guide - Page 50
EIS (p. 60) Digital zoom (p. 51) Microphone filter*1 (p. 60) *1: Not displayed in "SD" status. Date CD / EVF Ad j u s t EVF D i s p l a y Aut o Record Functions Setup ENTER RETURN Rec o rd Func t i ons Se t up V I DEO Mo d e F I NE 16:9 On Input Sou r ce CAMERA OSD Ou t pu t On HDD - Hitachi DZHS500A | Owners Guide - Page 51
English HDD 12/3 Zooming If you continue to hold the zoom lever on the "T" control side with Dig. Zoom specified, the digital zoom will the zoom lever will display the digital zoom bar. Note: • The digital zoom setting will be stored in memory even if the DVD video camera/recorder is turned off - Hitachi DZHS500A | Owners Guide - Page 52
• Wide-conversion lens: For stronger wide-angle effect Note: • With DZ-TL1 tele-conversion lens, the focusing range at "T" (telephoto) control side -angle side). • When replacing the lens, take care not to drop the DVD video camera/recorder. • If a generally available filter is attached, do not - Hitachi DZHS500A | Owners Guide - Page 53
English HDD 12/3 Manually Focusing Subject The DVD video camera/recorder usually focuses on a subject automatically (autofocus). You can also manually focus a subject depending on the recording conditions. FOCUSING DURING RECORDING Normally, the DVD video camera/recorder automatically focuses the - Hitachi DZHS500A | Owners Guide - Page 54
English Manually focus the following objects, which may not be automatically focused (see page 53): Objects not in the center of screen Objects with little variation in - Hitachi DZHS500A | Owners Guide - Page 55
English HDD 12/3 Adjusting Brightness of Image to be recorded (Exposure) The DVD video camera/recorder usually adjusts the exposure automatically. You can also manually adjust the exposure depending on the recording conditions. 1 Press the EXPOSURE button during recording. The exposure - Hitachi DZHS500A | Owners Guide - Page 56
English HDD 12/3 Using Full Auto Function Pressing the FULL AUTO button will fully automate the camera functions. 1 Press the FULL AUTO button. "FULL AUTO" will be displayed on the screen of DVD video camera/recorder for several seconds. The following settings will reset to defaults: Function - Hitachi DZHS500A | Owners Guide - Page 57
HDD 12/3 Setting Up Camera Functions Before You Begin • See page 49 for how to set. • No menu screen appears with external input. SELECTING SHOOTING MODE TO MATCH THE SUBJECT (SWITCHING PROGRAM AE MODE) This DVD on a ski slope. Low Light : Allows user to record in a dark place even with - Hitachi DZHS500A | Owners Guide - Page 58
recommended that you use a tripod). • If a subject cannot be focused properly, manually adjust the focus (see page 53). 4 Open the LCD monitor, turn it 180 monitor will light white. ADJUSTING COLOR (WHITE BALANCE) This DVD video camera/recorder automatically adjusts the color of subject. Change - Hitachi DZHS500A | Owners Guide - Page 59
balance will not work normally. ●Setting white balance manually 1 Point the DVD video camera/ Thick paper recorder at a white object place. Also, the white balance cannot be set when the zoom bar is in the digital zoom range (p. 51). In such status, the "h" indicator will remain blinking. Set - Hitachi DZHS500A | Owners Guide - Page 60
ZOOM) See page 51 for setting on digital zoom. REDUCING WIND NOISE DURING RECORDING (MIC.FILTER) When recording sound from the microphone built into this DVD video camera/recorder, you can reduce wind noise in recording. If "MIC.Filter: On" is specified, the low-frequency components in the sound - Hitachi DZHS500A | Owners Guide - Page 61
English Setting Up Record Functions HDD 12/ SWITCHING MOVIE QUALITY (VIDEO MODE) Choose the movie quality movie quality or wide-screen mode first used with the disc for recording. • When using a DVD-RW (VF-mode)/DVD-R/+RW: You cannot specify the combination of "VIDEO Mode: STD" and "16:9 On"(p. - Hitachi DZHS500A | Owners Guide - Page 62
English HDD 12/ SETTING TO WIDE TV SCREEN MODE (16:9 MODE) When viewing recorded images later on a wide-screen TV (aspect ratio 16:9), specify wide-screen (16:9) mode " - Hitachi DZHS500A | Owners Guide - Page 63
of TV, the TV will automatically switch to the wide-screen mode: See TV instruction manual for details. • When using a video selector, the TV may not automatically be switched to 16:9 mode. • If you connect the DVD video camera/recorder with a disc recorded in wide mode to a TV with 4:3 display only - Hitachi DZHS500A | Owners Guide - Page 64
press the A button. 3 Press the MENU button to end the setting. Note: • The still quality setting will be stored in memory even when the DVD video camera/recorder is turned off. HDD 12/3 RECEIVING IMAGE FROM ANOTHER DEVICE (INPUT SOURCE) If you wish to input an image from another device to this - Hitachi DZHS500A | Owners Guide - Page 65
, you can record stills of externally input images on a card. The DVD video camera/recorder can record an external image with little movement has been set by reviewing the on-screen information. • To release the self-timer mode, choose "Off" on the menu screen or turn DVD video camera/recorder off. - Hitachi DZHS500A | Owners Guide - Page 66
or "Off", use the f/e/d/ c/A buttons to then press the A button. When "Off" is specified, the icon will appear. Note: • The "HDD Protection" setting will return to "On" when the DVD video camera/recorder is turned off. 0:00:00 REM 3 0 MIN FINE 8 : 0 0 AM 1 2 / 1/2007 An icon will appear. (When - Hitachi DZHS500A | Owners Guide - Page 67
you will be able to make most use of Disc Navigation function. The screens in this instruction manual are basically those that will appear when the HDD is used: Some items will not appear when a DVD-RAM/DVD-RW/DVD-R/+RW or card is used, but the operation is the same. Before You Begin • Turn the - Hitachi DZHS500A | Owners Guide - Page 68
), and operation guide will appear in sequence (when HDD is used). HDD or disc is write-protected - Finalized DVD-RW (VF-mode)/DVD-R/+RW - DVD-RW (VF-mode)/DVD-R recorded on a Hitachi DVD video camera/recorder model marketed before this DVD video camera/recorder, and not finalized - Locked card - Hitachi DZHS500A | Owners Guide - Page 69
as long as 5 minutes, the Disc Navigation screen will automatically be restored. ●Playing back photos A photo on DVD-RAM will be displayed for approx. 3 seconds. When playing back photos on card, playback will stop after each photo playback. Note: • Press the A button to temporarily stop playback - Hitachi DZHS500A | Owners Guide - Page 70
a disc or card recorded on this DVD video camera/recorder to play Before You Begin back scenes on it. (p. 41, 42). • Turn the DVD video camera/recorder on (p. 31). HDD 12/3 PLAYING BACK LATEST RECORDED SCENE Playing Back 1 Press the A button in the recording pause status. The DVD video camera - Hitachi DZHS500A | Owners Guide - Page 71
A button. The scene will be recorded on a card. • A captured photo is played back on the DVD video camera/recorder as follows: When captured from a : Number of pixels (JPEG standard): 640 x 480 SEARCH PLAYBACK OF MOVIE HDD 12/ During playback, press the d or c button and hold it: Search - Hitachi DZHS500A | Owners Guide - Page 72
appears, release the button: Playback will start from that point. HDD 12/ Portion being played back Press f Press f Press e Press using DVD-RAM] (This DVD video camera/recorder cannot record any photo on a DVD-RAM.) Releasing the f or e button will start continuous playback. [When using card] - Hitachi DZHS500A | Owners Guide - Page 73
English HDD 12/3 JUMPING TO SPECIFIED POINT (GO TO) 1 Press the MENU button during playback. Go T o To p En d Spec i f y 2 HDD (10-second units for DVD, 1-still units for card) • Hold down: To move the cursor in 10-minute units for HDD (1-minute units for DVD, 10-still units for card) - Hitachi DZHS500A | Owners Guide - Page 74
List. *2 Number of program or play list being played back (not displayed when all programs are being played back). *3 Refer to "HDD, DVD/Card type" on page 46. *4 Will appear when each function is specified "On". *5 F : Standard playback b : Playback pause c : Forward search playback d : Reverse - Hitachi DZHS500A | Owners Guide - Page 75
English SELECTING MULTIPLE SCENES 1 Press the DISC NAVIGATION button. 2 Use the f/e/d/c buttons to select the desired scene. 3 Press the PHOTO/SELECT button once: The selected scene will be framed in red and yellow. Repeat steps 2 and 3 to randomly select multiple scenes. SELECTING CONSECUTIVE - Hitachi DZHS500A | Owners Guide - Page 76
all data recorded on HDD/DVD/Card. Protection ●●● You can protect the HDD/DVD-RAM/ DVD-RW (VR-mode DVD recorder/player or read into PC, the set effect results will not be reflected in the playback or reading. To reflect the set effect results, connect both devices using the AV/S input/output cable - Hitachi DZHS500A | Owners Guide - Page 77
FLOW OF DISC NAVIGATION MENU Press the MENU button on the Disc Navigation screen: The menu screens for Disc Navigation and menu screens for HDD/DVD/Card will appear. Shaded items will also appear in Quick Menu display mode (see page 49). Refer to pages indicated for details of settings. ●When - Hitachi DZHS500A | Owners Guide - Page 78
100 - 103) (p. 104) (p. 104) Select (p. 95) Play (p. 96) Title (p. 96) Go To DVD Setting Top (p. 105) End (p. 105) Finalize DVD*5 Format DVD Protect DVD Capacity Update Control Info. (p. 108) (p. 105) (p. 106) (p. 106) (p. 107) *5 DVD-RW (VR-mode) only Others Category*4 Repeat Play TV type - Hitachi DZHS500A | Owners Guide - Page 79
Setting Finalize DVD (p. 108) Unfinalize DVD*6 (p. 109) Format DVD*6 (p. 105) Capacity (p. 106) *6 DVD-RW (VF-mode)/+RW only Others Repeat Play TV type (p. 111) (p. 111) ●When using card On (p. 111) Off (p. 111) 16:9 (p. 111) 4:3 (p. 111) Scene Delete Lock Select Detail (p. 85) (p. 92 - Hitachi DZHS500A | Owners Guide - Page 80
the HDD contains a scene exceeding the length that is recordable on one disc, it cannot be dubbed: Divide the scene (see p. 86), and then perform dubbing. • Be sure to use the AC adapter/charger to power the DVD video camera/ recorder during dubbing: Dubbing is not possible with a battery connected - Hitachi DZHS500A | Owners Guide - Page 81
DVD-RW (VF-mode)/DVD-R/+RW, the scene before the division will be dubbed. • Please note in advance that Hitachi will DVD is replaced following the instruction on replacement of DVD during dubbing, dubbing will start from the scene following: Repeat this operation until dubbing of all scenes on HDD - Hitachi DZHS500A | Owners Guide - Page 82
the scenes will be dubbed up to capacity. When the DVD is replaced following the instruction on replacement of DVD during dubbing, dubbing will start from the scene following: Repeat this operation until dubbing of all scenes recorded on HDD on one day is finished. 1 Press the DUBBING button. The - Hitachi DZHS500A | Owners Guide - Page 83
" screen. Choosing "YES" will delete the dubbed scenes from the HDD. To retain the dubbed scenes on the HDD, choose "NO". 6 Press the DISC EJECT button to remove the DVD. Close the cover of DVD insertion block. If you do not want to remove the DVD, press the C (STOP/EXIT) button to end dubbing. 83 - Hitachi DZHS500A | Owners Guide - Page 84
. Choosing "YES" will delete the dubbed scenes from the HDD. To retain the dubbed scenes on the HDD, choose "NO". 6 Press the DISC EJECT button to remove the DVD. Close the cover of DVD insertion block. If you do not want to remove the DVD, press the C (STOP/EXIT) button to end dubbing. TURNING - Hitachi DZHS500A | Owners Guide - Page 85
(see page 105). • If the time of deleted scenes (stills) is quite short, the remaining free space of HDD/DVD/card may not increase in the HDD/DVD/card or card remaining indicator. • The locked scenes on card cannot be deleted (see page 92). If you want to change the scene to be deleted, you can - Hitachi DZHS500A | Owners Guide - Page 86
appear, depending on the setting. DIVIDING MOVIES (EDIT - DIVIDE) HDD 1< You can divide a scene into two parts. To delete unnecessary is 0.5 seconds or less cannot be divided. • If free space available on HDD/DVD is insufficient, division will not be possible: Delete unnecessary scenes. • If you - Hitachi DZHS500A | Owners Guide - Page 87
short scenes, combining them will be facilitated by the use of Disc Navigation. Be sure to select consecutive multiple scenes: When using the HDD or a DVD-RAM, combining scenes is possible only when "Category: All" is specified (p. 110). Stills cannot be combined. 1 Press the DISC NAVIGATION button - Hitachi DZHS500A | Owners Guide - Page 88
English HDD 1< DIRECTING SCENES EFFECTIVELY (EFFECT - FADE) You can add fading to the into a PC, the set fade will not be reflected (see Note on page 76). • When dubbing on a DVD-RW (VF-mode)/DVD-R/ +RW, the setting on fade will not be reflected (see page 80). You can use the f/e buttons to - Hitachi DZHS500A | Owners Guide - Page 89
English HDD 1< PLAYING BACK BY SKIPPING SCENES (EFFECT - SKIP) You can specify " will appear (p. 86). • If a disc on which skip has been set on scene with this DVD video camera/recorder is played on a DVD reorder/player, or the scene is captured into a PC, the set skip will not be reflected (see - Hitachi DZHS500A | Owners Guide - Page 90
English HDD 1< CHANGING IMAGES FOR THUMBNAILS (EFFECT - THUMBNAIL) Normally, the first image of PC, the set thumbnail will not be reflected (see Note on page 76). • When dubbing on a DVD-RW (VF-mode)/DVD-R/ +RW, the setting on changing thumbnail will not be reflected (see page 80). If you want to - Hitachi DZHS500A | Owners Guide - Page 91
English COPYING STILLS ON DVD-RAM TO CARD (COPY) 13 Before You Begin • Set the DVD-RAM (recorded on a Hitachi DVD video camera/recorder that can record photos on a DVD-RAM) that includes the photos you wish to copy, and a card with recordable space, in this DVD video camera/recorder. 1 Set the - Hitachi DZHS500A | Owners Guide - Page 92
lock each photo recorded on card so that it will not be deleted or edited by mistake. 1 Set the power switch to "SD". 2 Press the DISC button in step 6, the submenu screen will appear (p. 86). • When initializing the card, the locked scenes will also be deleted. 7 / 19 Lock icon If you want - Hitachi DZHS500A | Owners Guide - Page 93
English HDD 12/3 SELECTING SCENES USING MENU SCREEN (SELECT) You can use this "Select" function to select consecutive scenes at one time. This function is useful when there - Hitachi DZHS500A | Owners Guide - Page 94
Hitachi DVD video camera/ recorder that has this capability. *3 Not displayed with a DVD-RAM/DVD-RW/DVD-R (finalized) /+RW that was recorded on another device. (When using card) *1 Not displayed with DVD-RW (VF-mode)/DVD-R/ +RW. *2 When using the HDD digital devices that conform to DCF. This DVD - Hitachi DZHS500A | Owners Guide - Page 95
11:45AM Still 1:30PM Movie Program No. 1 Recorded on December 20 5:20PM Still 8:00PM HDD 12/ SWITCHING TO THUMBNAIL DISPLAY OF SPECIFIC DATE (SELECT) Since the scenes recorded on this DVD video camera/recorder are collected as "programs" for each recording date, selecting a program will - Hitachi DZHS500A | Owners Guide - Page 96
DISC NAVIGATION button. 2 Press the MENU button. 3 Use the f/e/d/c/A buttons to choose "Play" on the "Program" menu screen, and then press the A button. HDD 12/ 4 Select the program to be played back, and then press the A button. Playback will start from the first scene of the selected program - Hitachi DZHS500A | Owners Guide - Page 97
, the title setting screen will be restored. • Double byte characters set on other devices may be displayed blank on this DVD video camera/recorder. • Titles set on this DVD video camera/recorder may not be visible on other devices. ●Characters available for entering title You can choose the title - Hitachi DZHS500A | Owners Guide - Page 98
play list is not created by copying data, you will consume little of the HDD/DVD capacity by making a play list. On the other hand, deleting scenes on play list will not increase the remaining HDD/DVD capacity for recording. Example: Program 1 Program 2 Play list 1 created Play list of up to - Hitachi DZHS500A | Owners Guide - Page 99
thumbnail, Setting skip, Adding fade, Combining scenes, Dividing a scene, Copying to card, Changing title, Arranging order of scenes (only on play list) p. 80 select the play list to be played back, and then press the A button. HDD 1< Note: If "Repeat Play: On" is specified, the play list will be - Hitachi DZHS500A | Owners Guide - Page 100
004/014 time of the scene in which the cursor is placed on the P l ayL i s t N o. 0 1 008/008 operation guide will 1 2 / 1 / 2 0 0 7 1 2 : 3 0: 0 0PM appear. When using the HDD, pressing DISPLAY Recording date/time again will display the recording data of scene; pressing it once more will - Hitachi DZHS500A | Owners Guide - Page 101
English HDD 1< DELETING SCENES FROM PLAY LIST (EDITING PLAY LIST) 1 Press the DISC lower row, and place the cursor on scene to be deleted. You can also select multiple scenes (p. 75). HDD 1< ADDING SCENES USING SUBMENU FOR EDITING (EDITING PLAY LIST) You can use the menu screen to add scenes to - Hitachi DZHS500A | Owners Guide - Page 102
appear. Choose "Yes", and then end editing. Note: • If all scenes on play list are deleted, the play list itself will also be deleted. HDD 1< SELECTING SCENES USING SUBMENU FOR EDITING (EDITING PLAY LIST) You can specify the range of scenes when adding or deleting consecutive multiple scenes to - Hitachi DZHS500A | Owners Guide - Page 103
English ARRANGING ORDER OF SCENES (MOVE) HDD 1< 1 Press the DISC NAVIGATION button. 2 Press the MENU button. 3 the submenu screen will appear (p. 86). • Only scenes on play list can be moved. • When using DVD-RAM, scenes can be moved only when "Category: All" is specified (p. 110). If you want to - Hitachi DZHS500A | Owners Guide - Page 104
" to cancel deletion. After Yes or No setting, the Disc Navigation screen of all programs will be restored. HDD 1< Note: • Even if you delete a play list, the original scenes stored on HDD/DVD will not be deleted. • If any play list is deleted, the number of play lists will automatically be revised - Hitachi DZHS500A | Owners Guide - Page 105
INITIALIZING HDD/DVD/CARD HDD 1/3 Initializing the HDD, a DVD-RAM/DVD-RW/+RW or card will allow you to delete any recorded contents. Before using a DVD-RW/+RW on this video camera/recorder, you must format it. Before You Begin • Be sure to use the AC adapter/charger to power the DVD video - Hitachi DZHS500A | Owners Guide - Page 106
will be restored. 3 Use the f/e/d/c/A buttons to choose "Capacity" on the "HDD Setting", "DVD Setting" or "Card" menu screen, and then press the A button. Note: If the HDD is protected, or a write-protected disc or locked card is used, the remaining space will always be displayed as "0". (When - Hitachi DZHS500A | Owners Guide - Page 107
in order to prevent it from leaking out. Before You Begin • Use the AC adapter/charger to power the DVD video camera/recorder when completely deleting the data on the HDD: This is not possible with a battery. • If power is turned off and Full Format is interrupted midway, normal deletion will not - Hitachi DZHS500A | Owners Guide - Page 108
) Before You Begin • Be sure to use the AC adapter/charger to power the DVD video camera/ recorder when finalizing a DVD-RW/DVD-R/+RW. Finalization cannot be executed using a battery. If the DVD video camera/recorder is turned off during finalization and the finalization is interrupted, incorrect - Hitachi DZHS500A | Owners Guide - Page 109
recording can be done on it. 1 Press the DISC NAVIGATION button. 2 Press the MENU button. 3 Use the f/e/d/c/A buttons to choose "Unfinalize DVD" on the "DVD Setting" menu screen, and then press the A button. The screen for verifying unfinalization will appear. 4 Choose "YES", and then press the - Hitachi DZHS500A | Owners Guide - Page 110
are movies or stills. You can use the Disc Navigation screen to switch this display to stills only or movies only. DZ-HS500A cannot record any photos on a HDD/DVD. 1 Press the DISC NAVIGATION button. 2 Press the MENU button. 3 Use the f/e/d/ c/A buttons to choose "Category" on the "Others" menu - Hitachi DZHS500A | Owners Guide - Page 111
is instructed from the recording pause status. HDD 12/ PLAYING BACK WIDE-MODE IMAGES ON 4:3 DISPLAY TV (TV TYPE) If you connect the DVD video PLAYBACK OF STILLS) 3 If you play back stills recorded on a card, the DVD video camera/recorder will enter the playback pause status after each still - Hitachi DZHS500A | Owners Guide - Page 112
English HDD 12/3 Viewing on TV Screen Connecting to a TV CONNECTING TO A TV Use the provided AV/S input/output cable to connect the DVD video camera/recorder to a TV as follows: To AV input/output jack To S-VIDEO input jack* To video/audio input jacks AV/S input/output cable (provided) * If - Hitachi DZHS500A | Owners Guide - Page 113
English VIEWING ON TV SCREEN HDD 12/3 1 Turn the TV on and set the input selector to "VCR" whichever applicable Video input. Refer to the TV instruction manual for how to switch the TV input. 2 Turn the DVD video camera/recorder on. The image that the DVD video camera/ recorder is seeing will - Hitachi DZHS500A | Owners Guide - Page 114
DVD-RAM/DVD-RW (VR-MODE) You can use a DVD recorder or DVD player that conforms to DVD-RAM/DVD-RW (VR-mode) to play back 8 cm DVD-RAM/DVD-RW (VR-mode) recorded on this DVD video camera/recorder. 1 Insert the disc into the DVD recorder/player and play it back. See the instruction manual for DVD - Hitachi DZHS500A | Owners Guide - Page 115
from AC outlet using the AC adapter/charger. RECORDING (DUBBING) IMAGES FROM OTHER VIDEO DEVICE You can record (dub) images from other video devices to disc or card in this DVD video camera/ recorder. Use the AV/S input/output cable (provided) to connect the DVD video camera/recorder to the other - Hitachi DZHS500A | Owners Guide - Page 116
copyright protected images include those of DVD video, LD, recorded video tapes, some parts of digital satellite broadcasts, etc. • If a video signal that cannot be read by this DVD video camera/recorder is present - even in images recorded on camcorder for personal enjoyment without copy-guard - Hitachi DZHS500A | Owners Guide - Page 117
(DUBBING) IMAGES ON OTHER VIDEO DEVICES You can record (dub) images played back on this DVD video camera/recorder, on other video devices. Use the AV/S input/output cable (provided) to connect the DVD video camera/recorder to another video device as shown in the following figure: Signal flow To - Hitachi DZHS500A | Owners Guide - Page 118
Disc 1 Card ● -*2 ● -*2 Note: • Finalize the DVD-RW/DVD-R recorded on the DVD video camera/recorder before using it on PC. • You cannot create a DVD-VR (DVD-RAM/DVD-RW) on the Macintosh software. • Since the audio format of the MPEG file imported into Macintosh using ImageMixer 3 Mac Edition for - Hitachi DZHS500A | Owners Guide - Page 119
.3.9, v10.4.2-v10.4.8 The provided software cannot be used on Mac OS X Server. • CPU: PowerPC G4 1 GHz or higher, PowerPC G5, Intel Core • Memory: At least 256 MB (512 MB or more is recommended) • HDD: Free space needed for installation: Approx. 30 MB To create a DVD, free space of at least - Hitachi DZHS500A | Owners Guide - Page 120
software programs. 2 Insert the provided CD-ROM into the CD- ROM drive drive in which the CDROM is located, and then double-click the setup.exe icon in it. (Extension "exe" may not appear depending on the PC used.) 3 Choose the language to be installed. Choose the language used with ImageMixer - Hitachi DZHS500A | Owners Guide - Page 121
, remove the CD-ROM from the PC. Installing the software is now complete instructions on screen to install Direct X®. Click Important information for customers who use Easy CD Creator 5 made by Roxio Corporation: If ImageMixer 3 provided with this DVD video camera/recorder is installed, Easy CD - Hitachi DZHS500A | Owners Guide - Page 122
CD-ROM into the CD-ROM drive of Macintosh. 2 Double-click the DVDHS7S icon displayed on desktop. 3 Double-click the icon of "ImageMixer "I agree". * With the provided software for Macintosh, the language used with Then click "Install". Follow the instructions on screen for operation: Installation - Hitachi DZHS500A | Owners Guide - Page 123
the PC connection cable and AC adapter/charger. • When connecting the DVD video camera/recorder to PC, the ACCESS/PC indicator will light green. While HDD or a disc is being accessed, the indicator will light or blink orange. While an SD memory card is being accessed, the CARD ACCESS indicator will - Hitachi DZHS500A | Owners Guide - Page 124
on the right will appear. Double-click this icon: The contents of card can be checked. (The shape of icon and drive name will depend on the software environment used.) ●Handling photos Photos are recorded on a SD memory card in this DVD video camera/recorder in JPEG format: Use the application that - Hitachi DZHS500A | Owners Guide - Page 125
that the icon disappears from desktop, remove the SD memory card from the card insertion slot of this DVD video camera/recorder. USING DISC IN DVD DRIVE BUILT INTO PC If you have a PC with the drive conforming to the disc used, and the application software, you can directly insert the disc into the - Hitachi DZHS500A | Owners Guide - Page 126
SP3 or later may resolve the problem. Ask your PC manufacturer or Microsoft Corporation how to get Windows® 2000 SP3. Click [When using Macintosh] When removing the DVD video camera/recorder from PC, choose the drive icon of DVD video camera/recorder (HDD, disc or card), and choose "Eject" in the - Hitachi DZHS500A | Owners Guide - Page 127
PC, edit the video file, and create a DVD-Video or DVD-VR using the video file. The following shows the basic operation of ImageMixer 3. Refer to the electronic instruction manual that can be read on PC for detailed instructions about ImageMixer 3: While ImageMixer 3 is being activated, click "Help - Hitachi DZHS500A | Owners Guide - Page 128
insert the disc you wish to save into the DVD video camera/recorder, and then connect the DVD video camera/recorder to the USB port of PC. 2 Start ImageMixer 3. When ImageMixer 3 starts up, the launcher shown below will appear: Click "Create DVD-Video". 4 Setting up project. Set up a project. You - Hitachi DZHS500A | Owners Guide - Page 129
English 5 On the "Importing Device" screen, choose "Hitachi DVDCAM (HDD)" when the power switch is set to "HDD"; and "Hitachi DVDCAM" when the power switch is set to "DVD". If you wish to change the import device, and continue import, unplug the PC connection cable from the PC, and then change over - Hitachi DZHS500A | Owners Guide - Page 130
drive. Clicking "Preview" will allow you to check any image of DVD to be created. Click • If a video recorded on the HDD in this DVD video camera/recorder for extended hours is too long for one disc, cut-edit the video so that it can be recorded on one disc. See the on-line instruction manual - Hitachi DZHS500A | Owners Guide - Page 131
Note: • The provided software cannot be used to burn a DVD-VR (DVD-RAM/DVD-RW). • With scenes recorded on a DVD-RW (VF-mode)/DVD-R/+RW, no recording date/time will appear on ImageMixer 3 Mac Edition for DVDCAM. VIEWING IMAGES RECORDED ON HDD/DISC USING MACINTOSH A DVD-RW/DVD-R/+RW recorded on this - Hitachi DZHS500A | Owners Guide - Page 132
ImageMixer 3 will appear in a list as shown below. 2 Start ImageMixer 3 for DVDCAM. 3 Choose Hitachi DVDCAM. Click "Hitachi DVDCAM" displayed on the left of screen: The images recorded on HDD (DVD when DVD the video. Refer to the electronic instruction manual of ImageMixer 3 for details on how to - Hitachi DZHS500A | Owners Guide - Page 133
camera/recorder must be finalized on this DVD video camera/recorder (see page 108) before importing the images on it. 1 Start ImageMixer 3 for DVDCAM. 2 Choose Hitachi DVDCAM. Click "Hitachi DVDCAM" displayed on the left of screen: The images recorded on HDD or disc will appear. 3 Select the scene - Hitachi DZHS500A | Owners Guide - Page 134
the bottom of screen. When checking the video files in list, click "Write" at the bottom of screen: Note: • If you load a written DVD-RW in the write drive, a dialog "Are you sure you want to delete the contents of disc?" will appear. Deleting the content of disc will erase all data - Hitachi DZHS500A | Owners Guide - Page 135
Library/Receipts/ImageMixer 3 for DVDCAM.pkg Note: • "User" will depend on the login user name. • Administrator authority is required for uninstallation. Contact The Following ●Inquiries on software provided with this DVD video camera/recorder should be directed to: PIXELA PC Software Support Center - Hitachi DZHS500A | Owners Guide - Page 136
cables while the HDD/disc in DVD video camera/recorder is being accessed from PC: If the PC connection cable (provided) or power cable is unplugged while the ACCESS/PC or CARD the DVD video camera/recorder using software other than that provided with the DVD video camera/recorder, but Hitachi does - Hitachi DZHS500A | Owners Guide - Page 137
) Tele-conversion lens (DZ-TL1)* (p. 52) Step-up ring (DZ-SR3437) (p. 52) • When using camera accessories, be sure to read the instruction manuals for each accessory. * You will need the optional step-up ring when attaching these lenses. POWER SUPPLY Battery (DZ-BP7SW) Battery (DZ-BP14SW) • Refer to - Hitachi DZHS500A | Owners Guide - Page 138
the file repair function.) Follow the instructions on screen, taking note of the following cautions: • Be sure to use the AC adapter/charger to power the DVD video camera/recorder when repairing data: Repair is not possible using a battery. If a battery has been attached, turn the power - Hitachi DZHS500A | Owners Guide - Page 139
and *4 on page 144 for troubleshooting. CANNOT RECORD PHOTOS • This message will appear when the PHOTO/SELECT button is pressed with the power switch set to "HDD" or "DVD". • No photo can be recorded on the HDD or disc in this DVD video camera/recorder: Use a card to record photos. CANNOT RECORD - Hitachi DZHS500A | Owners Guide - Page 140
inside, connect the AC adapter/charger, and then power the DVD video camera/recorder again. Card full. Delete unnecessary stills and try the card, or use another card. Card is not formatted. Was the card formatted on PC? When using the card on this DVD Format the card now? video camera/recorder - Hitachi DZHS500A | Owners Guide - Page 141
English Message Cause & Troubleshooting DVD error has occurred. Disc error could have occurred during editing of scenes. Keep DVD inside & Turn off the DVD video camera/recorder with the disc being used restart. in it, connect AC adapter/charger, and then power the DVD video camera/recorder - Hitachi DZHS500A | Owners Guide - Page 142
English Message Cause & Troubleshooting DVD-RAM, Finalize is not required. This message will appear if you press the FINALIZE button with a DVD-RAM loaded in this DVD video camera/recorder. No finalization is necessary for a DVD-RAM. END OF CARD No more recording on this card can be done: - Hitachi DZHS500A | Owners Guide - Page 143
Troubleshooting NO DVD This message may appear when the DVD video camera/recorder or disc is moved from a cold place to a warm place. Condensation has occurred on the camera/recorder lens or HDD/ DVD drive. Do not remove the disc; leave the DVD no scenes cannot be supported by specifications, a - Hitachi DZHS500A | Owners Guide - Page 144
Use AC adapter/ charger. No dubbing, HDD deletion, or disc finalization is possible with a battery: Use the AC adapter/charger. Use AC adapter/ charger. Turn off power. Scene cannot be repaired when the DVD video camera/recorder is powered by a battery. If the AC adapter/charger is unavailable in - Hitachi DZHS500A | Owners Guide - Page 145
to AC adapter/charger? Unplug it. 27 Has the battery been unused for a long time? Remove the battery, and then reattach it. • If the battery does not charge off to save battery power. To restart recording in this case, set the power switch to "OFF" and then set it to "HDD", "DVD" or "SD". You can - Hitachi DZHS500A | Owners Guide - Page 146
image cannot be recorded on this DVD video camera/recorder. No photo can be recorded • Check to see whether the proper type of card is loaded. • Set the power switch to "SD". • If the card is locked, unlock it. • Check the remaining free space on card. LCD screen is hard to Has brightness of LCD - Hitachi DZHS500A | Owners Guide - Page 147
"HDD", "DVD" or "SD" again. An error message for repair appears. Perform repair following the instructions on screen. Repair is possible when the DVD video camera/recorder is powered by the AC adapter/charger. If you are using the HDD and have detected an error in part of video file, a battery can - Hitachi DZHS500A | Owners Guide - Page 148
to adjust the volume on TV. Was the image recorded from AV input/output jack with interference? Record image with no noise or disturbance. This DVD video camera/recorder can play back image data recorded on SD memory card in other digital cameras conforming to the DCF (Design rule for Camera File - Hitachi DZHS500A | Owners Guide - Page 149
newest version driver provided by each USB2.0 card maker. Is disc scratched or does dirt or fingerprint adhere to it? Clean the disc. DVD drive built into PC This problem may be solved if you update the DVD editing/ cannot be used after the creating software of your PC. provided software has been - Hitachi DZHS500A | Owners Guide - Page 150
recorder turn off because the battery remaining level ran out? Connect a charged battery or the AC adapter/charger, set the power switch to "OFF", and then press the DISC EJECT button to remove the disc. Is the power switch set to "HDD" or "SD"? Set the power switch to "DVD" or "OFF", and then press - Hitachi DZHS500A | Owners Guide - Page 151
felt These vibrations or sound are caused by HDD/disc drive: This or slight sound is heard does card is • When disc is subject to severe vibrations. inserted, it takes • When the battery DVD video camera/recorder connected to PC using PC connection cable? Unplug the PC connection cable. • Does DVD - Hitachi DZHS500A | Owners Guide - Page 152
before using the DVD video camera/recorder. 1 Set the power switch to "OFF" to turn the DVD video camera/reorder off. Detach the battery or AC adapter/charger. 2 Use Quality 16:9 Input Source PHOTO Input Self Timer OSD Output HDD protection Date Setup Date Set Date Mode LCD/EVF Setup LCD - Hitachi DZHS500A | Owners Guide - Page 153
stabilizer Shutter speed Self-timer recording Capacity of built-in HDD Recording mode Maximum recordable time Maximum number of recordable stills HDD DVD-RAM/DVD-RW/ DVD-R/+RW (per side) SD memory card (when using 32 MB card) 1/6-inch interlaced Total number of pixels approx. 680,000 Number - Hitachi DZHS500A | Owners Guide - Page 154
less using HDD) Weight Approx. 505 g (without battery or disc) Total weight when recording Approx. 560 g Provided accessories AC adapter/charger, Battery, AV/S input/output cable, Lens cap, Lens cap string, Shoulder strap, Power cable, DC power cord, Software CD-ROM, PC connection cable, Disc - Hitachi DZHS500A | Owners Guide - Page 155
English STORAGE CAPACITY OF HDD/DVD/CARD Recordable Time On HDD*1 Recording quality Movie recordable time XTRA Approx. 7 hours *2 FINE Approx. 11 hours *3 STD Approx. 23 hours *4 Application Best quality High quality Standard quality Recordable Time - Hitachi DZHS500A | Owners Guide - Page 156
Photos The following table shows the file size and quality of one still (JPEG) recorded on card: Quality File size External input Application FINE Approx. 160 KB Approx. 160 KB When image mode can be chosen when recording stills on card (p. 64). Note: • No still can be recorded on HDD/DVD. 156 - Hitachi DZHS500A | Owners Guide - Page 157
6C3 Service Direct: 1-800-HITACHI (1-800-448-2244) Durant les heures de bureau: Lundi au vendredi 9:00am - 7:00pm (h.n.e) Samedi 9:00am - 5:00pm (h.n.e) DECLARATION OF CONFORMITY with FCC Rules for Electromagnetic Compatibility Products: Models: Trade Name: DVD VIDEO CAMERA/RECORDER DZ-HS500A - Hitachi DZHS500A | Owners Guide - Page 158
charger 26 ACCESS/PC indicator 41 Add (edit 101 All programs 95 Auto (program AE 57 Autofocus 53 AV input/output jack 112 B Backlight correction 55 Battery Attaching to DVD Go To (on Disc Navigation 105 H Hand strap 21 HDD Format 105 Protection 106 Howling 112 I Information display mode - Hitachi DZHS500A | Owners Guide - Page 159
switch 41 Low Light (Program AE 58 M Manual Focus 53 MENU button 49 MIC.Filter 60 Move 103 O Optical 30x zoom lens 51 OSD Output 66 P PHOTO capture Play 96 Select 95 Title 96 Program AE 57 Protect 106 Q Quality (Card 64 Quick Menu 49 QUICK MENU button 49 R Record button 41 Recording - Hitachi DZHS500A | Owners Guide - Page 160
the package of the storage device (CD-ROM) provided with this product, in the past. License Agreement ■ Grant of License • Hitachi, Ltd. nonexclusively grants you the right to install this Agreement If you duplicate this program and its accessories without permission, or fail to comply with the - Hitachi DZHS500A | Owners Guide - Page 161
, software, or from abuse, neglect, accident or any other cause beyond the control of DVD, VCR, Camcorder Products, AC Adapter Charger Limited Warranty Registration Hitachi. C. Unpacking, set-up or installation, (for your records) adjustment of customer operated controls, user instruction - Hitachi DZHS500A | Owners Guide - Page 162
PARTS (Except Battery) • CAMCORDER Products For information concerning repairs, operation, • AC ADAPTER CHARGER technical assistance or for referral to the location of your nearest Authorized Service Facility or Parts A Conditions of LY D Hitachi Limited Warranty A These Hitachi Products are - Hitachi DZHS500A | Owners Guide - Page 163
serve customer needs, please complete this card and return it to Hitachi America, Ltd., Ubiquitous Platform Systems. Completion of this card is not required in order to validate your Hitachi limited warranty, but would assist us in developing better services and programs for our customers." (Please - Hitachi DZHS500A | Owners Guide - Page 164
Register your product on-line at hitachi.com/tv or mail this portion to the following address Attn:Warranty Department Hitachi America, Ltd., Ubiquitous Platform Systems 900 Hitachi Way Chula Vista, CA 91914-3556 - Hitachi DZHS500A | Owners Guide - Page 165
- Hitachi DZHS500A | Owners Guide - Page 166
PRODUIT VIDÉO VOTRE GARANTIE HITACHI CANADA LTD DIGITAL MEDIA DIVISION 1-2495 Meadowpine Blvd., Mississauga, Ontario L5N 6C3 CANADA IMPORTANT NOTICE: This warranty will not apply to product purchased outside of Canada OR sold by any organization other than HITACHI CANADA LTD AVIS IMPORTANT - Hitachi DZHS500A | Owners Guide - Page 167
to better serve our customers' needs, please complete this card and return it to Hitachi Canada Ltd. Completion of this card is not required in order to validate your Hitachi limited warranty, but would assist us in developing better services and programs for our customers." (Please print or type - Hitachi DZHS500A | Owners Guide - Page 168
Register your product on-line at Hitachi.ca or mail to the address on this card. Enregistrez votre produit en ligne à Hitachi.ca ou par la poste à l'adresse indiquée sur cette carte. ATT:WARRANTY DEPARTMENT HITACHI CANADA LTD. 1-2495 MEADOWPINE Blvd., MISSISSAUGA ON L5N 6C3 - Hitachi DZHS500A | Owners Guide - Page 169
-3556 Service Hotline: 1-800-HITACHI (1-800-448-2244) HITACHI CANADA LTD. DIGITAL MEDIA DIVISION 1-2495 Meadowpine Blvd. Mississauga, Ontario L5N 6C3 CANADA Service Direct: 1-800-HITACHI (1-800-448-2244) http://www.hitachi.ca Hitachi, Ltd. Japan QR71043 ©Hitachi, Ltd. 2007 This manual was printed
-
 1
1 -
 2
2 -
 3
3 -
 4
4 -
 5
5 -
 6
6 -
 7
7 -
8
-
9
-
10
-
11
-
12
-
13
-
14
-
15
-
16
-
17
-
18
-
19
-
20
-
21
-
22
-
23
-
24
-
25
-
26
-
27
-
28
-
29
-
30
-
31
-
32
-
33
-
34
-
35
-
36
-
37
-
38
-
39
-
40
-
41
-
42
-
43
-
44
-
45
-
46
-
47
-
48
-
49
-
50
-
51
-
52
-
53
-
54
-
55
-
56
-
57
-
58
-
59
-
60
-
61
-
62
-
63
-
64
-
65
-
66
-
67
-
68
-
69
-
70
-
71
-
72
-
73
-
74
-
75
-
76
-
77
-
78
-
79
-
80
-
81
-
82
-
83
-
84
-
85
-
86
-
87
-
88
-
89
-
90
-
91
-
92
-
93
-
94
-
95
-
96
-
97
-
98
-
99
-
100
-
101
-
102
-
103
-
104
-
105
-
106
-
107
-
108
-
109
-
110
-
111
-
112
-
113
-
114
-
115
-
116
-
117
-
118
-
119
-
120
-
121
-
122
-
123
-
124
-
125
-
126
-
127
-
128
-
129
-
130
-
131
-
132
-
133
-
134
-
135
-
136
-
137
-
138
-
139
-
140
-
141
-
142
-
143
-
144
-
145
-
146
-
147
-
148
-
149
-
150
-
151
-
152
-
153
-
154
-
155
-
156
-
157
-
158
-
159
-
160
-
161
-
162
-
163
-
164
-
165
-
166
-
167
-
168
-
169
 |
 |

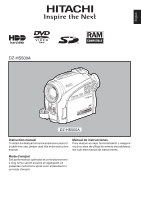
DZ-HS500A
Instruction manual
To obtain the best performance and ensure years of
trouble-free use, please read this entire instruction
manual.
Mode d’emploi
Des performances optimales et un fonctionnement
à long terme seront assurés en appliquant les
présentes instructions après avoir entièrement lu
ce mode d’emploi.
Manual de instrucciones
Para obtener el mejor funcionamiento y asegurar
muchos años de utilización exenta de problemas,
lea todo este manual de instrucciones
.
English
DZ-HS500A