Hitachi DZHS500A Owners Guide - Page 128
Creating Dvd-video Using Images Recorded On Hdd/disc
 |
UPC - 050585223943
View all Hitachi DZHS500A manuals
Add to My Manuals
Save this manual to your list of manuals |
Page 128 highlights
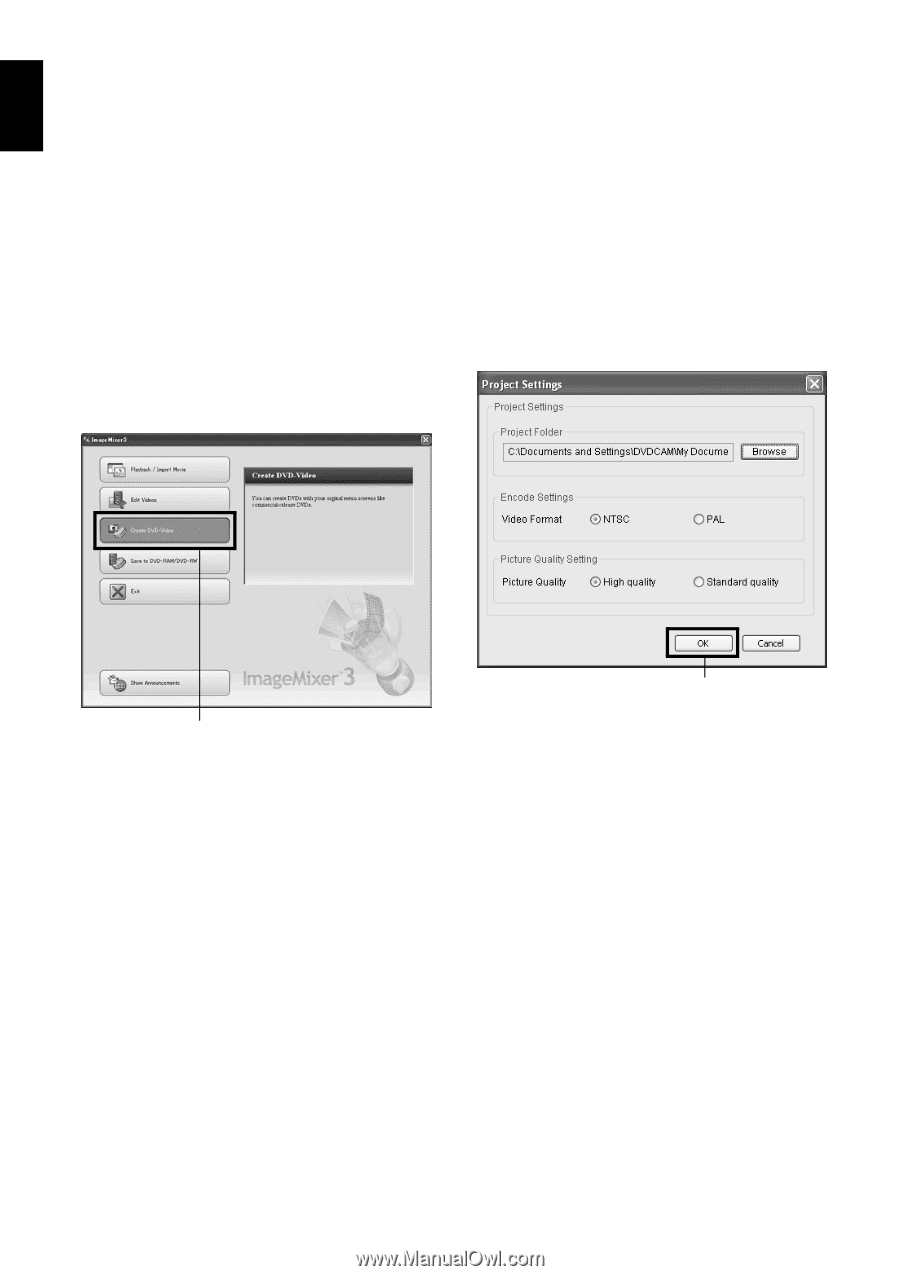
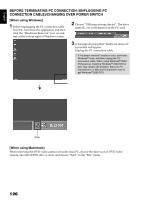
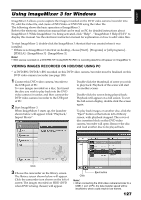
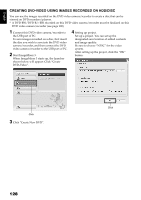
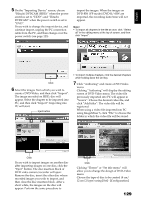
English CREATING DVD-VIDEO USING IMAGES RECORDED ON HDD/DISC You can use the images recorded on the DVD video camera/recorder to create a disc that can be viewed on DVD recorders/players. * A DVD-RW/DVD-R/+RW recorded on this DVD video camera/recorder must be finalized on this DVD video camera/recorder (see page 108). 1 Connect this DVD video camera/recorder to the USB port of PC. To save images recorded on a disc, first insert the disc you wish to save into the DVD video camera/recorder, and then connect the DVD video camera/recorder to the USB port of PC. 2 Start ImageMixer 3. When ImageMixer 3 starts up, the launcher shown below will appear: Click "Create DVD-Video". 4 Setting up project. Set up a project. You can set up the designated save location of edited contents and image quality. Be sure to choose "NTSC" for the video system. After setting up the project, click the "OK" button. Click Click 3 Click "Create New DVD". 128
-
 1
1 -
2
-
3
-
4
-
5
-
6
-
7
-
8
-
9
-
10
-
11
-
12
-
13
-
14
-
15
-
16
-
17
-
18
-
19
-
20
-
21
-
22
-
23
-
24
-
25
-
26
-
27
-
28
-
29
-
30
-
31
-
32
-
33
-
34
-
35
-
36
-
37
-
38
-
39
-
40
-
41
-
42
-
43
-
44
-
45
-
46
-
47
-
48
-
49
-
50
-
51
-
52
-
53
-
54
-
55
-
56
-
57
-
58
-
59
-
60
-
61
-
62
-
63
-
64
-
65
-
66
-
67
-
68
-
69
-
70
-
71
-
72
-
73
-
74
-
75
-
76
-
77
-
78
-
79
-
80
-
81
-
82
-
83
-
84
-
85
-
86
-
87
-
88
-
89
-
90
-
91
-
92
-
93
-
94
-
95
-
96
-
97
-
98
-
99
-
100
-
101
-
102
-
103
-
104
-
105
-
106
-
107
-
108
-
109
-
110
-
111
-
112
-
113
-
114
-
115
-
116
-
117
-
118
-
119
-
120
-
121
-
122
-
 123
123 -
 124
124 -
 125
125 -
 126
126 -
 127
127 -
 128
128 -
 129
129 -
 130
130 -
 131
131 -
 132
132 -
 133
133 -
134
-
135
-
136
-
137
-
138
-
139
-
140
-
141
-
142
-
143
-
144
-
145
-
146
-
147
-
148
-
149
-
150
-
151
-
152
-
153
-
154
-
155
-
156
-
157
-
158
-
159
-
160
-
161
-
162
-
163
-
164
-
165
-
166
-
167
-
168
-
169
 |
 |