IBM 2498-B40 User Guide - Page 41
Setting the switch IP address, Using DHCP to set the IP address - default ip
 |
View all IBM 2498-B40 manuals
Add to My Manuals
Save this manual to your list of manuals |
Page 41 highlights
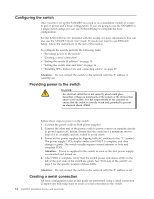
1. Connect the serial cable to the console port on the switch and to an RS-232 serial port on the workstation. If the serial port on the workstation is RJ-45 instead of RS-232, remove the adapter from the end of the serial cable and insert the exposed RJ-45 connector into the RJ-45 serial port on the workstation. 2. Open a terminal emulator application (such as HyperTerminal on a PC, or TERM, TIP, or Kermit in a UNIX environment), and configure the application as follows: v In a Windows environment: Parameter Bits per second Databits Parity Stop bits Flow control Value 9600 8 None 1 None v In a UNIX environment using TIP, enter the following string at the prompt: tip /dev/ttyb -9600 If ttyb is already in use, then use ttya instead and enter the following string at the prompt: tip /dev/ttya -9600 Setting the switch IP address You can configure the SAN48B-5 with a static IP address, or you can use a DHCP (Dynamic Host Configuration Protocol) server to set the IP address of the switch. DHCP is enabled by default. The SAN48B-5 supports both IPv4 and IPv6. Using DHCP to set the IP address When using DHCP, the switch obtains its IP address, subnet mask, and default gateway address from the DHCP server. The DHCP client can only connect to a DHCP server that is on the same subnet as the switch. If your DHCP server is not on the same subnet as the switch, use a static IP address. Setting a static IP address Complete the following steps to configure the switch with a static IP address: 1. Log into the switch using the default password, which is password. 2. Use the ipaddrset command to set the Ethernet IP address. If you are using an IPv4 IP address, enter the IP address in dotted decimal notation as prompted. Ethernet IP Address: 192.168.74.102 If you are using an IPv6 address, enter the network information in colon-separated notation as prompted. switch:admin> ipaddrset -ipv6 --add 1080::8:800:200C:417A/64 IP address is being changed...Done. 3. Complete the rest of the network information as prompted. Ethernet Subnetmask: 255.255.255.0 Ethernet IP Address: 192.168.74.102 Ethernet Subnetmask: 255.255.255.0 4. Enter off to disable DHCP when prompted. Chapter 2. Installing and configuring the switch 15
-
 1
1 -
2
-
3
-
4
-
5
-
6
-
7
-
8
-
9
-
10
-
11
-
12
-
13
-
14
-
15
-
16
-
17
-
18
-
19
-
20
-
21
-
22
-
23
-
24
-
25
-
26
-
27
-
28
-
29
-
30
-
31
-
32
-
33
-
34
-
35
-
 36
36 -
 37
37 -
 38
38 -
 39
39 -
 40
40 -
 41
41 -
 42
42 -
 43
43 -
 44
44 -
 45
45 -
 46
46 -
47
-
48
-
49
-
50
-
51
-
52
-
53
-
54
-
55
-
56
-
57
-
58
-
59
-
60
-
61
-
62
-
63
-
64
-
65
-
66
-
67
-
68
-
69
-
70
-
71
-
72
-
73
-
74
-
75
-
76
-
77
-
78
 |
 |
